With all the little plug-ins and themes available, Google Chrome is a browser that lets us do it all. But, even a great browser like this is not immune to freezing or simply just not responding at times.
A lot of reasons and factors are at play whenever this happens, so it’s important that you approach it with simple fixes whenever you need to troubleshoot. Fortunately, there are a lot of different ways you can go about that. Here is what you can do when you encounter this type of error.
Check Your Internet Connection
The most basic fix in the event of Google Chrome not responding is to check if you still have a stable Internet connection. To do this, you can follow these steps:
Step 1. Click on the Start Menu.
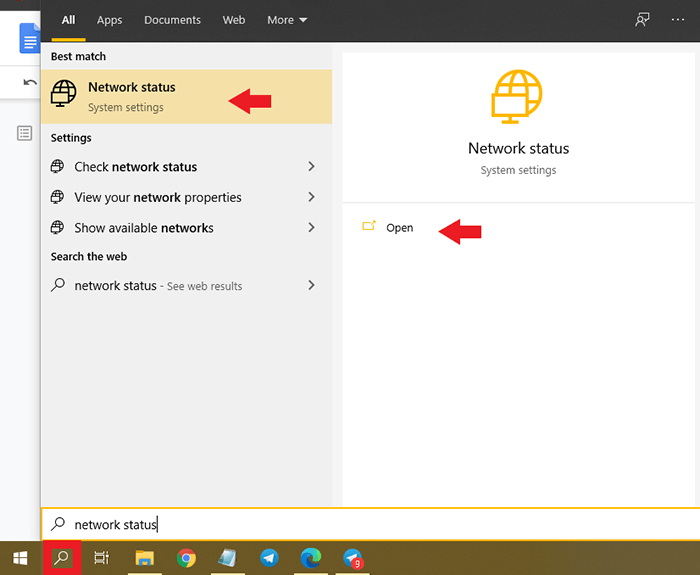
Step 2. In the search bar, type in network status.
Step 3. Click on the Network status option.
Step 4. Check to see if it says You’re connected to the Internet. If it doesn’t say this, you may have to go and troubleshoot your Internet connection first before proceeding.
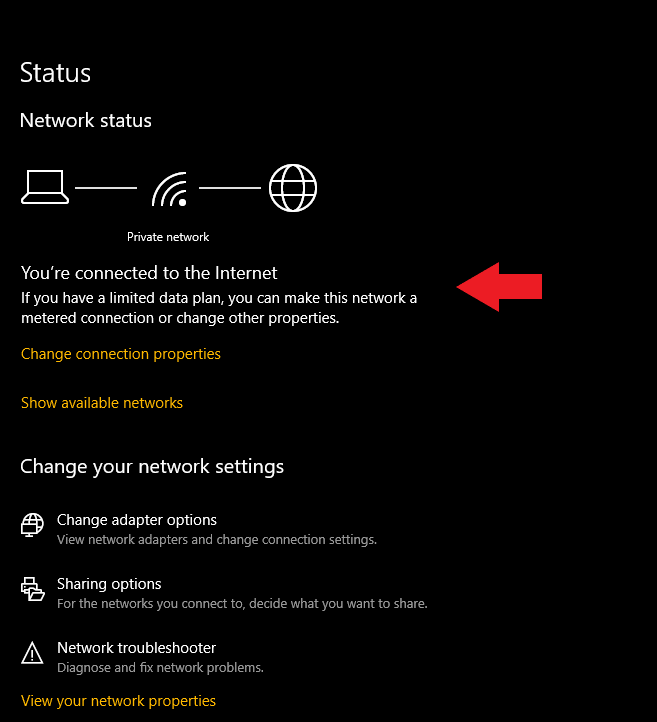
Step 5. If it does say this, open up a different browser to check if this is solely a Chrome-related problem.
Step 6. If you can connect to other browsers with ease, that means that Chrome is the issue. You can now proceed to browse more steps as you continue troubleshooting this problem.
Close Other Running Apps, Programs, and Tabs
Oftentimes, Google Chrome stops responding when you’ve run out of memory. Your computer may be too overloaded, that’s why it cannot load the site you’re trying to access. To address this, follow these steps:
Step 1. On your Google Chrome browser, close all tabs except for the tab which is showing the error message.
Step 2. Close other programs or apps that are running.
Step 3. If you’re downloading any files or applications, try to stop and close those first.
Step 4. Try reloading the browser. If it is still not responding, go ahead and try the other fixes below.
Restart Google Chrome Browser
As simple as it sounds, sometimes restarting Chrome can somehow shake it off its buggy state.
Step 1. Close your Google Chrome browser and re-open it. To quit the browser, you can simply press Ctrl + Q.
Step 2. Once you have opened Chrome again, try reloading the site that showed the error message. You can reopen all the tabs that were open before by pressing Ctrl + Shift + T.
Restart Your Computer
If you have other programs or apps running when the error message appeared in Chrome, then those may be the culprit.
Sometimes, other programs or apps can prevent a site from loading correctly. You can reboot your computer to close those programs and possibly fix the Chrome issues.
Step 1. Quit all programs and apps running.
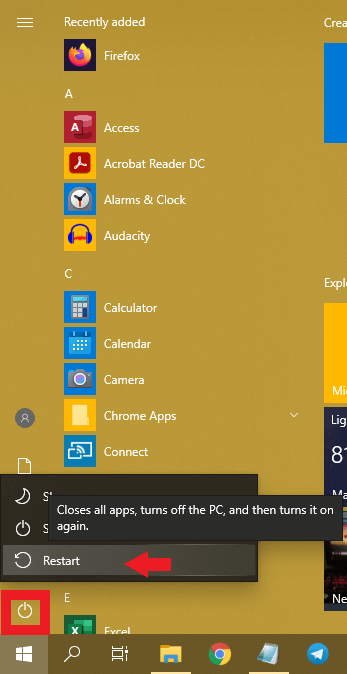
Step 2, Restart your computer by clicking the Start Menu, selecting Power, and choosing Restart.
Step 3. Once your computer is rebooted, try opening Chrome and reloading the page again.
Reset All Google Chrome Settings to the Defaults
When any of the fixes stated above still did not successfully solve your issue, you can try resetting Google Chrome’s settings. Enabling or tweaking with the wrong settings in Chrome may actually trigger it to be buggy and not respond.
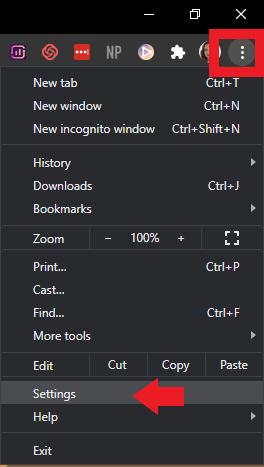
Step 1. When you’re in your Google Chrome browser, click on the icon with three dots which can be found at the right-hand corner of the browser.
Step 2. Click on Settings.
Step 3. Scroll down to the bottom of the page until you find Advanced. Click on that to see more of your Chrome’s settings.
Step 4. Scroll down again to the bottom of the page until you get to the Reset and clean up section. Once there, click Restore settings to their original defaults.
Step 5. A pop-up window will appear that tells you that doing this would disable all of your downloaded extensions and clear your temporary data, such as cookies. However, it will still retain your bookmarks, history, and saved passwords. To continue, click on the Reset settings button.
Check for Malware
If none of those fixes worked, it may be time to explore the possibility that you may have malware that is getting in the way of Chrome’s functionality. Thankfully, Google Chrome has a built-in anti-malware scanner that will help you detect if your computer has any suspicious applications.
Step 1. In your Google Chrome browser, open Settings. You can find it by clicking on the icon with three dots on the upper right-hand corner.
Step 2. Scroll down until you find Advanced.
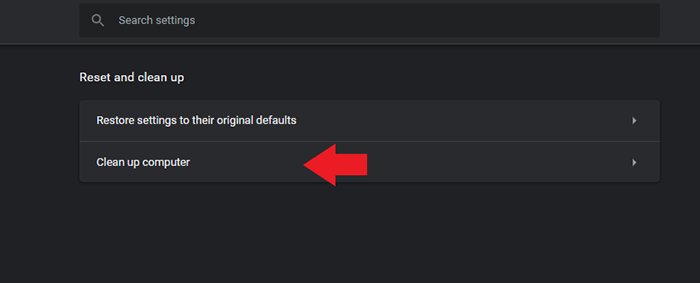
Step 3. Scroll down until you get to the Reset and clean up section once again.
Step 4. Select Clean up computer.
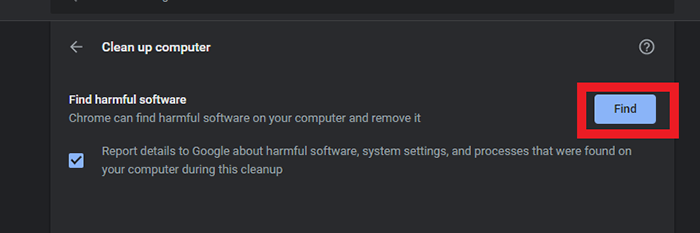
Step 5. A new window will appear which is where you can conduct the malware scan. Click on the Find button to start the scan.
Step 6. Once the scan is complete, it should show you all the suspicious applications. To remove these, click on the Remove button next to the application name. Hopefully, once you’ve removed all problematic apps, Chrome would start to work perfectly again.
Fix Problematic Apps
Sometimes, though, some apps could be the reason why Google Chrome is not responding. They may be interfering with Chrome’s normal operations, which is why you have to remove such apps. Thankfully, Chrome made it easy for you to detect any of these bad applications.
Step 1. Launch Chrome’s Settings page by clicking the icon with three dots on the upper right-hand corner of the browser.
Step 2. Scroll down to the bottom of the page and click on Advanced.
Step 3. Under the Reset and clean up section, select Update or remove incompatible applications. If you do not see this option, then that means that you have no problematic applications. You may then proceed to the next possible fix.
Step 4. A list of all bad applications will appear. You can then decide whether or not to remove these apps.
Uninstall and Reinstall Chrome
Lastly, if all else fails, you can opt to uninstall and reinstall your Google Chrome browser. Keep in mind that this should be your last resort, in the event that no other simple fix was able to successfully troubleshoot the issue of Google Chrome not responding.
Step 1. Make sure to download a fresh version of the Google Chrome installer.
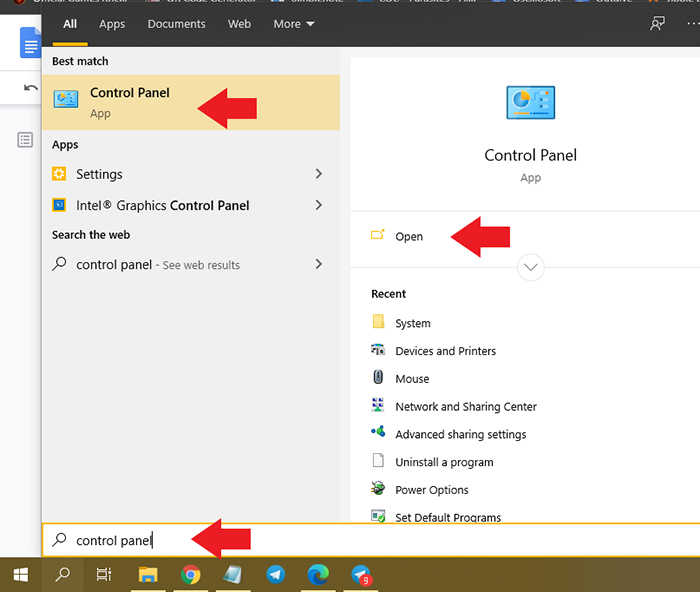
Step 2. On your desktop, open on the Start Menu and type Control Panel in the search bar.
Step 3. Select the Control Panel application.
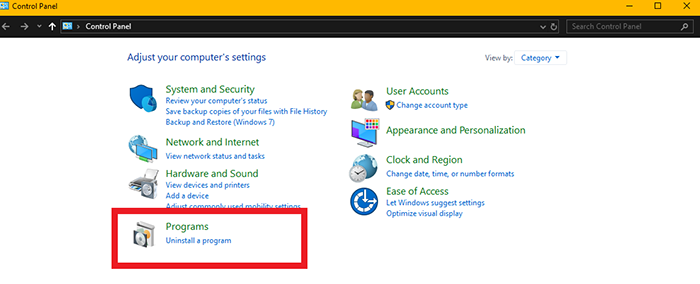
Step 4. Click on Programs and go to Programs and Features.
Step 5. Click Uninstall programs and browse through the list of installed programs until you find Google Chrome.
Step 6. Right-click on Google Chrome and select Uninstall.
Step 7. Once it is done uninstalling, you can go ahead and run the Chrome installer you recently downloaded.
Step 8. Once you have re-downloaded Google Chrome, it should start working again normally, with no issues.
No matter why Google Chrome is not responding on your computer, the above methods will get the issue sorted on your machine. Your favorite browser will then start working the way it’s supposed to.