Windows modules installer is an installer that mostly deals with the Windows updates that are to be installed on your computer. Sometimes, you may see in your Task Manager that this utility uses up a lot of your resources on your computer. While this could be due to various reasons, most are related to the Windows updates stored on your computer.
If Windows modules installer is eating up your CPU and is causing high CPU usage, you might want to take some quick actions to prevent it from doing so. Luckily, there are a few methods you use to fix this malfunction of the feature on your Windows 10 machine.
Delete Downloaded Windows Updates on your Computer
When a new Windows update is available, your computer downloads and saves it in a folder on your storage. Then when the time comes to install it, it uses the saved files to update your computer to the latest version of the operating system.
Sometimes, the files that remain downloaded on your computer can get corrupted. If that’s the case, the Windows modules installer will likely start using your CPU resources as it can’t find the actual working files for Windows updates.
One of the ways to fix the issue is to re-download those updates to your computer. To do it, you’re first going to need to delete the existing update files from your computer. The following shows how you can do it.
Step 1. Press the Windows + R keys at the same time and it’ll open the Run dialog box.
Step 2. Type in services.msc in the box and press Enter on your keyboard.

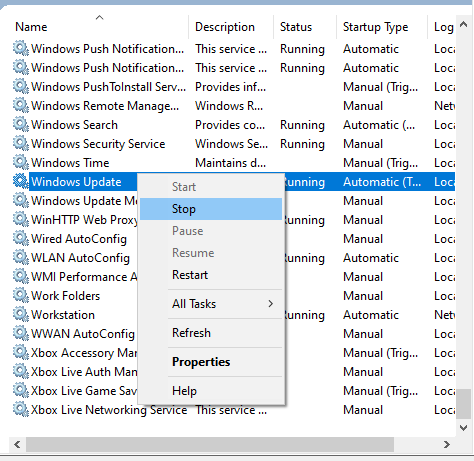
Step 3. It’ll show all the services that run on your computer. Find the one that says Windows Update, right-click on it, and select Stop. It’ll stop the service from running anymore. Then, close the panel.
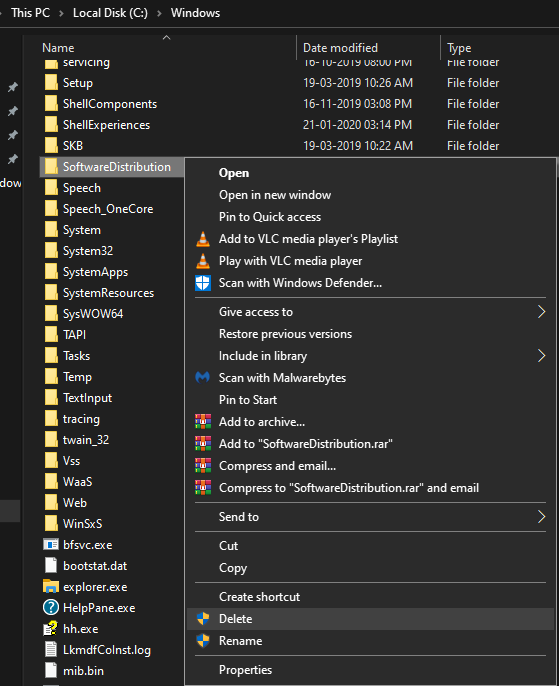
Step 4. Open a File Explorer window and head to the following path. It’s where your update files are located.
C:\Windows\
Step 5. Find the folder named SoftwareDistribution. It contains all of your Windows update files. Right-click on this folder and select Delete to delete your Windows updates.
Step 6. Restart your computer by opening the Start Menu, clicking on the power icon, and selecting Restart.

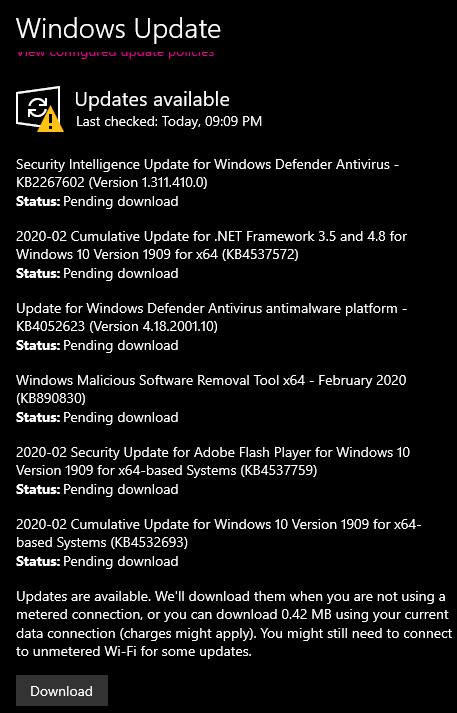
Step 7. When your computer boots back up, open the Settings app and click on Update & Security followed by Windows Update. Select Check for updates and install the available updates.
The Windows modules installer should no longer cause any high CPU usage on your computer.
Restart the Windows Update Service
The issue may be with the Windows Update service as well. In that case, your best solution is to restart the service and let it do everything with a fresh boot. This can be done from the same panel you used above to stop the service.
Step 1. Press the Windows + R keys, type in services.msc, and hit Enter.
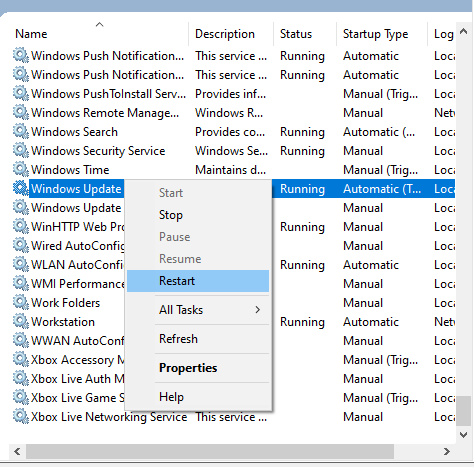
Step 2. You’ll see all the services that your computer uses. Right-click on the one that says Windows Update and choose Restart.
That should fix the issue if the Windows Update service was the culprit.
Set your Connection on Metered Mode
The reason why Windows modules installer issues are unexpected is because your computer automatically downloads the update files to your machine, and these are the files that often happen to be the cause of the issue.
An easier way to resolve the Windows modules installer high CPU usage is to disable the automatic download of your updates. That way, you’ll be in more control over your updates and you’ll decide when and when not to download and install updates on your machine.
This will only work if you use a WiFi network. You can basically set your connection to the metered mode and Windows won’t download new updates on this mode.
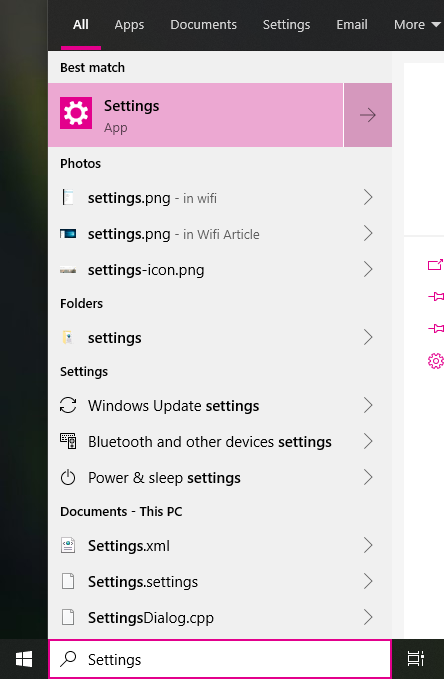
Step 1. Launch the Start Menu and search for and open the Settings app.
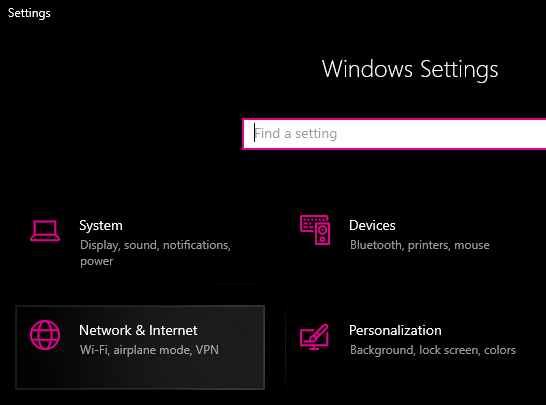
Step 2. Click on the option that says Network & Internet to open your network settings.
Step 3. Click on the Wi-Fi option in the left sidebar to view your WiFi network settings.

Step 4. You’ll see your saved WiFi networks. Select the one that you use with your machine.
Step 5. On the following screen, scroll down and you’ll see an option that says Set as metered connection. Turn the option on.
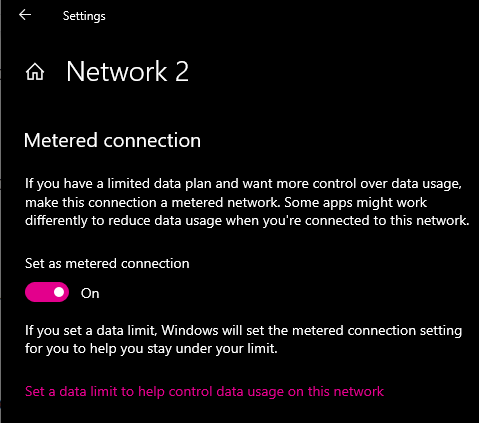
That’s all. For as long as your network is on metered mode, your computer won’t attempt to automatically download any updates.
Fix Corrupt Files on your Computer
Microsoft knows that corrupt files are often the cause of many issues, and so they’ve included a tool that lets you scan for and fix any corrupt files on your computer.
It’s basically a command that you run off a Command Prompt window which checks your computer for any corrupted files. Then, it gets them fixed.
Step 1. Press the Windows + R keys, type in cmd, and hit Enter.

Step 2. When the Command Prompt window opens, type in the following command and press Enter.
sfc /scannow
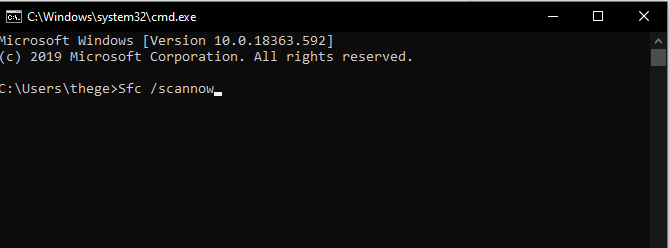
Step 3. Let it run and fix the corrupt files on your machine.
Once the files are fixed, the Windows modules installer taking up high resources issue should be gone from your computer.
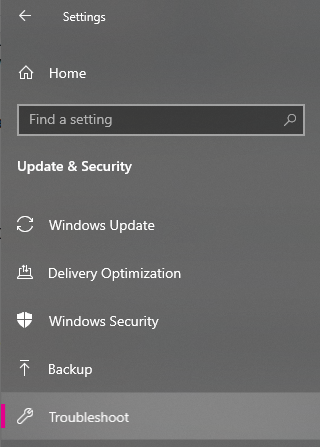
Use Windows Update Troubleshooter
Lastly, if none of the above methods work, your best bet is to use the built-in Windows Update troubleshooter. It’s a tool built into your system that checks for any issues related to Windows Updates and offers you suggestions to fix them.
Step 1. Open the Settings app using the Start Menu on your computer.

Step 2. Click on Update & Security on the following screen.

Step 3. Select Troubleshoot from the left sidebar.
Step 4. Find Windows Update on the right-hand side pane, click on it, and select Run the troubleshooter.
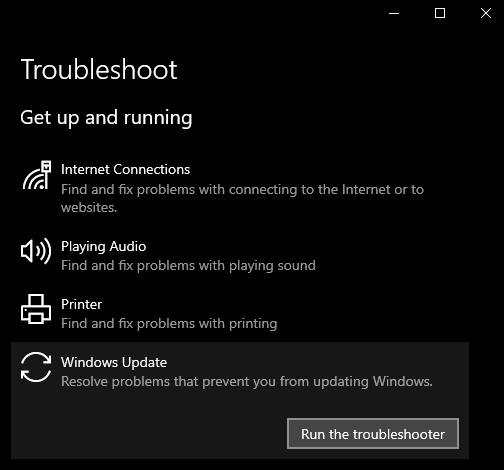
Step 5. Wait for it to find and help you fix issues on your computer.

If it’s your first time facing the Windows modules installer issue, you might be worried what it’s about and how come it suddenly popped-up on your machine. We hope the above guide explains to you what it is and what are the ways to fix the issue on your Windows computer.