- Press Windows + R to launch Run, type services.msc in the Open field, and press Enter. In the Services window that appears, double-click File History Service to open its Properties window. Under Service status, click Start. Then, set the Startup type parameter to Automatic. Click Apply > OK.
- Other fixes include reconnecting and checking your drive for issues as well as deleting your File History configuration.
Encountering a “File History doesn’t recognize this drive” error on your Windows 11 or Windows 10 PC? Whether it’s to restore your data or ensure that your files are getting backed up properly, there are ways to fix that.
We’ll show you how to fix issues with unrecognized drives in four methods, including reconnecting your drive, using the CHKDSK command-line tool, starting the File History service, and deleting your current configurations.
Fix 1. Disconnect and Reconnect the Drive
You typically connect an external drive to your machine to enable File History. Refresh its connection by unplugging its connector from your computer’s port. Here’s what to expect when you unplug your drive:
- File History might show an error or notification about the missing drive.
- It will stop backing up files.
Wait for at least 30 seconds before plugging your drive back in. One helpful tip to follow is to use a different port when reconnecting your drive. This way, you can see if it’s your ports that are problematic. Restart your device once done and check if the issue has been fixed.
There’s no need for you to reselect the drive for File History via Control Panel after reconnecting. Windows will automatically recognize it and resume using it for that feature. Any cached data for backups (from when the drive was disconnected) will also be transferred to your external drive.
Fix 2. Start the File History Service
If reconnecting your drive doesn’t work, check whether the File History Service is enabled in the first place. Here’s what to do.
Press Windows + R to launch the Run utility. In the Open field, type services.msc and press Enter.
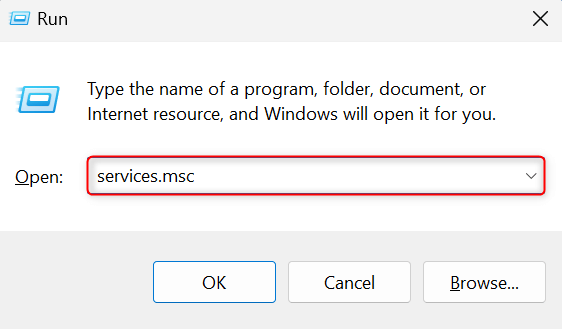
In the Services utility window, double-click File History Service to open its Properties window.
In the Properties window, navigate to the General tab. Then, see if the Service status parameter indicates Stopped. If it does, click the Start button below it.
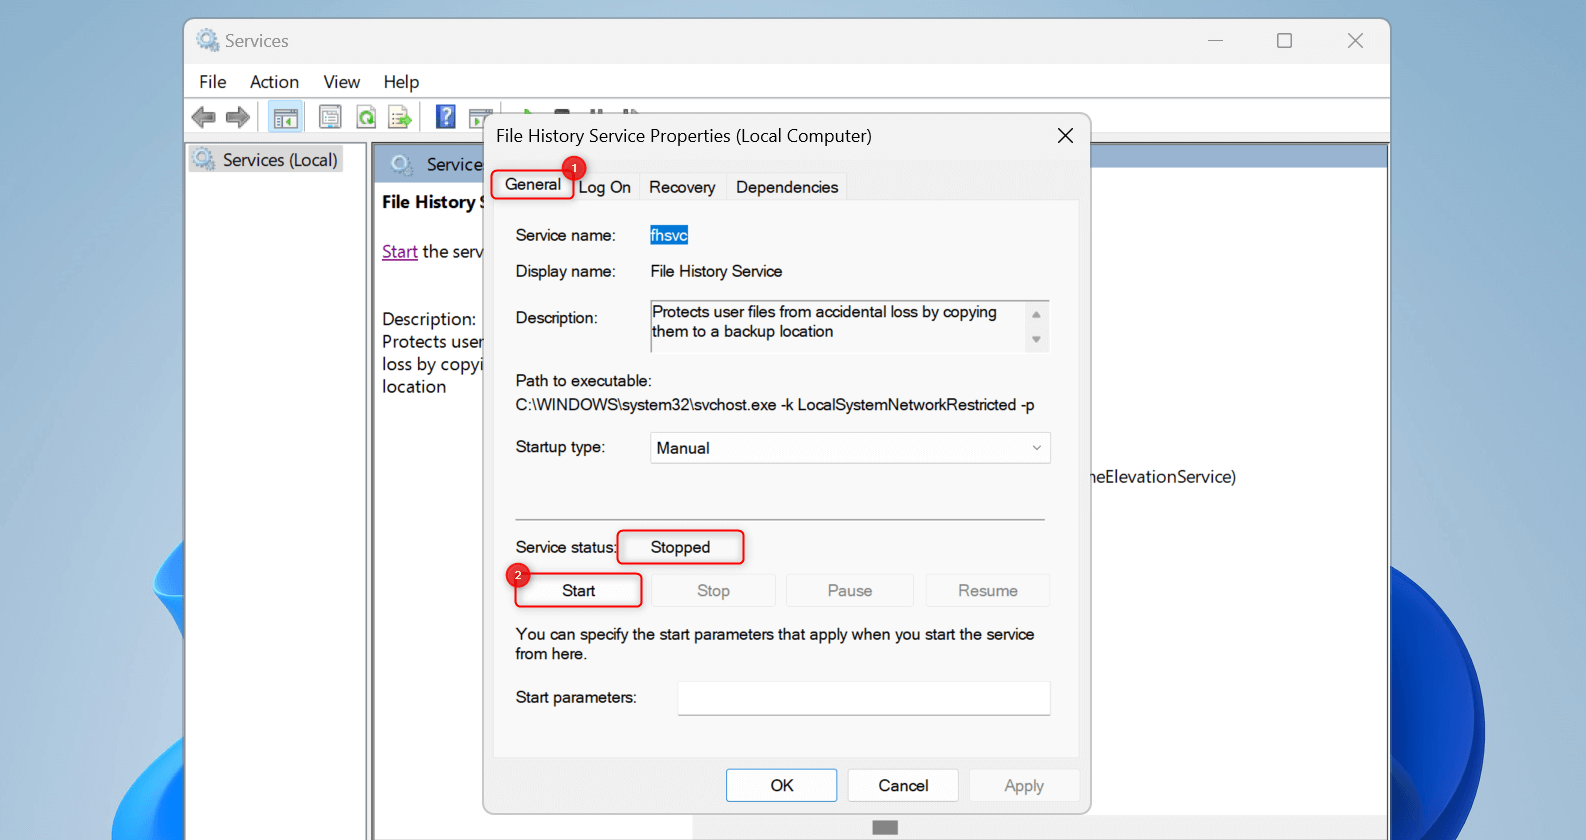
To ensure that File History Service works once your computer turns on, expand the Startup type drop-down and choose Automatic.
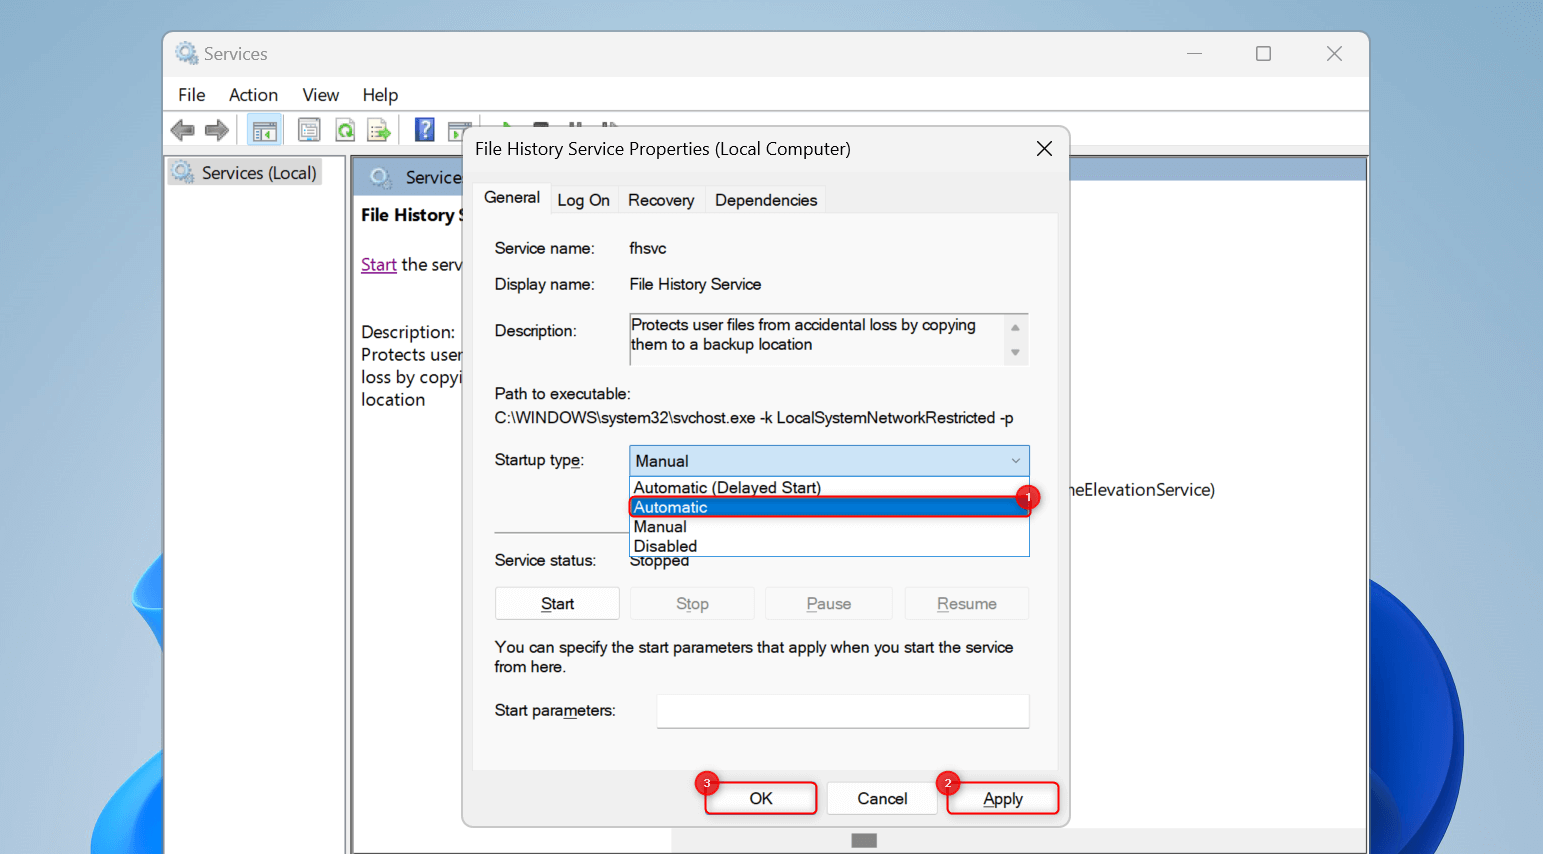
Click Apply > OK to save your changes. Then, close the Properties window. Meanwhile, you can also refresh the service here if it’s already turned on before. To do this, right-click File History Service and choose Stop.
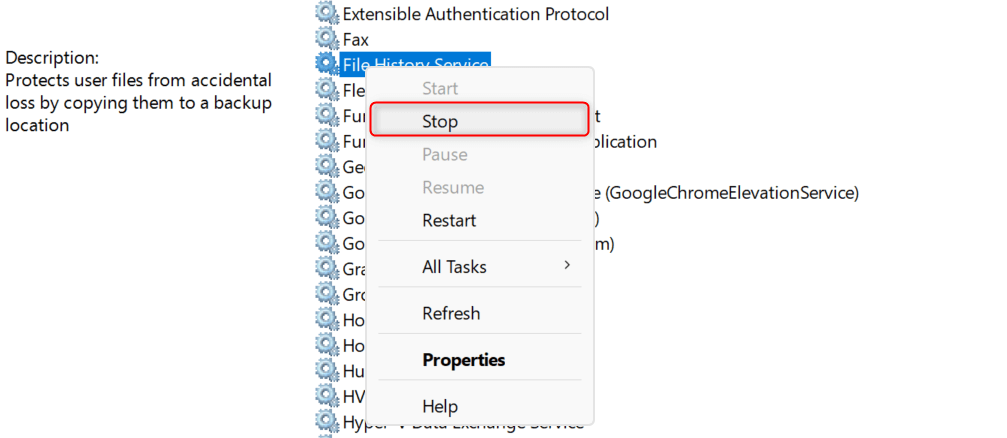
Wait for a few minutes before right-clicking File History Service again and choosing Start.
Fix 3. Fix Drive Issues
There’s also a chance that it’s your drive that is presenting the issue. Resolve this by using the CHKDSK command-line tool, an in-built utility in Windows that allows you to check for and repair disk damage. Here’s how to use it.
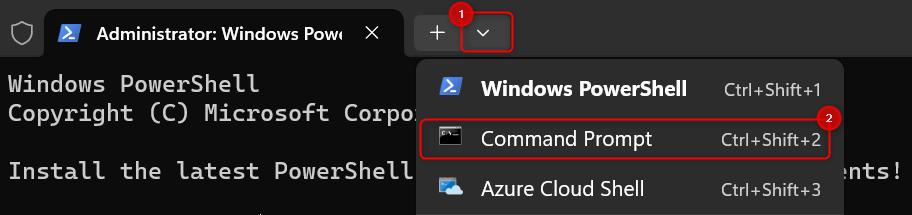
Press Windows + X to open the WinX menu and select Terminal (Admin).
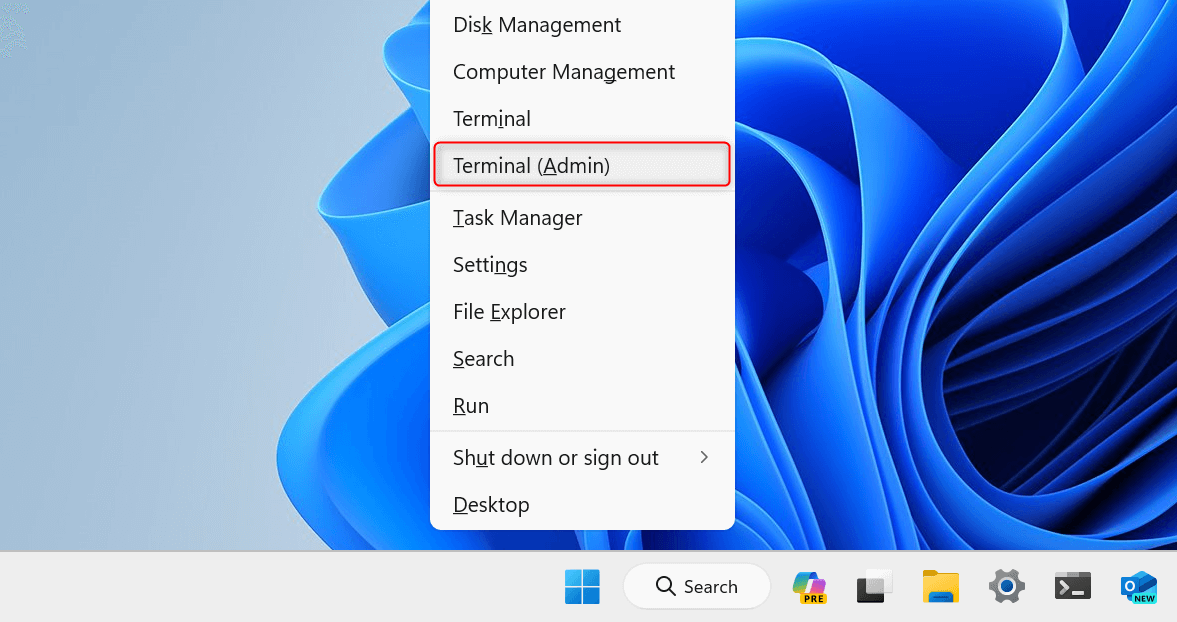
In the User Account Control dialog, choose Yes to proceed.
At the top of the Terminal window that appears, click the Open a new tab drop-down and select Command Prompt.
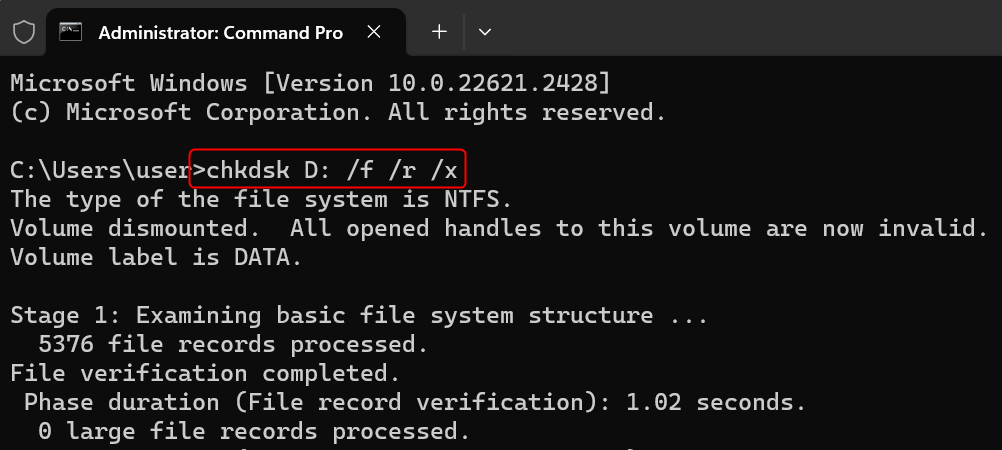
Type the following command:
chkdsk [DRIVE LETTER]: /f /r /x
Make sure to replace [DRIVE LETTER] with the letter assignment of the drive you want to check. Then, press Enter to run the command.
The above command will accomplish the following:
- /f: Fix any errors it finds on the disk
- /r: Locate bad sectors on the drive and try to recover readable information from them
- /x: Force the volume (drive) to dismount first if necessary, which might be needed if the drive is currently in use by programs
Simply wait for the command to finish. Once done, check if it can be recognized by File History.
If you’re using a version of Windows 11 or Windows 10 that doesn’t have the Terminal app installed by default, download Terminal from Microsoft Store. Alternatively, use Windows Command Processor (cmd.exe), the classic version of Command Prompt.
Fix 4. Delete the File History Configuration
If none of the fixes above works for you, reset the entire File History feature by deleting its configuration files. Here’s how.
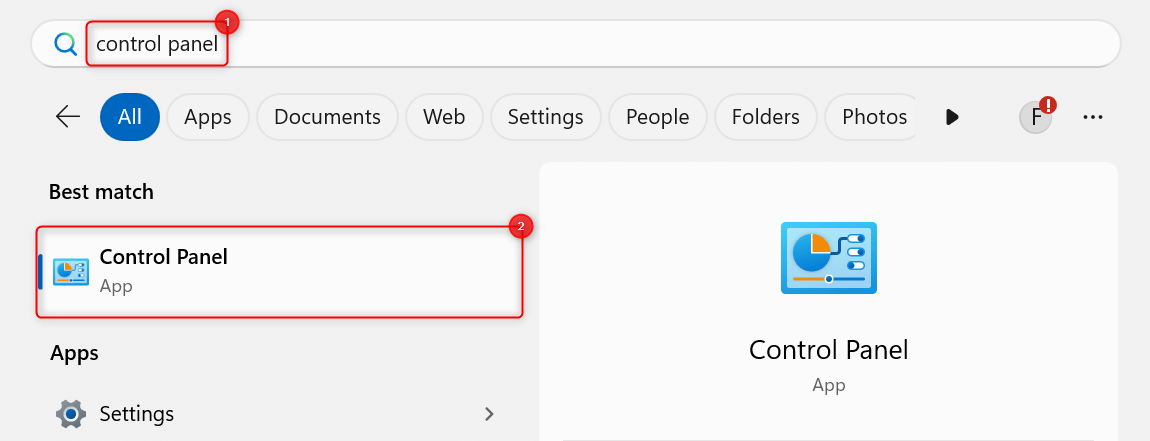
Open the Start menu and type control panel. From the search results, select and open Control Panel.
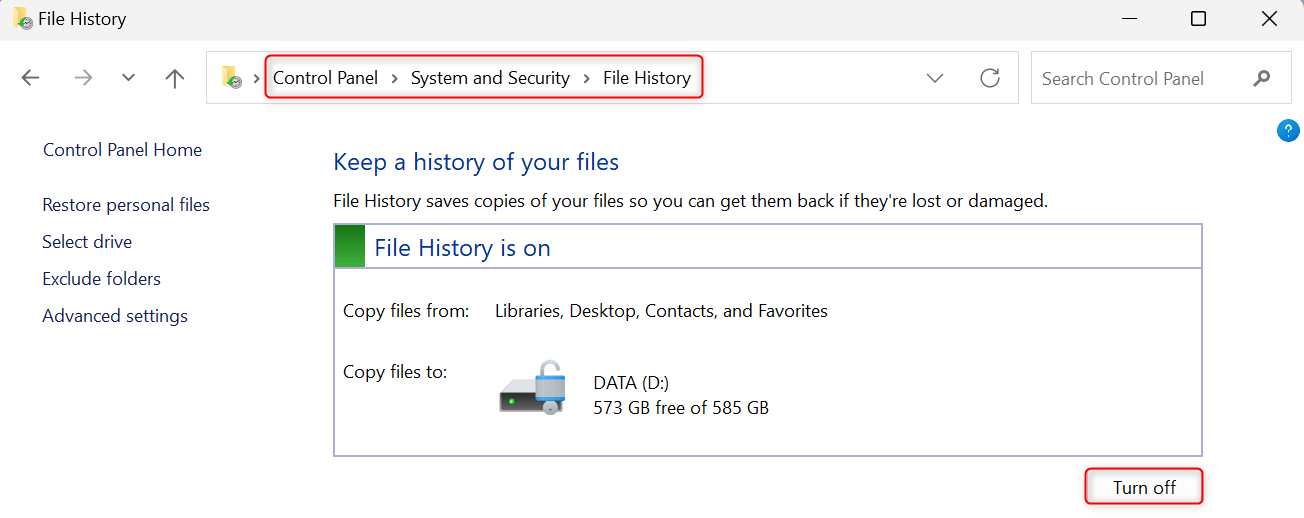
Navigate to System and Security > File History. Check the status of File History on your computer and see if it’s on. If it’s enabled, click the Turn off button.
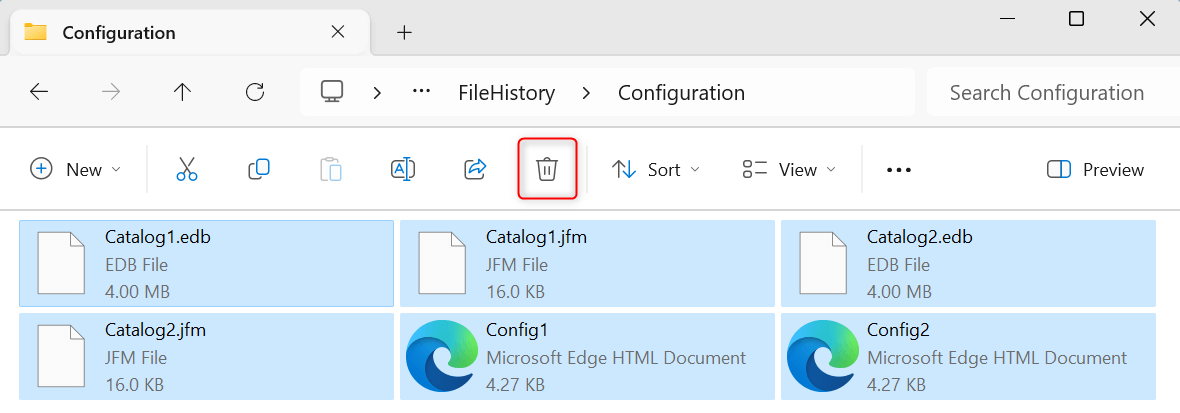
Next, press Windows + E on your keyboard to launch File Explorer. At the top of the window, click the address bar and paste the following path:
%USERPROFILE%\AppData\Local\Microsoft\Windows\FileHistory\Configuration
Once there, press Ctrl + A to select all files and folders present in that location. From the toolbar, click Delete (a trash bin icon).
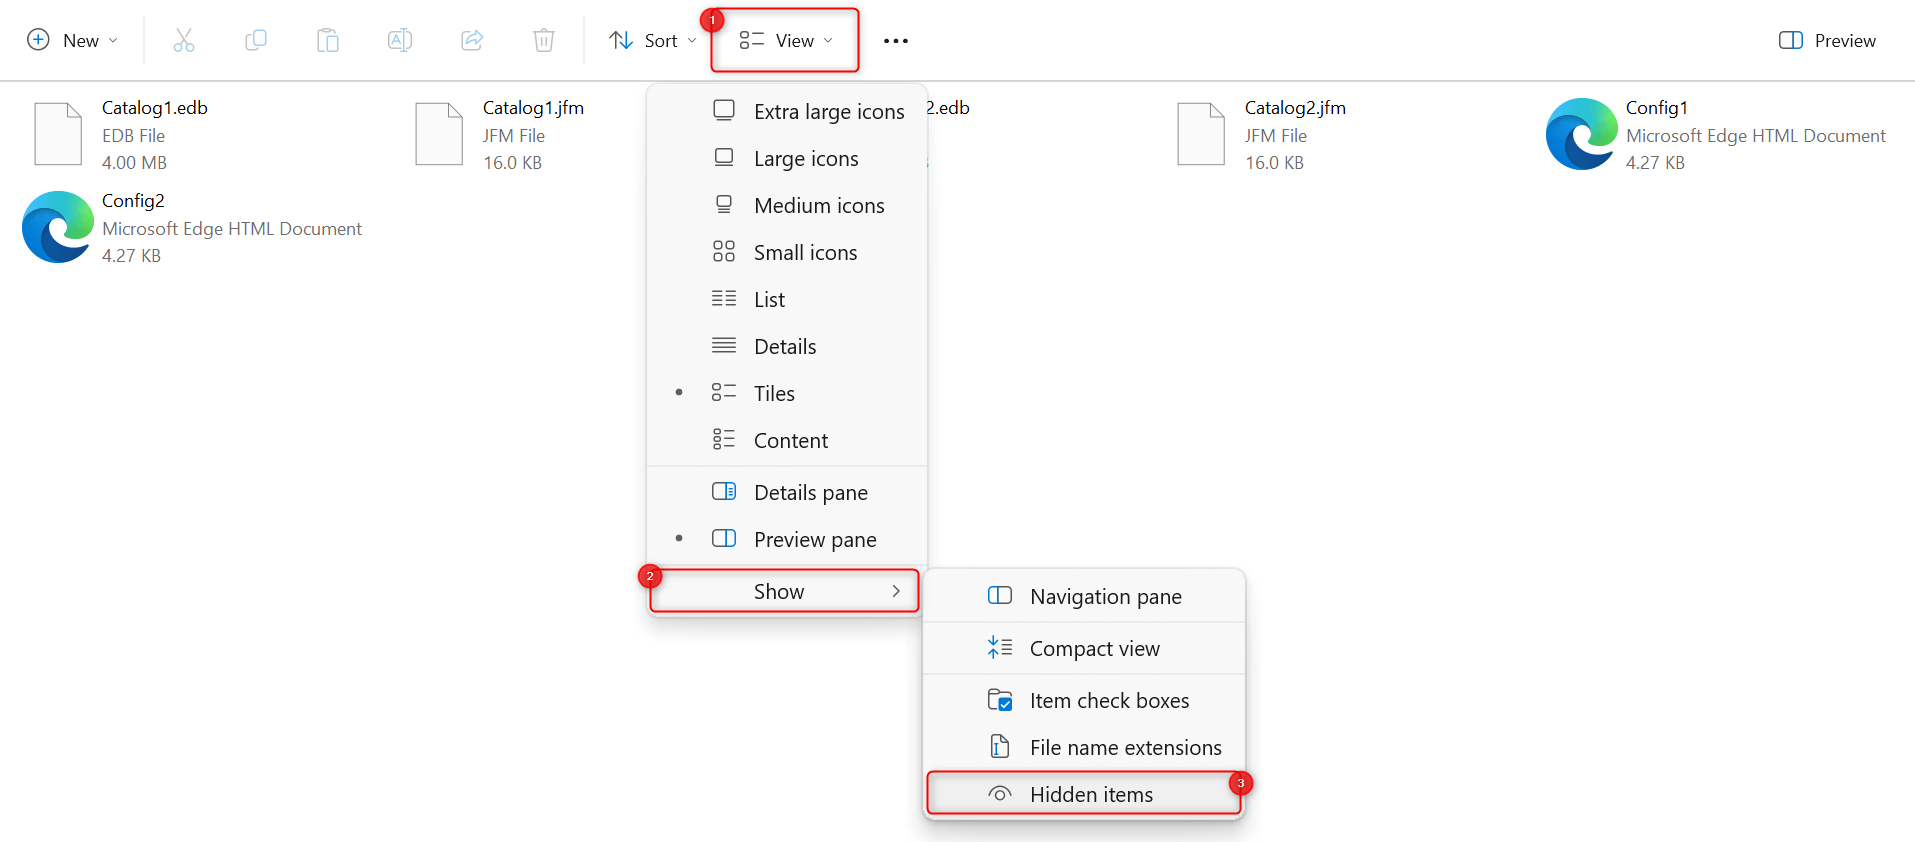
In some cases, there are also hidden files stored in that folder. To view them and ensure that they get deleted, expand the View drop-down from the toolbar and select Show > Hidden items.
After doing that, enable File History again. Navigate to Control Panel > System and Security > File History. Then, click Turn on. See if File History now recognizes your selected drive.
And that’s how you resolve a “File History doesn’t recognize this drive” error on Windows 11 and Windows 10. If the issue persists, a workaround you can do to backup your data is to allocate your SSD to create a separate storage. Make sure to browse our other articles to find fixes to other Windows-related errors.