
- To allocate an SSD in Windows 11, open Disk Management, right-click Unallocated, choose New Simple Volume, follow the instructions in the wizard, and click Finish.
Want to allocate an SSD (solid-state drive) on your Windows 11 computer? Whether it’s to separate your personal data from your operating system files or increase your security, there are three different methods (both graphical and command line) you can use to partition your drive. We’ll show you just that in this post.
What Allocating an SSD Does
When you allocate an SSD, you divide your storage space into multiple drives called partitions. They will appear in File Explorer, allowing you to store your data. Here’s why you might want to partition your drive:
- Better file organization: You can categorize your files into groups and store them in separate drives (or volumes).
- Enhanced security: You can prevent other users on your machine from accessing specific partitions, keeping your files private.
- Creating backups: If something goes wrong with one of your drives, you can retrieve the copies you saved in another partition to restore your data.
Note that it’s not a requirement to allocate your SSD. Whether you do it or not, there will be little to no differences in its performance. Still, if you’re one who likes to keep things organized and secure, partitioning your drive will be a good choice.
Using Disk Management (Graphical Method)
A graphical way to allocate your SSD is by using Disk Management, a tool built right into your Windows 11 system. Here’s how you use it:
Press Windows + X on your keyboard to open the WinX menu. Then, click Disk Management from the list.
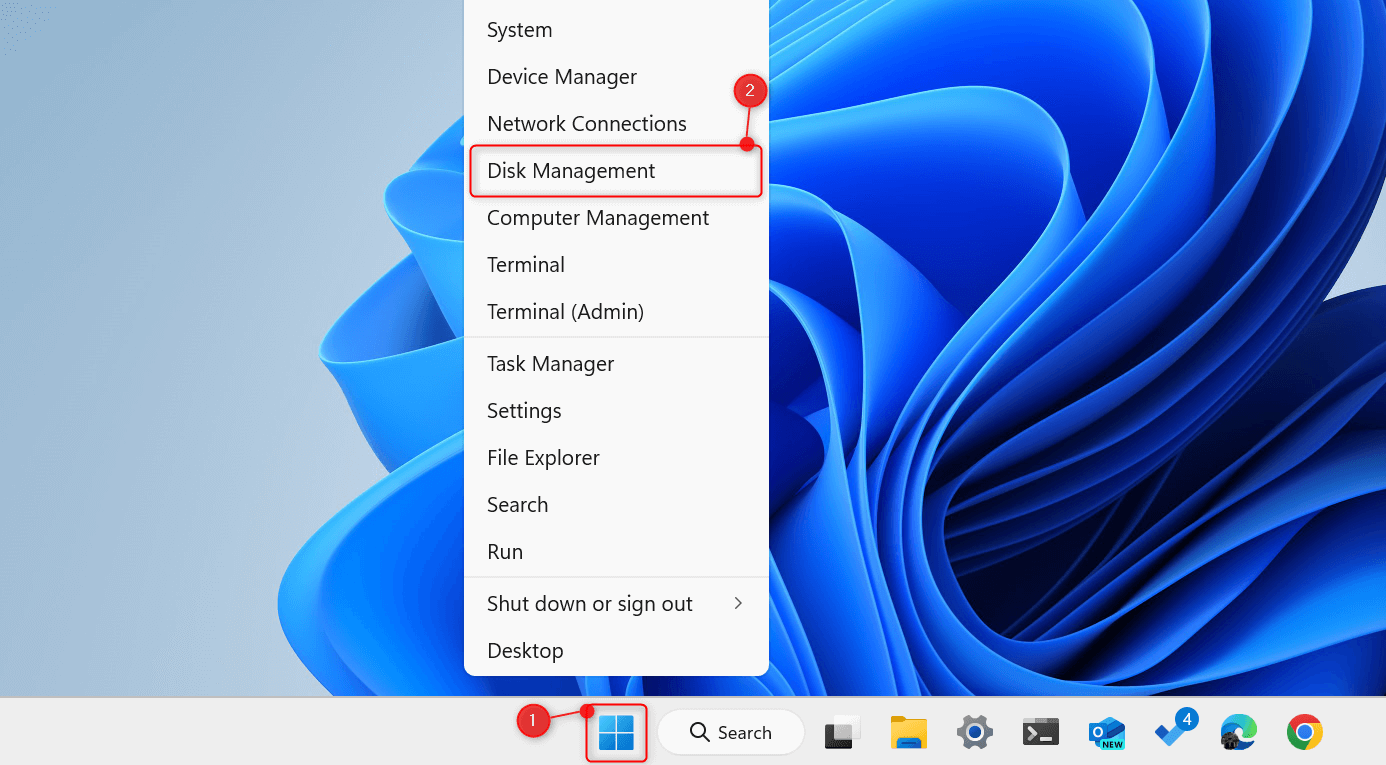
This will open the Disk Management window. Right-click Unallocated. From the context menu, choose New Simple Volume.

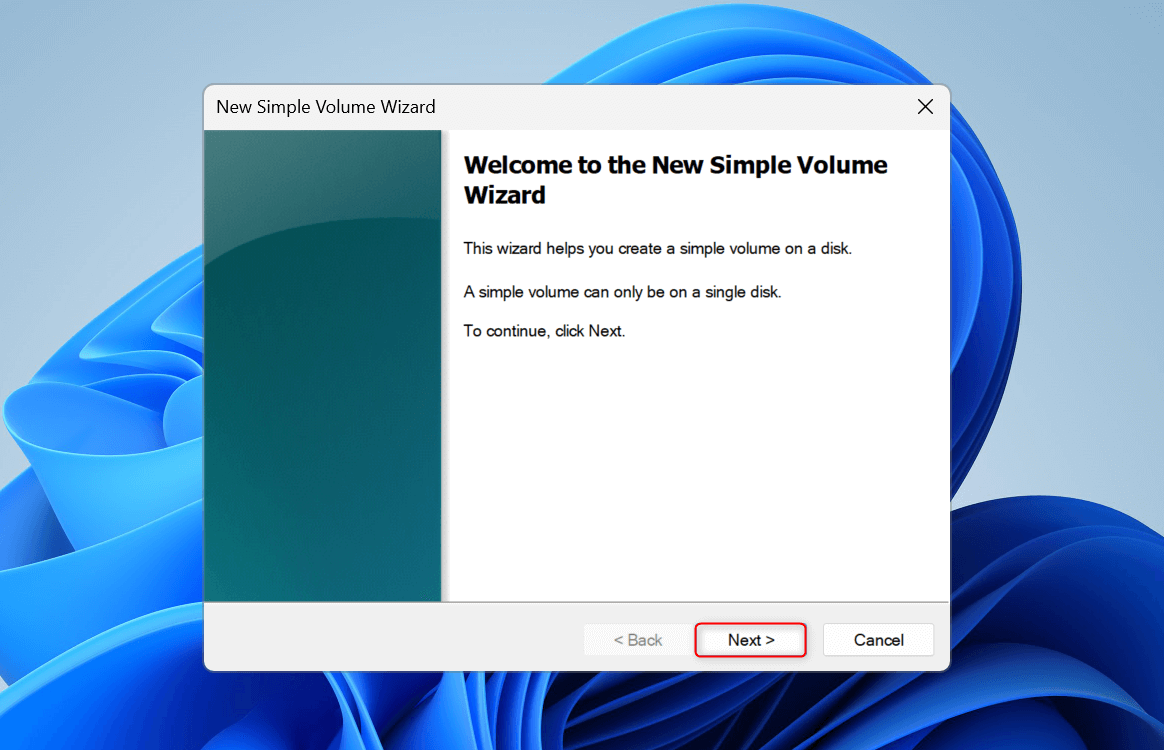
The New Simple Volume Wizard will launch. On the welcome page, click Next.
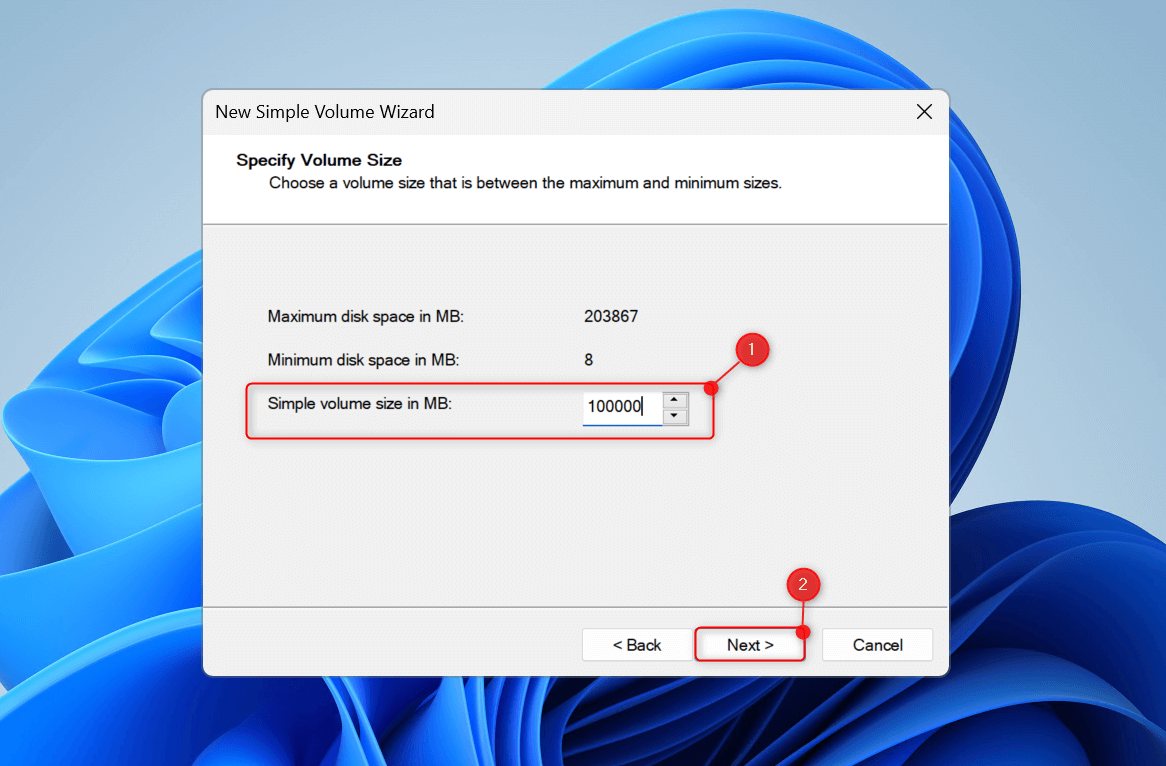
Click the Simple volume size in MB field and enter your preferred partition size. You can check the minimum and maximum sizes that you can enter in the fields above it. Click Next.
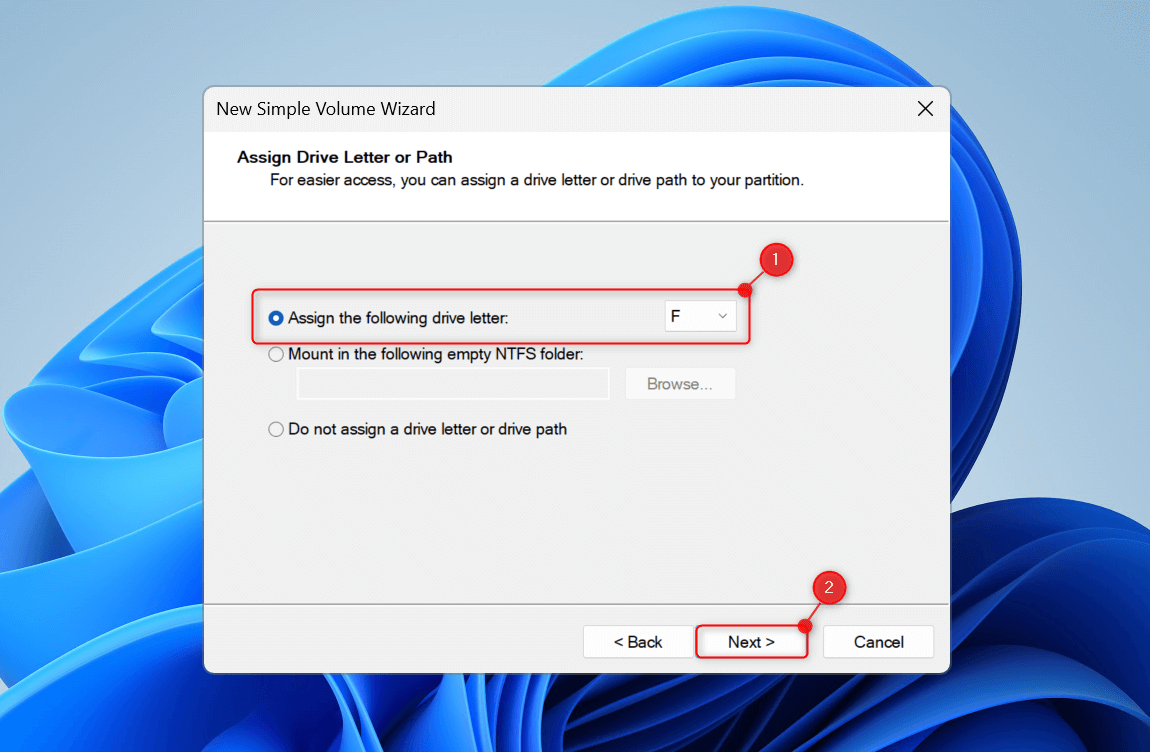
You will see the Assign Drive Letter or Path section next. Open the Assign the following drive letter drop-down and choose your preferred drive letter. Click Next.
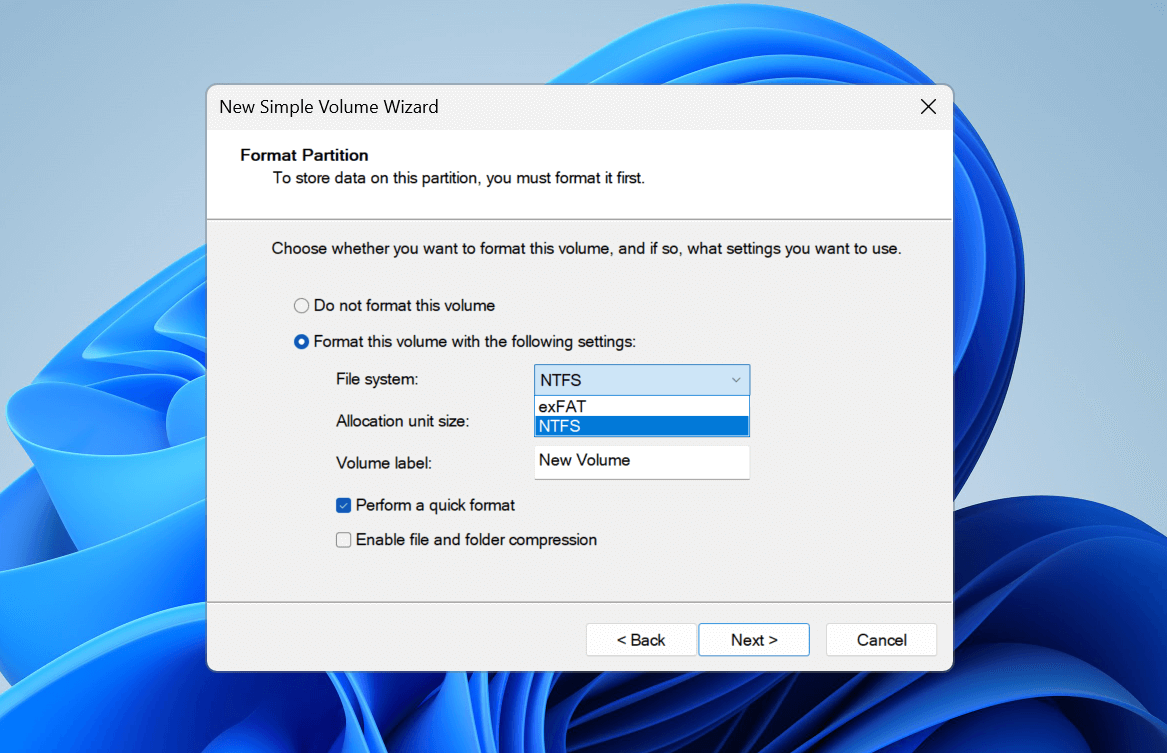
In the Format Partition section, select Format this volume with the following settings. Then, expand the File system drop-down and choose NTFS.
Note: NTFS (New Technology File System) is Windows-preferred and offers file permissions, better recoverability, shadow copies for backups, and encryption. It’s also more suitable than other file systems when creating large partitions, with its size limits of 128 petabytes (128,000 TB).
Leave the Allocation unit size field as is. Then, click the Volume label field and give your new partition a name. Click Next.
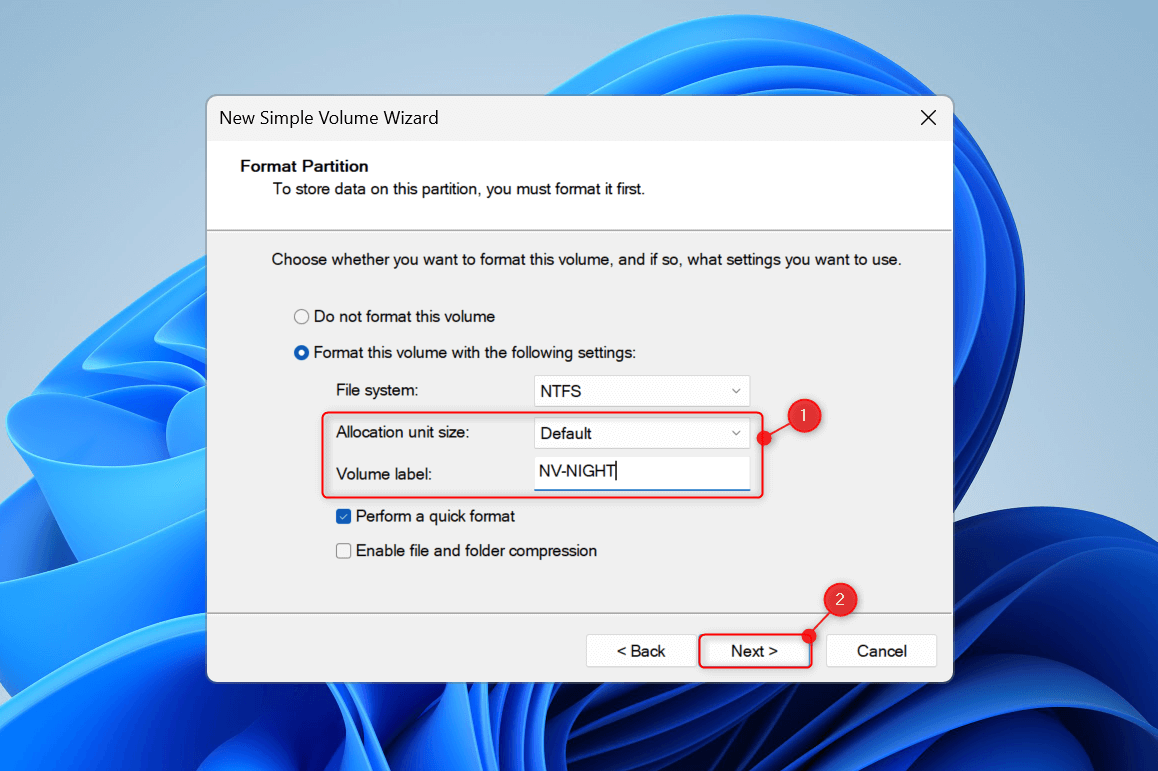
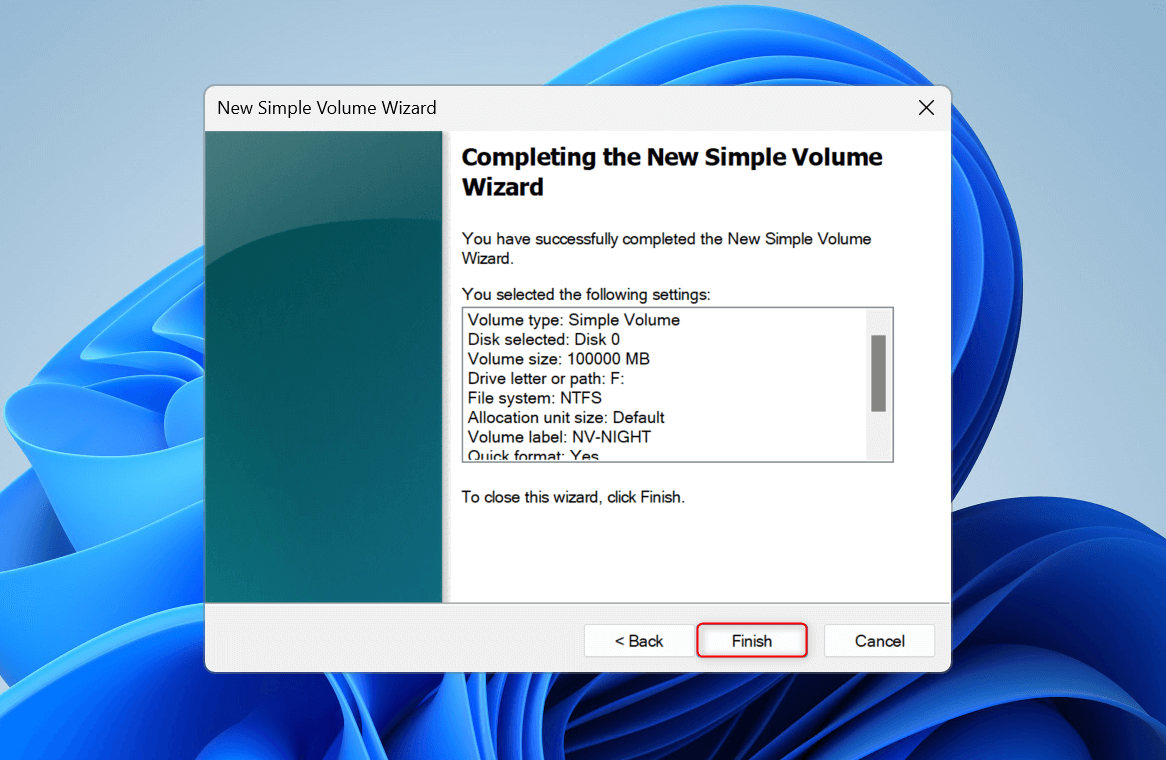
You’ll now see the summary of your options. To apply your changes, click Finish. Otherwise, you can click the Back button and modify your settings.
There might be cases where you see no Unallocated category in Disk Management. You will need to shrink an existing volume to make it show up. To do so, right-click a volume from the list and choose Shrink Volume.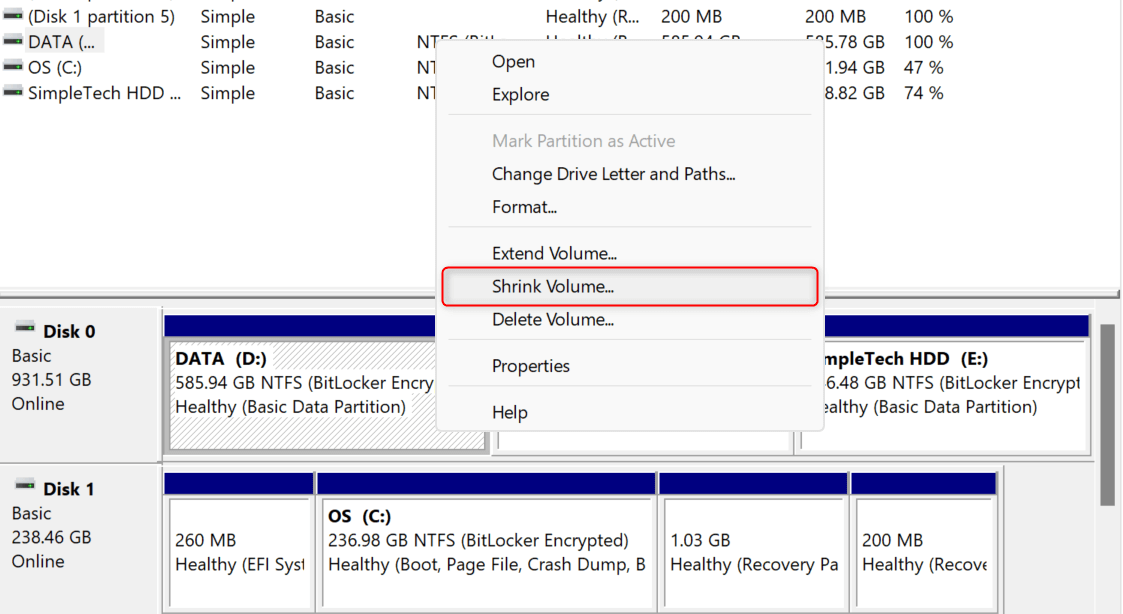
Using Settings (Graphical Method)
You can also use the Settings app to allocate free SSD space. However, the options may be less flexible than the other methods we covered. For example, you cannot choose another file system besides NTFS, which would be bad if you have specific format requirements.
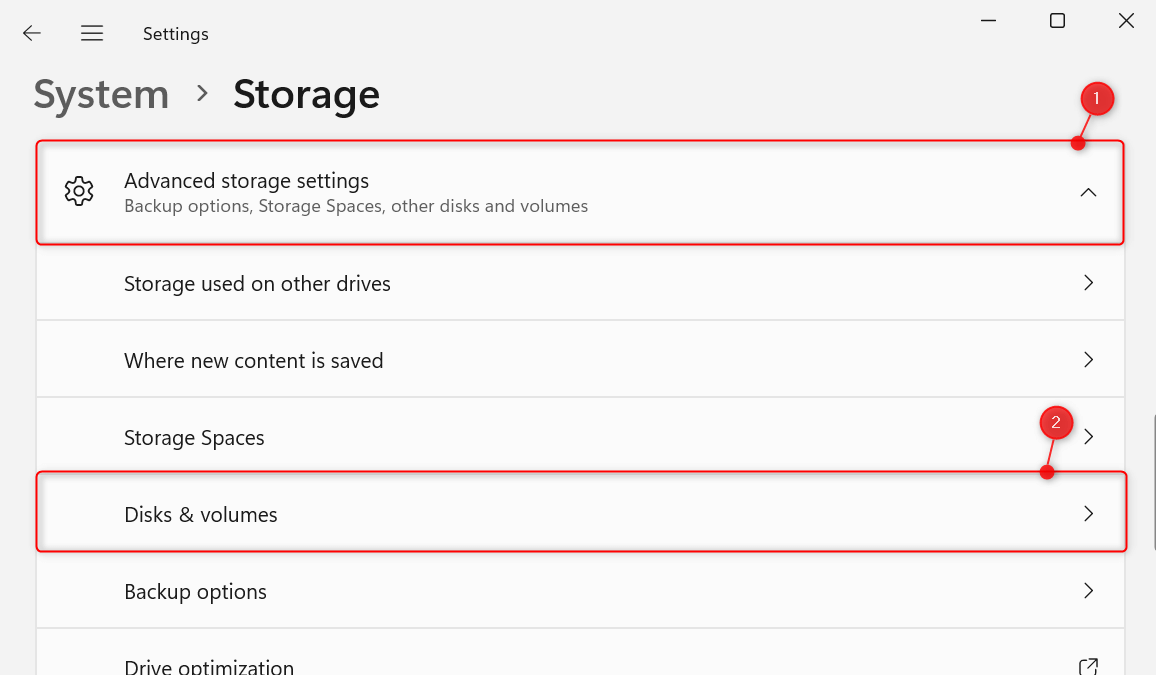
To begin, press Windows + I to open Settings. Once it launches, navigate to System > Storage. Under Storage management, expand the Advanced storage settings section. From the options, choose Disks & volumes.
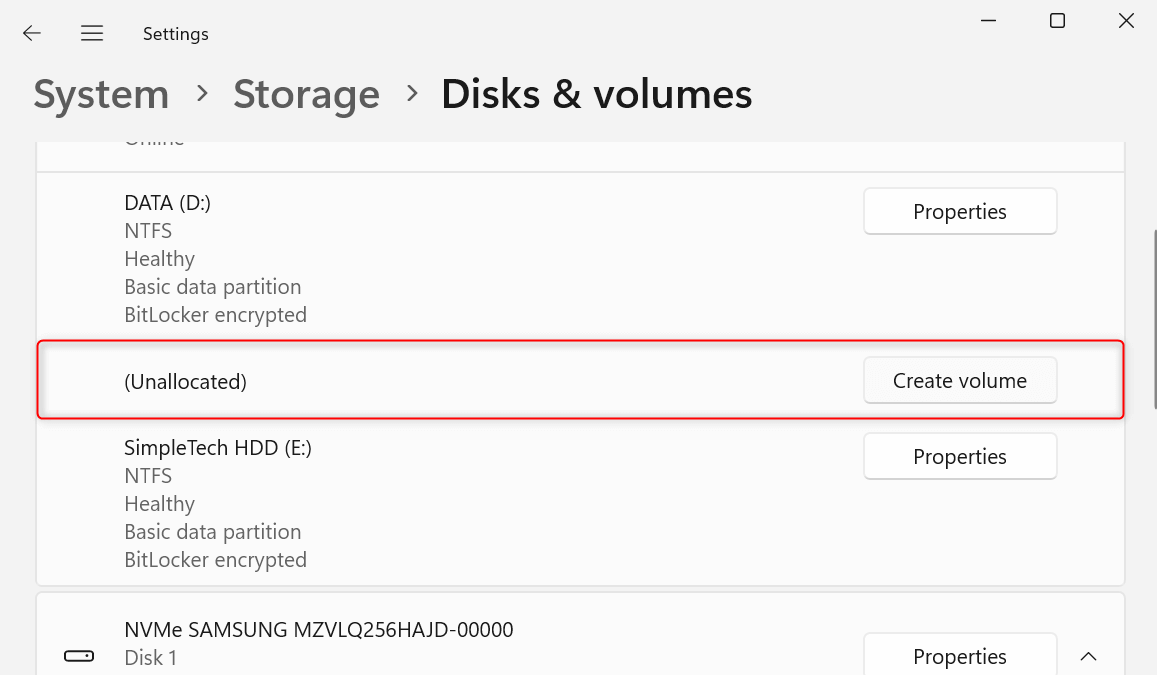
From the disks and volumes displayed, find Unallocated. Then, on the right, click its corresponding Create volume option.
In the New Volume dialog, click the Label field and enter a partition name. Also, choose a letter for the drive from the Drive Letter drop-down. Then, enter your preferred partition size in the Size (MB) field. Lastly, click Format.

If there’s no unallocated space, you can resize the existing volumes to free up storage. To do this for a specific volume, click Properties > Change size.
With Command Prompt (Command Line Method)
If you’re familiar with Command Prompt and prefer to use it, you can use the diskpart command to allocate your SSD.
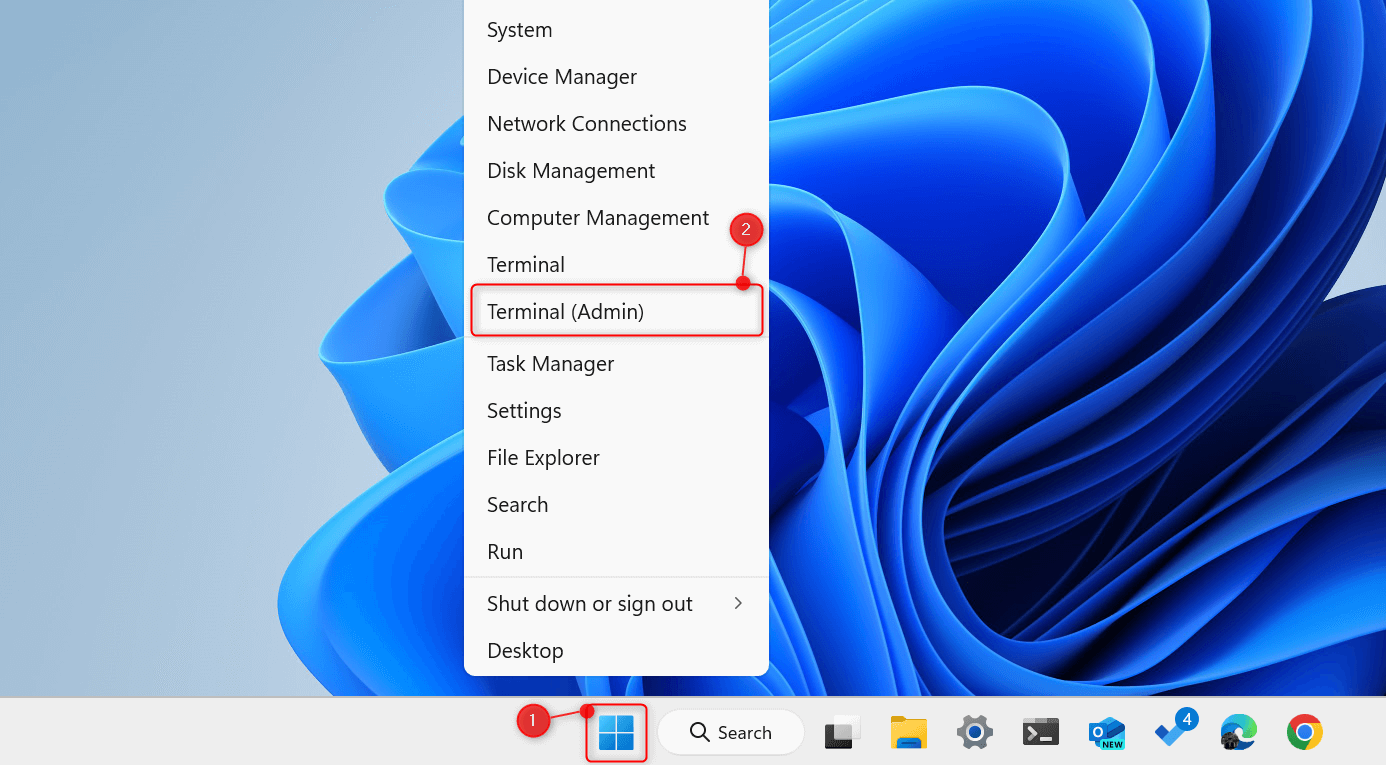
To begin, press Windows + X to open the WinX menu. From the list, choose Terminal (Admin). When asked to confirm in a User Account Control dialog, choose Yes.
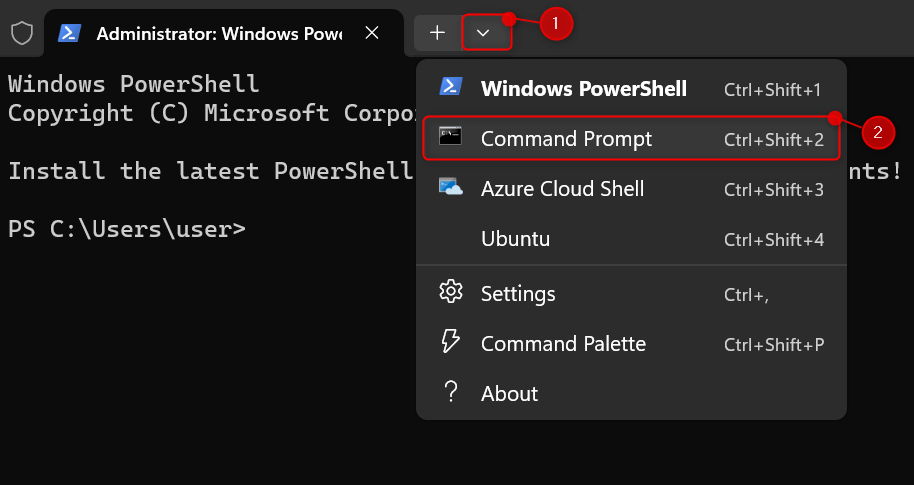
This will open an elevated Terminal window. If it opens a Windows PowerShell tab by default, click the Open a new tab drop-down and choose Command Prompt.
In the command line, type diskpart and press Enter. This will initiate the diskpart tool. Next, run list disk to view all available disks. You will see the disk number, status, size, free space, and other information.

Take note of the disk number where you want to allocate SSD space. In particular, choose the one with at least 1 MB (or 1024 kB) under the Free column. This is the minimum value for you to successfully create a partition.
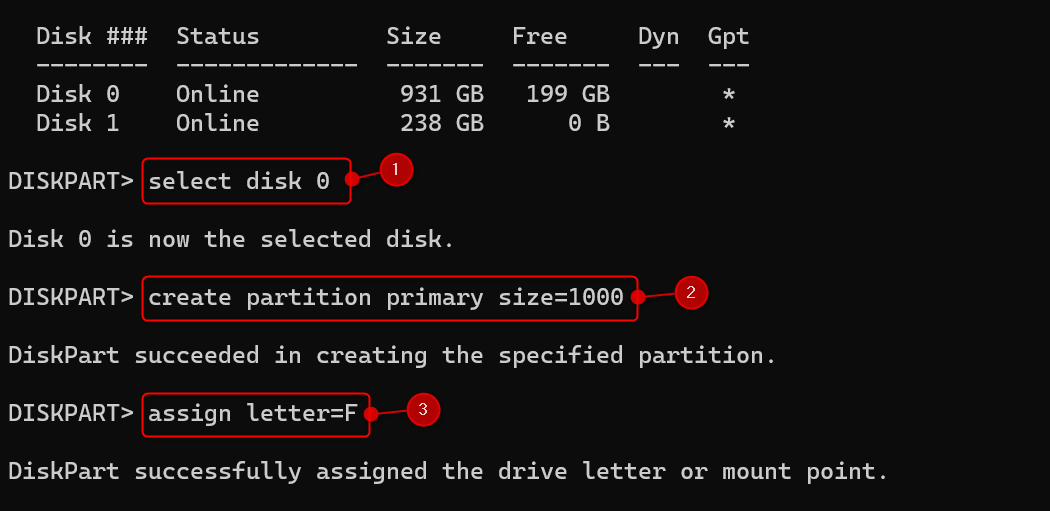
Now, run select disk #. Replace the # (hash) with your preferred disk number. In our example, we ran select disk 0.
To finally make the partition, run create partition primary. This will use the entire free SSD space. If you want to assign a specific partition size, run create partition primary size=[SIZE], replacing [SIZE] with your preferred value in MB.
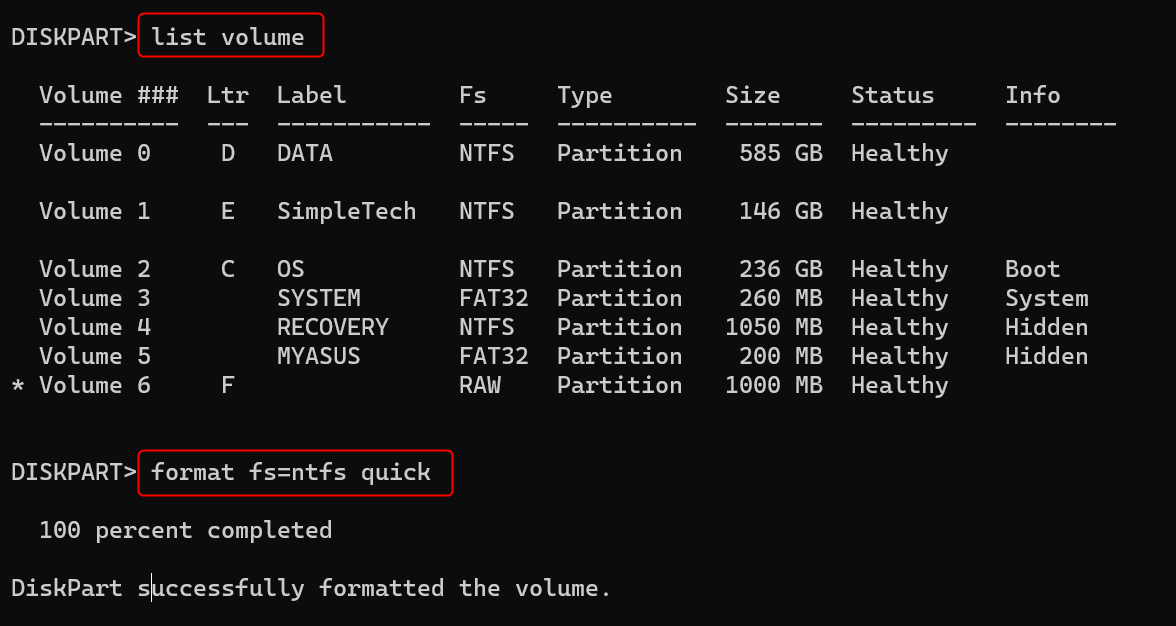
To name your newly created partition, run assign letter=[LETTER]. Replace [LETTER] with your preferred one. To view the available drive letters, run list volume first.
Finally, to format your partition, run format fs=ntfs quick. Once done, run exit.
You Can Partition the SSD While Installing Windows 11
When installing Windows 11 using either the Windows Media Creation Tool or from a USB installation media, you can choose to partition your SSD directly.
In the Which type of installation do you want? section, choose Custom: Install Windows only (advanced). For each partition listed, select it and click Delete. Now, select Disk 0 Unallocated Space and click New.
Enter a value in the Size field and click Apply to finish.
And that’s how you allocate an SSD in Windows 11. While there’s really no need for it, partitioning your disk helps organize your data better. You can also use a specific volume to store your backups. With a few changes, these methods are also applicable to your HDDs.