
- You receive the DISM error 50 because the /Online parameter doesn’t work in Windows PE. Replace it with the image path of your Windows OS. For example, run DISM.exe /Image:C:\ /Cleanup-Image /RestoreHealth.
- If you have already exited Windows PE but still receive an Error 50, find and delete the MiniNT key using the Registry Editor.
- You can also clean boot your Windows PC to determine if an app or service is causing the issue.
Receiving an “Error: 50” when running DISM (Deployment Image Servicing and Management) commands on your PC? We’ve got you covered. We’ll tell you why it occurs in the first place, as well as how to resolve it on Windows 11 and Windows 10.
You Can’t Use DISM /Online Parameter in Windows PE
DISM primarily works with servicing an already-running Windows installation. Meanwhile, Windows PE is a minimal environment used for deploying and repairing the operating system.
If you’re trying to run DISM commands in Windows PE, or your machine thinks that you are in that environment, you cannot use the usual /Online parameter. This parameter targets the currently running Windows installation, which obviously isn’t the case in the Windows PE context.
This is why you receive a DISM Error 50. To resolve this issue, exit Windows PE, restart your computer, and run your DISM commands.
Use the Windows Installation Drive Letter in the Command
Since you can’t use the /Online parameter, you can access an offline image of the operating system by specifying its Windows installation drive letter. This is also more precise and straightforward.
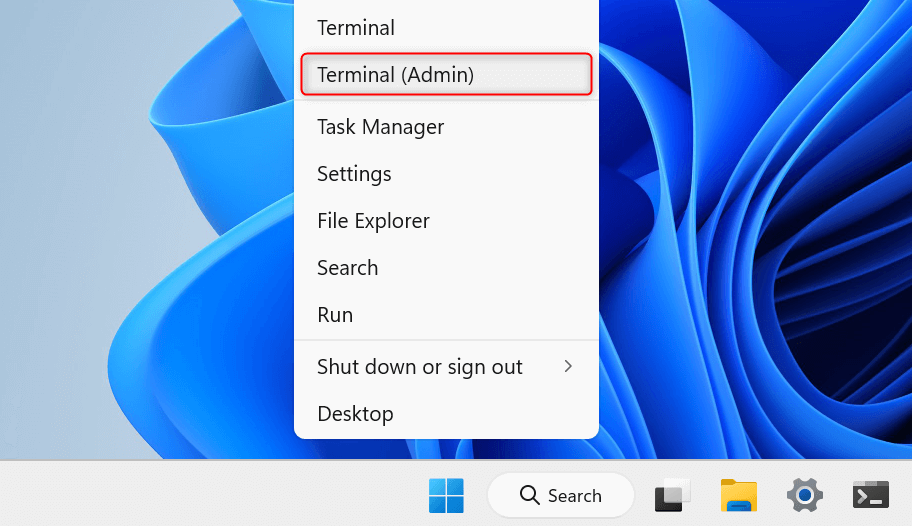
To begin, press Windows + X to open the WinX menu. From the options provided, choose Terminal (Admin). In the User Account Control prompt, select Yes to launch Terminal with administrator permissions.
In Terminal, click the Open a new tab drop-down and choose Command Prompt.

Once you’re in a Command Prompt tab, paste the following command and press Enter.
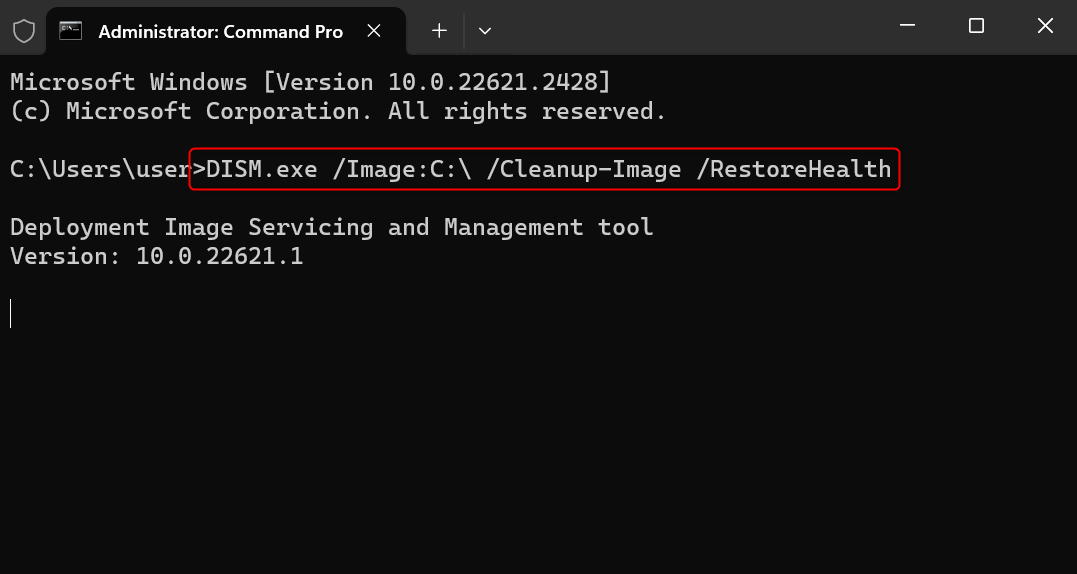
DISM.exe /Image:C:\ /Cleanup-Image /RestoreHealth
Next, run the following command to find system files that are potentially corrupted.
sfc /scannow /offbootdir=C:\ /offwindir=C:\Windows
Here, you will notice that the /Image parameter features the drive letter C:\. The Windows folder is typically located here, so you can directly run the above commands as they are. However, if the said folder is installed in another drive, make sure to type the right letter in the command.
If you’re not sure where the Windows folder is, run the following command.
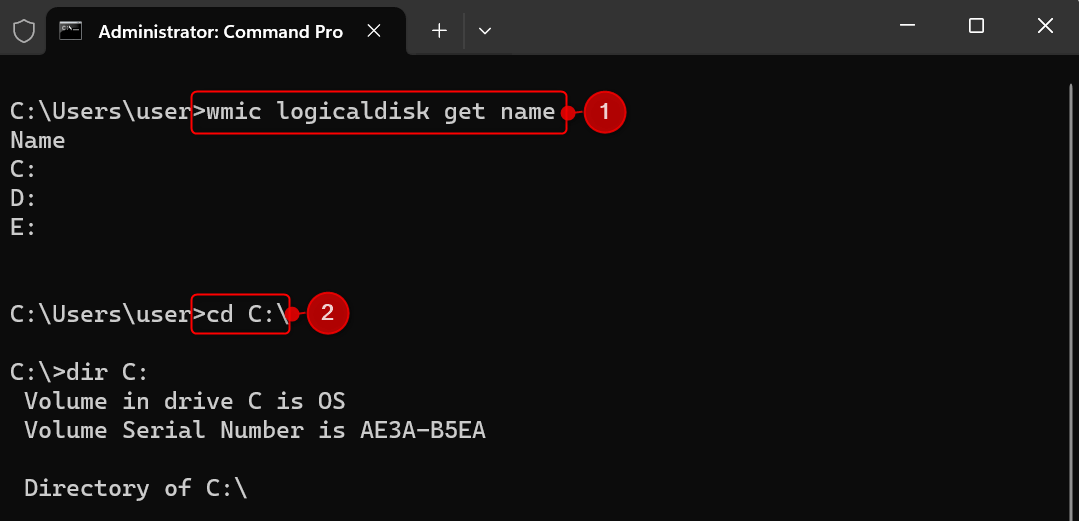
wmic logicaldisk get name
Command Prompt will display the list of all available volumes and drives on your machine. For each drive letter available, run these commands one by one.
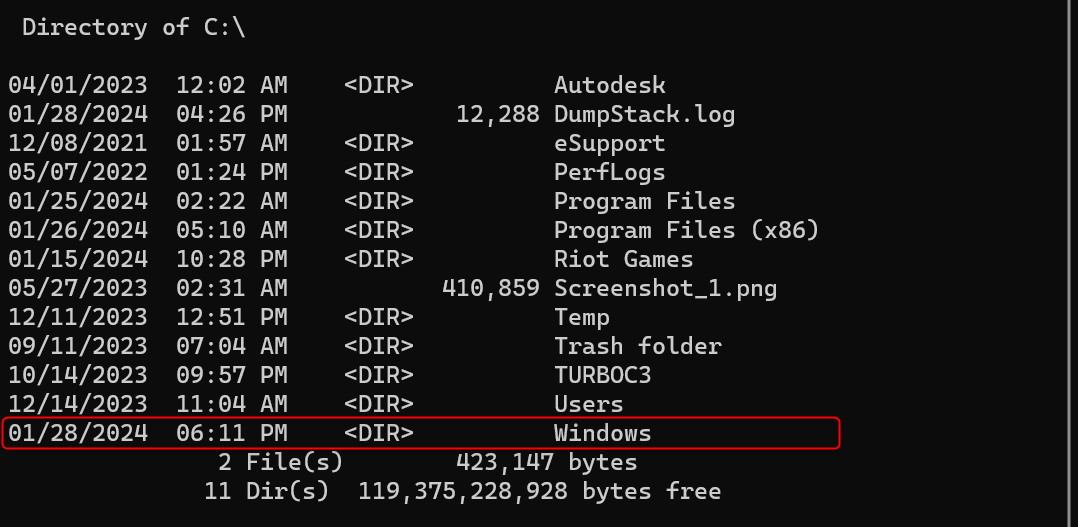
[DRIVE-LETTER]:
dir [DRIVE-LETTER]:
If you’re running the commands while in drive C:, you can change your location by running these instead:
cd C:\
dir C:
Note: You can use the same set of commands in Windows 10 and Windows 11. If the Windows 10 version you’re using doesn’t have the Terminal app by default, you can use the Windows Command Processor (the old Command Prompt) instead. Alternatively, download Terminal from Microsoft Store.
Delete the Registry Key That Tells DISM You’re In Windows PE
If you have already exited Windows PE but still get an Error 50, there might be a leftover registry key telling DISM that you’re still in that environment. Delete it using the Registry Editor.
Warning: Refrain from making any other modification to your system registry aside from the changes below. We recommend you create a backup first by clicking File > Export to revert your edits in case issues occur.
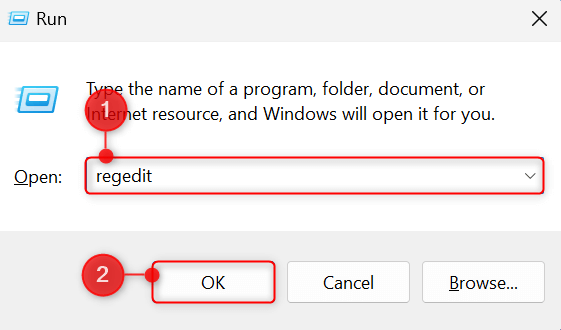
Press Windows + R to open the Run utility. In the Open field, type regedit and press Enter. In the User Account Control dialog that appears, choose Yes to continue the action with administrator rights.
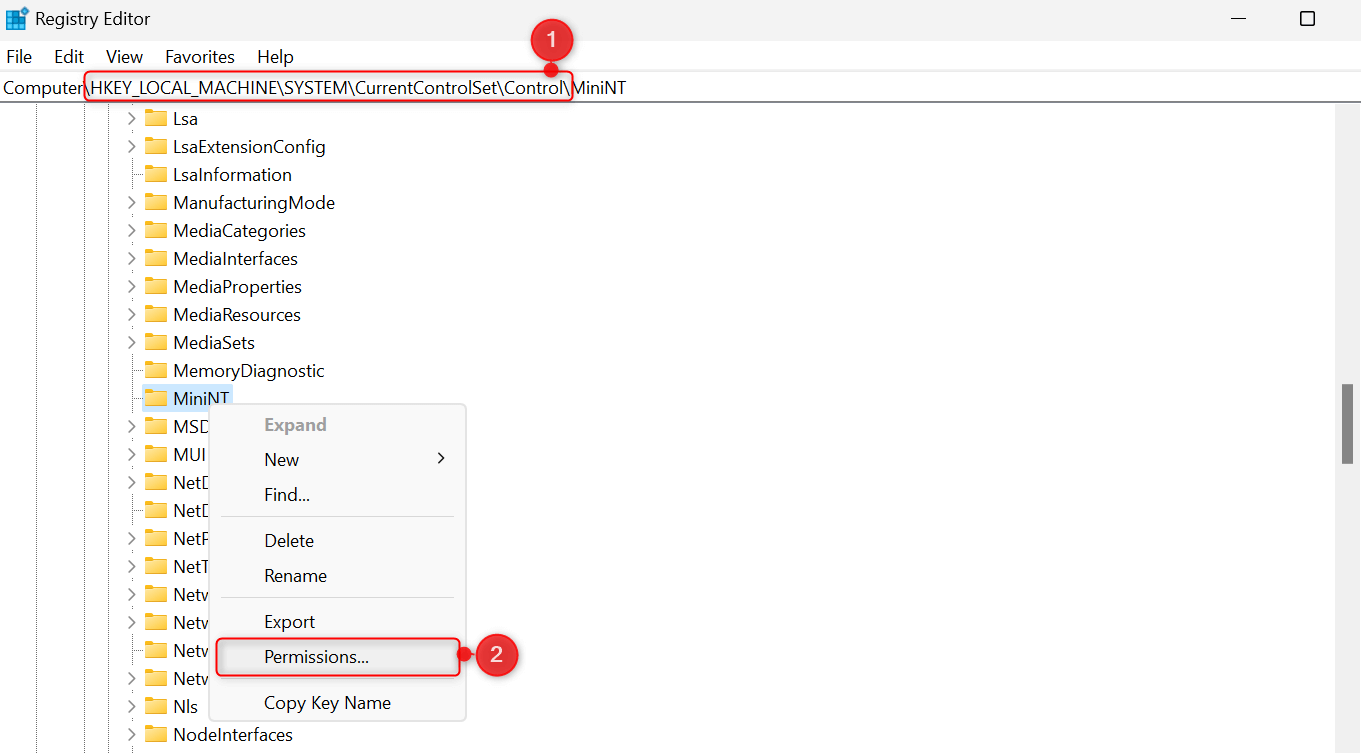
This will open the Registry Editor. Once you’re here, click the topmost field, paste the following path, and press Enter.
HKEY_LOCAL_MACHINE\SYSTEM\CurrentControlSet\Control
From the folder tree, find the folder named MiniNT. Right-click MiniNT, and choose Permissions from the right-click context menu. This will open a Permissions window on your screen.
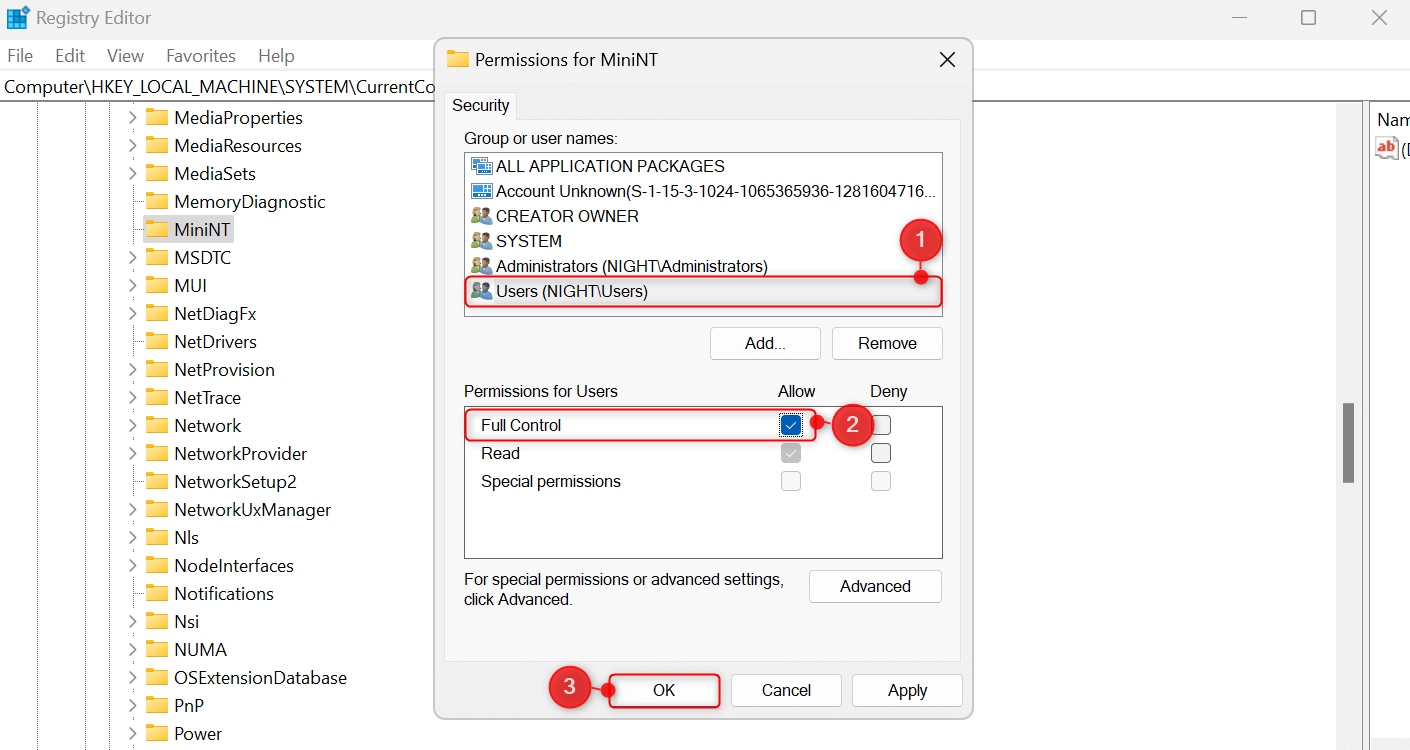
Under Group or user names, choose your username. Then, in the Permissions for Users section, check the box for Full Control under the Allow column. Click OK to save your changes.
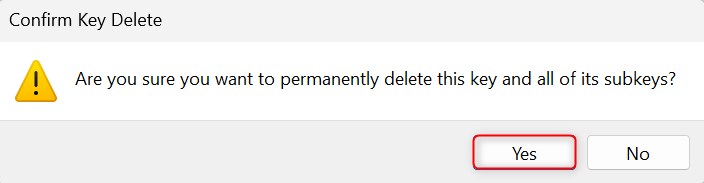
Back to the main interface of Registry Editor, right-click MiniNT again, and choose Delete.

In a Confirm Key Delete window, select Yes to confirm the removal process.
Once done, run your DISM command again and see if Error 50 has been resolved.
Clean Boot Your Windows PC and Run the Command
If none of the methods above work for you, enter the clean boot mode of your Windows PC. This allows you to pinpoint any app or service that’s causing a DISM error 50.
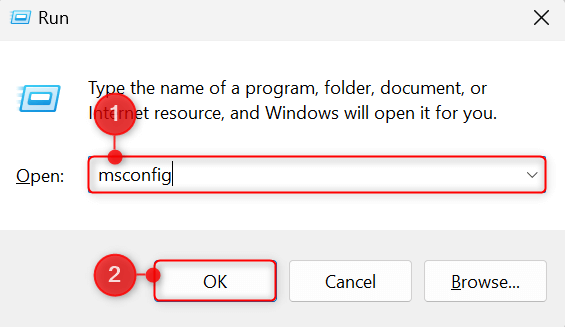
Press Windows + R to open the Run utility. In the Open field, type msconfig, and press Enter. The System Configuration utility will launch on your computer.
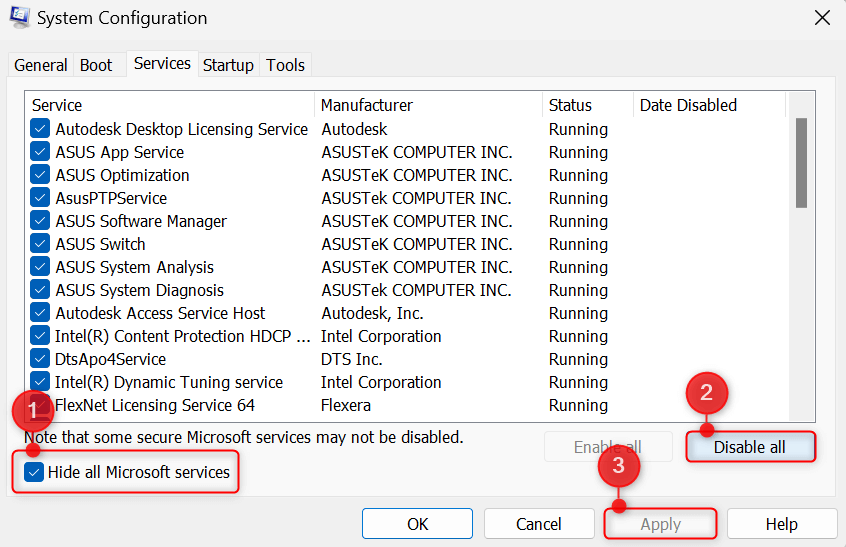
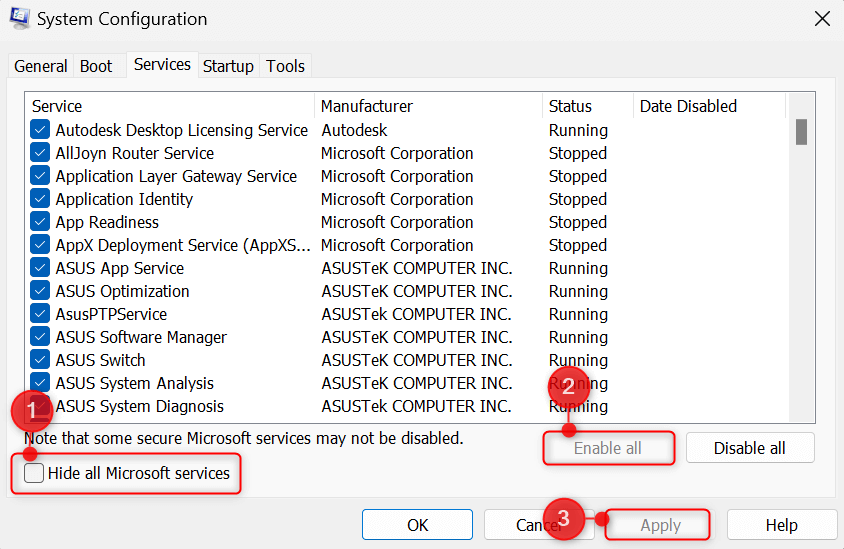
Open the Services tab and toggle on the checkbox for Hide all Microsoft services. Then, click Disable all and choose Apply.
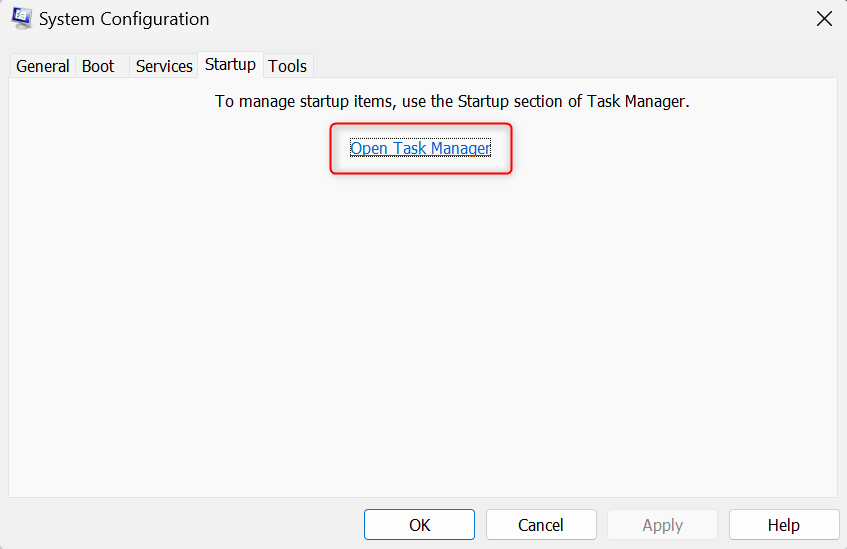
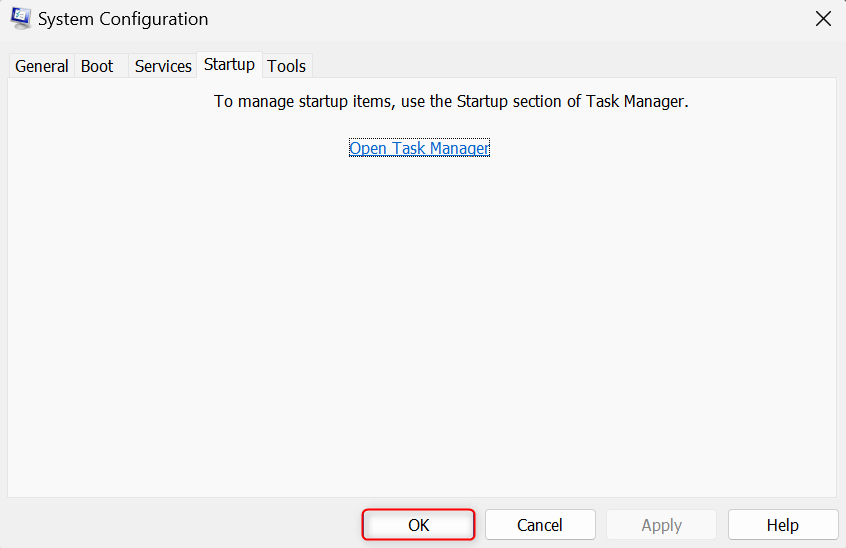
Now, switch to the Startup tab and click Open Task Manager.
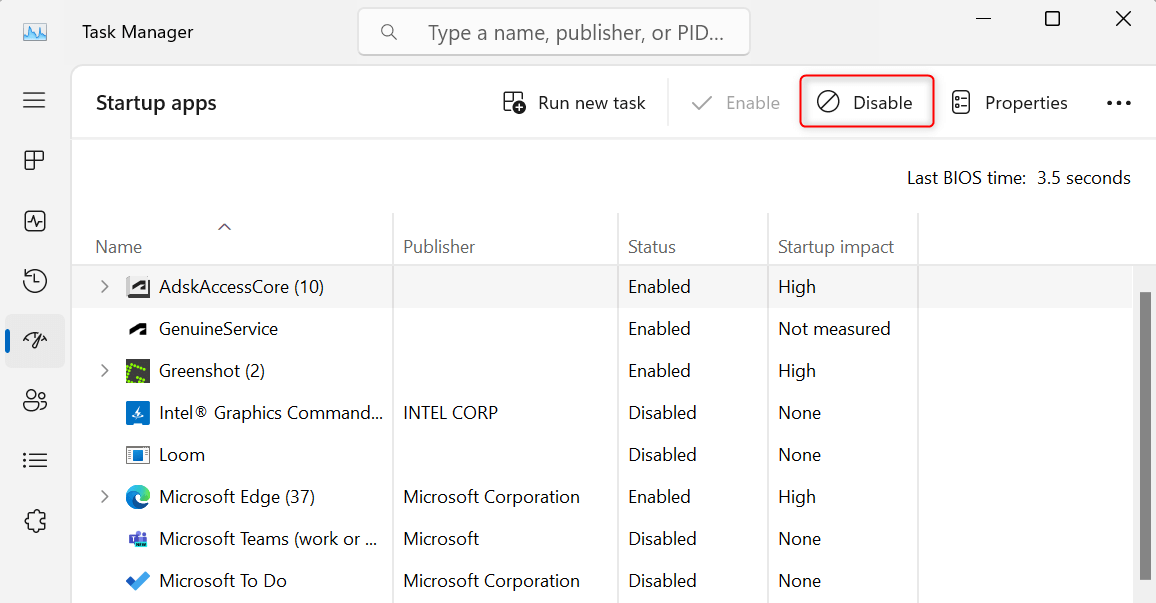
The Startup apps section in Task Manager will launch on your machine. For every application with the Enabled status, select it from the list and click Disable.
Go back to the System Configuration utility and click OK.
To finally enter the clean boot environment, restart your computer. While in this state, launch Command Prompt and run your DISM commands. If you still can’t execute them successfully, a Windows service might be causing problems for your machine.
For more information about clean boot troubleshooting, visit Microsoft’s official support page.
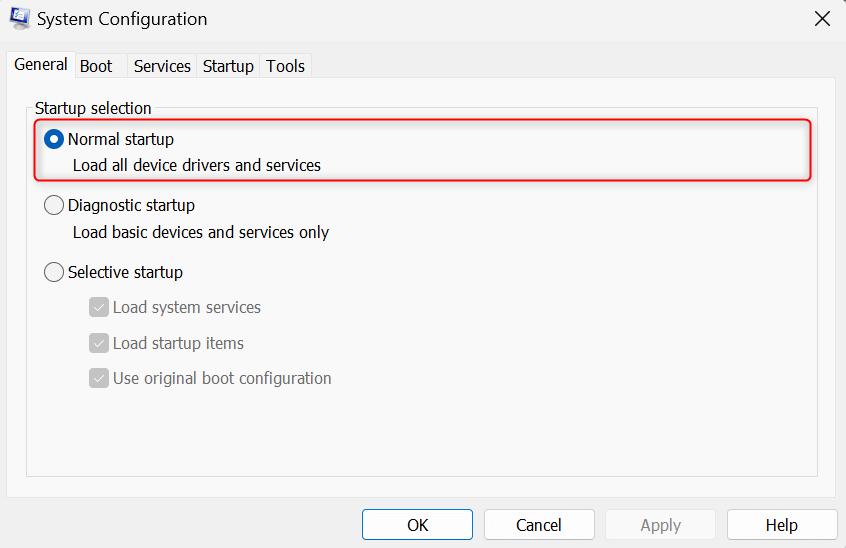
To get out of the clean boot mode, open System Configuration. In the General tab, under Startup selection, select Normal startup.
Next, go to Services. Remove the checkmark for Hide all Microsoft services and click Enable all. Click Apply to finish.
Go to the Startup apps tab in Task Manager. Select a disabled app and click Enable. Repeat the steps for all other programs you disabled. Then, restart your PC.
And that’s how you fix a DISM Error 50 on Windows 11 and Windows 10. If you’re encountering other issues with DISM, such as an Error 87, feel free to browse through our other guides.