Windows Defender helps prevent viruses and malware from infecting your Windows 10 computer. It runs automatically in the background ensuring your PC is clean of any viruses. Sometimes, though, you may want to turn this feature off on your computer. To do that, you will need to learn how to disable Windows Defender.
There are two methods to turn off the Defender in Windows 10. There is a method for temporarily disabling the feature and then there’s another method that permanently turns off the feature. Depending on why you want to disable the Defender, you will need to choose either method.
The following explains both temporary and permanent methods to disable the Windows Defender.
Temporarily Disable Windows Defender on Windows 10
This is one of the temporary methods on how you can get Windows 10 to disable Windows Defender. You are turning off Windows Defender instead of completely disabling it.
You can choose to temporarily disable Windows Defender if you would want to do some tasks and don’t want the Defender to interfere with it. In this way, you can also turn it back on when you are done with the task.
Here are the steps on how you can do it:
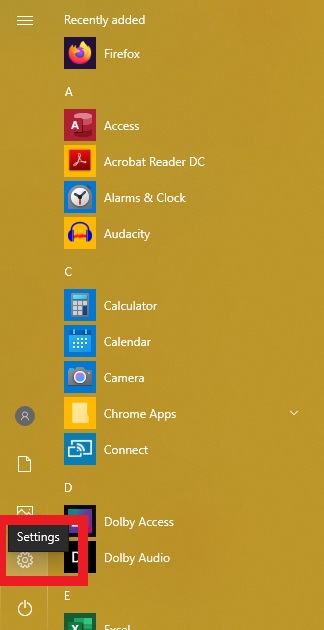
Step 1. Open the Start Menu.
Step 2. Open Settings.
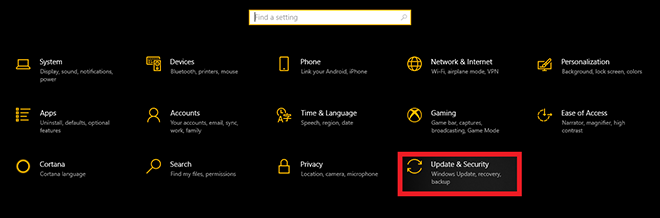
Step 3. Click on Update & Security among the list.
Step 4. On the left side of the windows pane, click on Windows Security.
Step 5. Go to Protection areas and click on Virus & threat protection. This is the first option under the list.
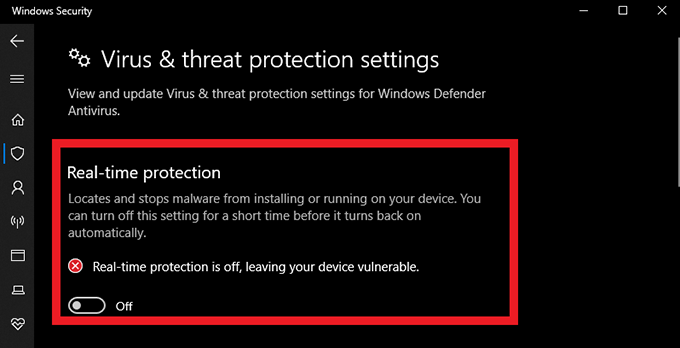
Step 6. Go to Virus & threat protection settings.
Step 7. Toggle the Real-time protection switch Off.
You can also access and disable Windows Defender by simply searching it from the Search bar. Here’s how you can do it:
Step 1: Click on the Search icon beside the Start menu.
If you can’t see the Search (magnifying glass) icon, right-click on your taskbar. This will open a menu list. Select Search, then go to Show Search box. Check this option. The Search icon should now show up on your taskbar.
Step 2. Type Windows Defender.
Step 3. Search results should show up. Click on the Windows Defender desktop app.
Step 4: On the Windows Defender window, click on Settings located at the top right.
Step 5: From the settings window, click on Update & Security, then go to Windows Defender.
Step 6: Toggle the Real-time protection option Off.
Permanently Disable Windows Defender on Windows 10
The following disables the Defender permanently on your computer. Make sure you have installed a good antivirus program before you do this or your computer will become vulnerable to viruses.
Step 1. Press the Windows + R keys to open the Run box..
Step 2. Type in regedit to open the Registry Editor. In the prompt that appears on your screen, click on Yes to continue to edit your registry.

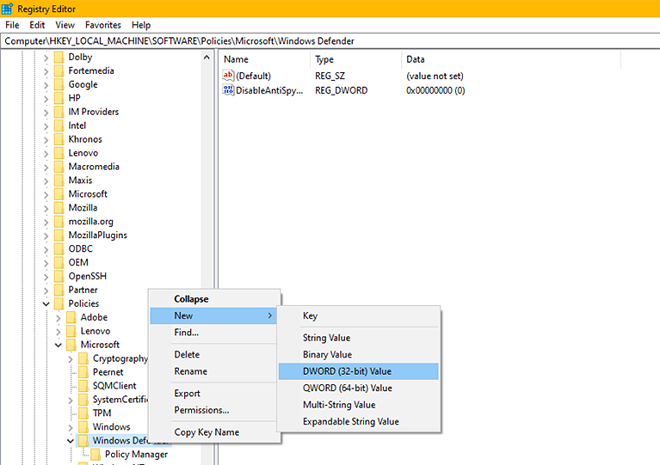
Step 3. Double-click on HKEY_LOCAL_MACHINE to expand the folder. Then, head to the following path:
Software\Policies\Microsoft\Windows Defender
Step 4. Right-click on the Windows Defender folder. Then, select New from the dropdown list and choose DWORD (32-bit) Value.
Step 5. Clicking this option will show a new entry in the Windows Defender window.
Step 6. Type in DisableAntiSpyware as the file name. Then, press Enter.
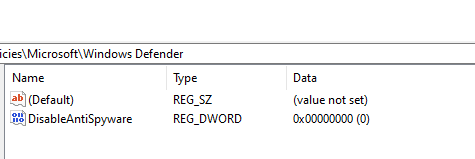
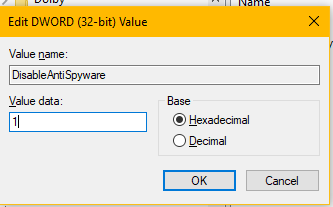
Step 7. Double-click on the DisableAntiSpyware DWORD. A pop-up window should open.
Step 8. Change Value data to 1. Then, click on OK.
Step 9. Restart your computer. After restarting, Windows Defender will now be disabled.
Disable Windows Defender Using Group Policy
There is another way you can disable Windows Defender in Windows 10. That is, by using the group policy. Here’s how you can do it.
Step 1: Open the Run command box. Press WinKey + R keys at the same time.
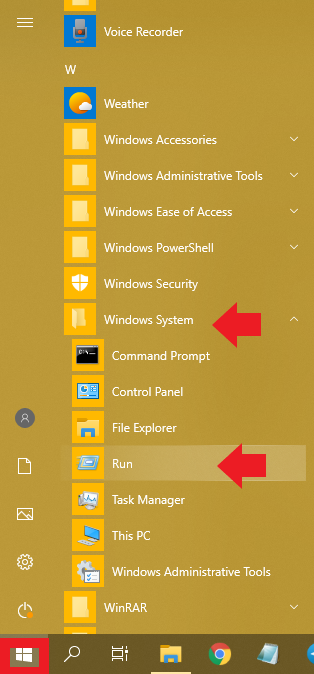
You can also open the Run command box by accessing it through your Start Menu. Click on the Start button, and under Windows System, click on Run.
Step 2. The Run dialogue box will open. Type gpedit.msc and click OK or press Enter.

Step 3. The Local Group Policy Editor window will open. Click on Computer Configuration.
Step 4. In the dropdown list, select Administrative Templates.
Step 5. Click on Windows Components and double-click on Windows Defender Antivirus.
Step 6. Double-click on Turn off Windows Defender Antivirus, select Enable at the left part of the edge, and click OK.
These are the two simple methods on how you can get Windows 10 to disable the Windows Defender. Remember that you should know the risks of disabling the Defender.
It is, after all, made to protect your computer from any possible malware. Make sure that you have a trusted anti-malware software when you are disabling the built-in Windows Defender. In this way, you are guaranteed that your PC or laptops will be free from any malicious software that you might encounter when browsing the web or performing other file exchange tasks.