
- Right-click Start, choose Terminal (Admin), and select Yes in the prompt.
- Type the following command, press Enter, and note the package name of the app to remove:
DISM /Online /Get-ProvisionedAppxPackages | select-string Packagename - Type the following command, replace PACKAGE with the noted package name, and press Enter:
DISM /Online /Remove-ProvisionedAppxPackage /PackageName:PACKAGE - Your chosen system app is now removed from your PC.
Whether you want to free up your storage space or declutter your menus, it’s easy to remove the unwanted system apps (called bloatware) from your Windows 11 computer. You can use a couple of free third-party apps or the built-in Windows methods to delete those apps. Here are your options.
Before you begin, create a system restore point so you can roll back your changes in case something goes wrong. Do that by opening Start, finding Create a restore point, clicking Create, typing any name, and selecting Create.
Using JunkCtrl (a Free Third-Party App)
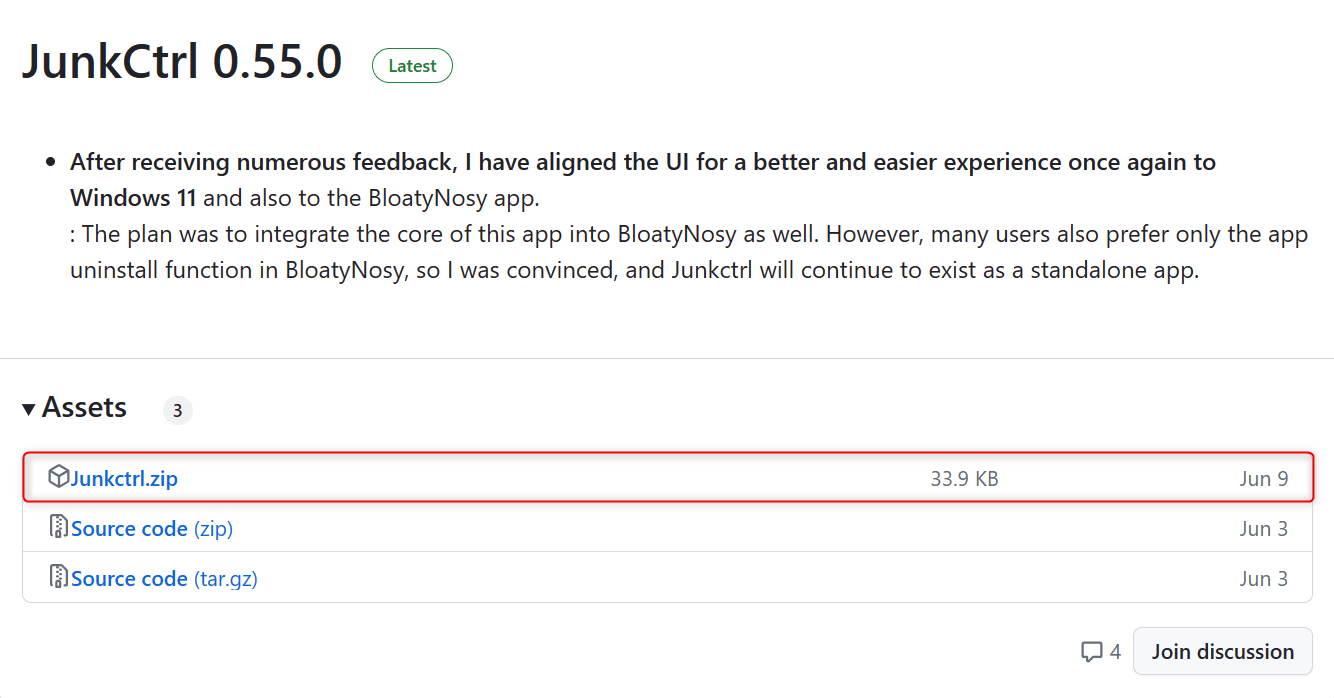
JunkCtrl is a free application you can use to remove many system apps from Windows 11. To use it, first, visit JunkCtrl’s GitHub page. Find the latest version of the app and expand its Assets section. From the files listed, click Junkctrl.zip.
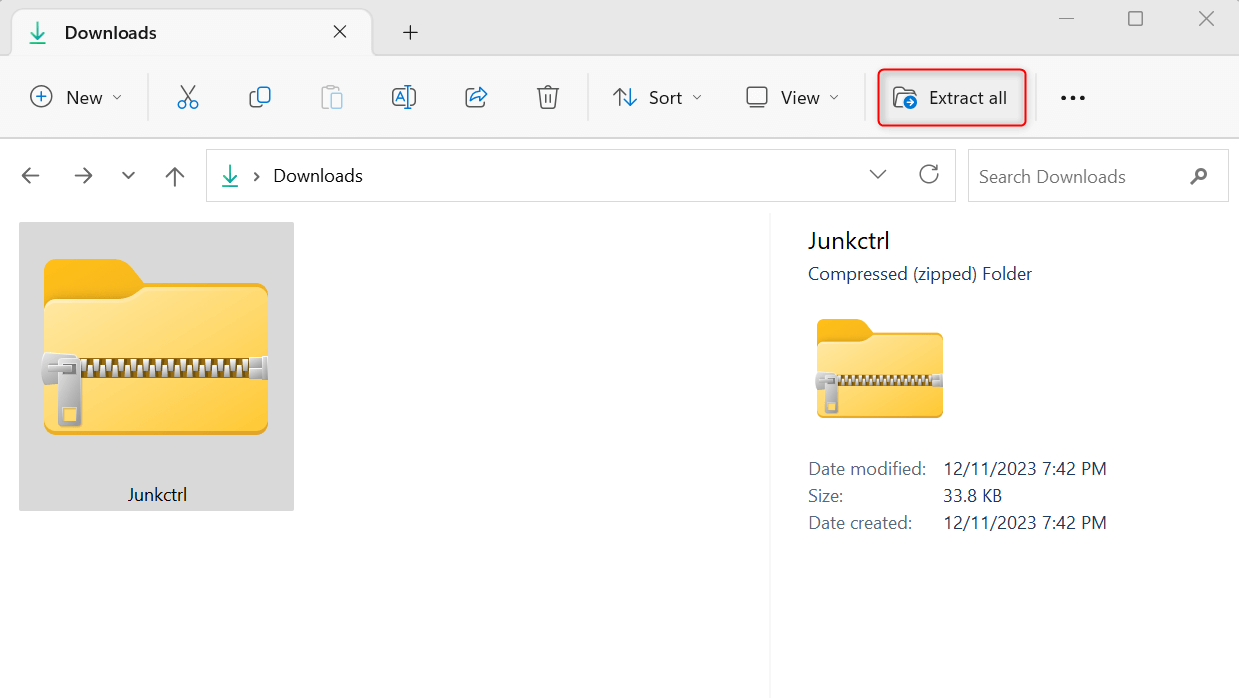
Go to your Downloads folder (or any other directory) and select the ZIP file. From the command bar at the top, click Extract all.
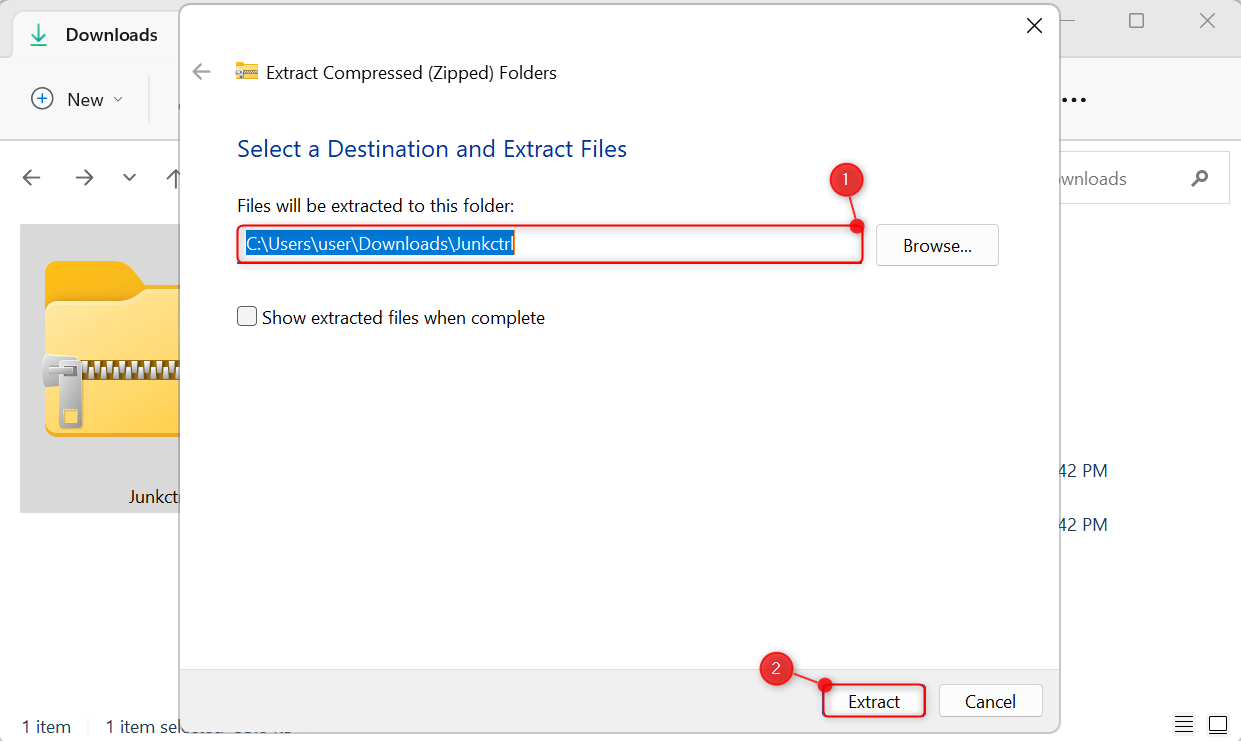
In another dialog, choose your preferred extraction destination folder. Then, click Extract.
Open your destination folder and launch the Junkctrl application file. This won’t need any installation on your PC.

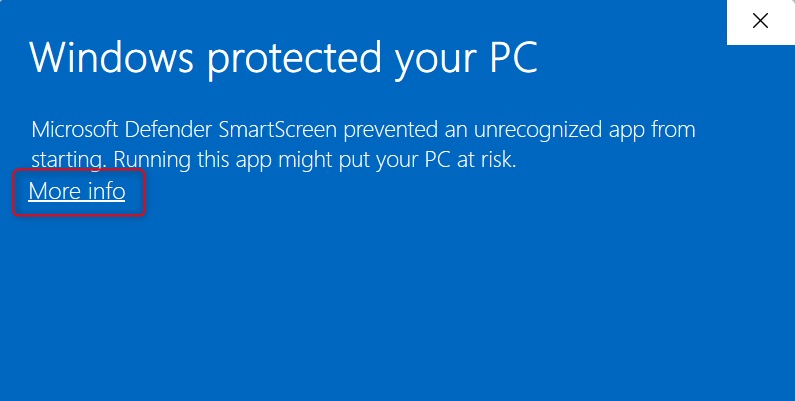
In some cases, Microsoft Defender SmartScreen may block you from running the app. When such a prompt appears, click More info.
 Then, from the bottom right of the dialog, click Run anyway.
 You must also confirm the action in a separate User Account Control dialog by clicking Yes. This will completely launch the app on your machine.
On the right portion of the JunkCtrl interface, find and click Skip and use Copilot.
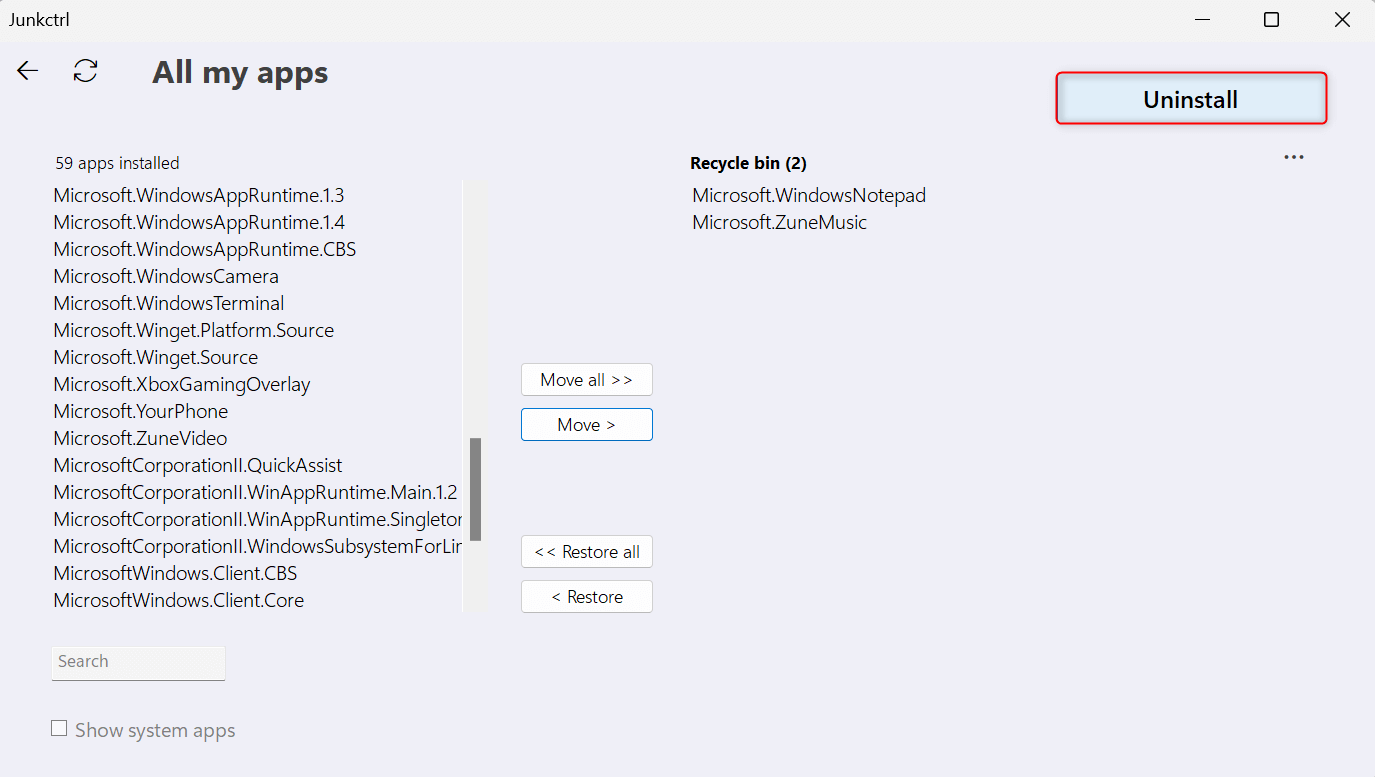
You will be taken to the All my apps section. From the left pane, choose the apps you want to remove. Hold the Ctrl key to select multiple apps at a time. Then, click Move.
 Lastly, click Uninstall.
 When using JunkCtrl, keep these things in mind:
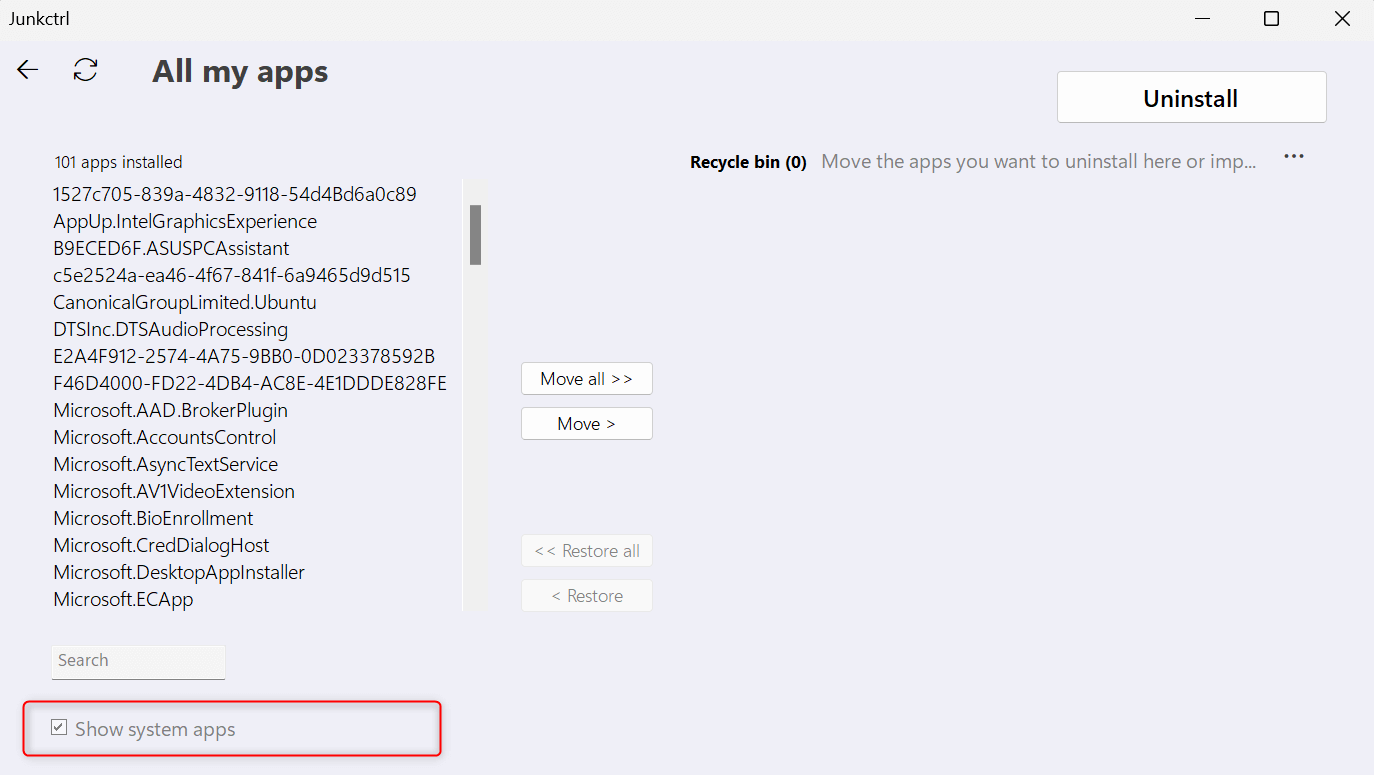
- At the bottom left, you can toggle on Show system apps to view all applications that come with Windows by default. Be careful when choosing system apps to remove to avoid problems with your computer.
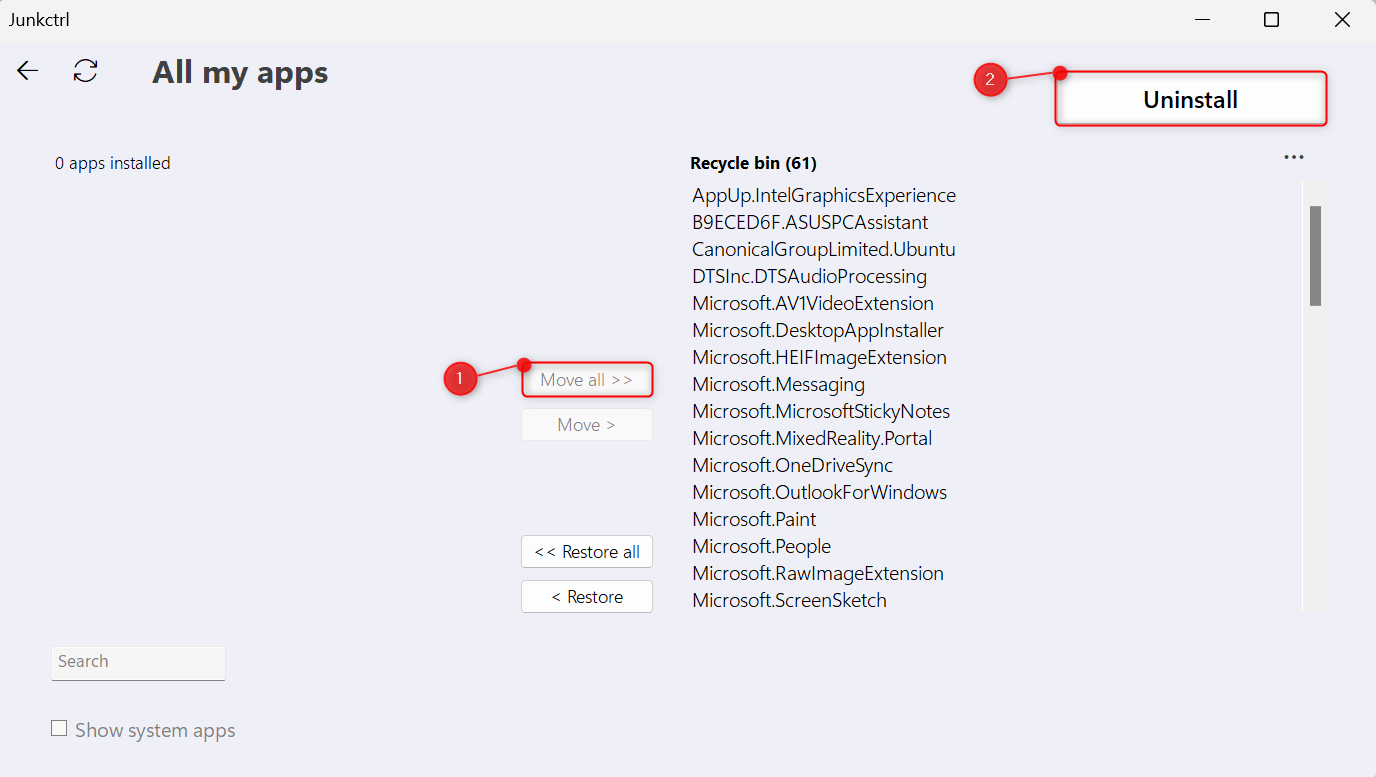
- (Not recommended, but optional) To remove all Windows 11 native apps, choose Move all > Uninstall.
- You may also receive a prompt about the unsuccessful removal of Windows 11 apps. This happens when you try to remove important programs like Microsoft Edge, Xbox, and more.
Manually Remove Unwanted System Apps
If you don’t want to use a third-party tool to remove bloatware, you have two manual methods to do the task. These are using the Settings app and the DISM (Deployment Image Servicing and Management) command in PowerShell.
Uninstalling From Settings
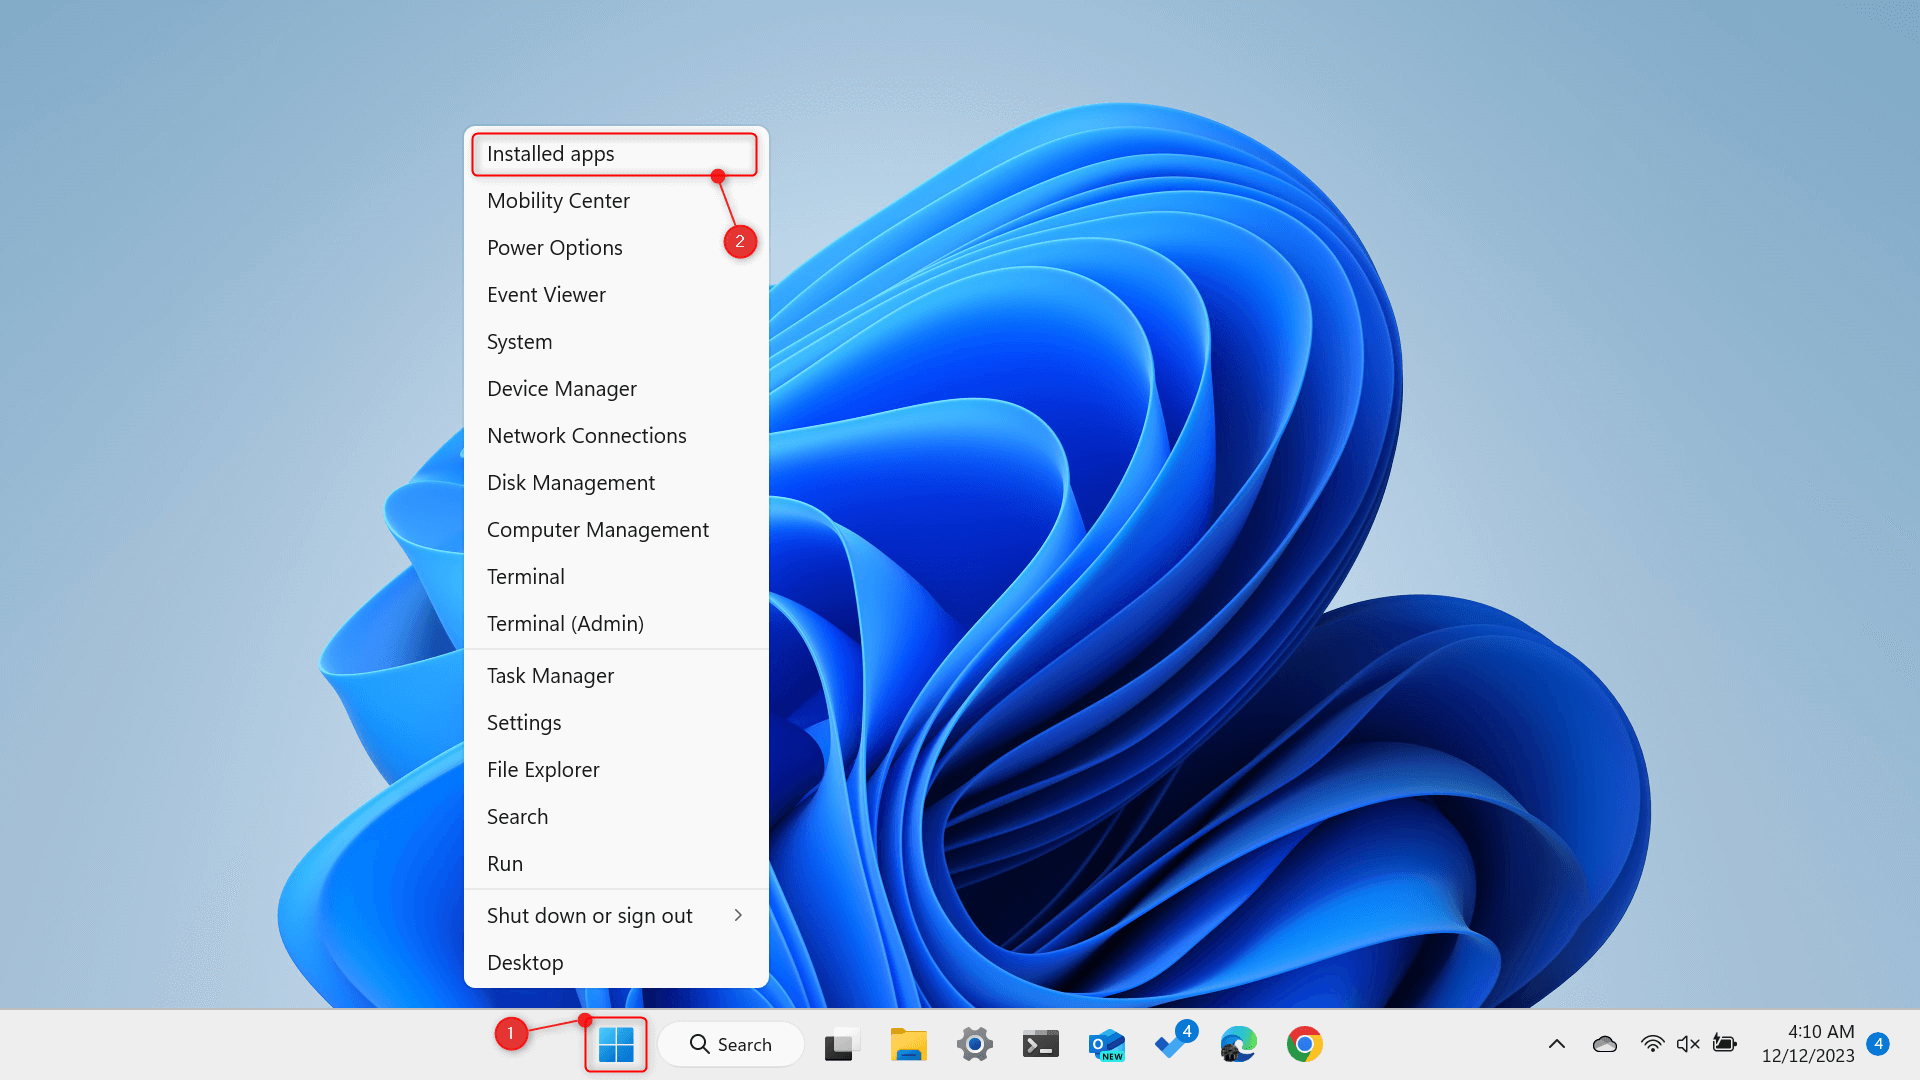
Right-click the Start button and, from the Power User Menu, choose Installed apps. This will display a list of all your applications in Settings.
 Find the unwanted system app you want to remove (e.g., Notepad). Click its corresponding More button (an ellipsis icon) and choose Uninstall.
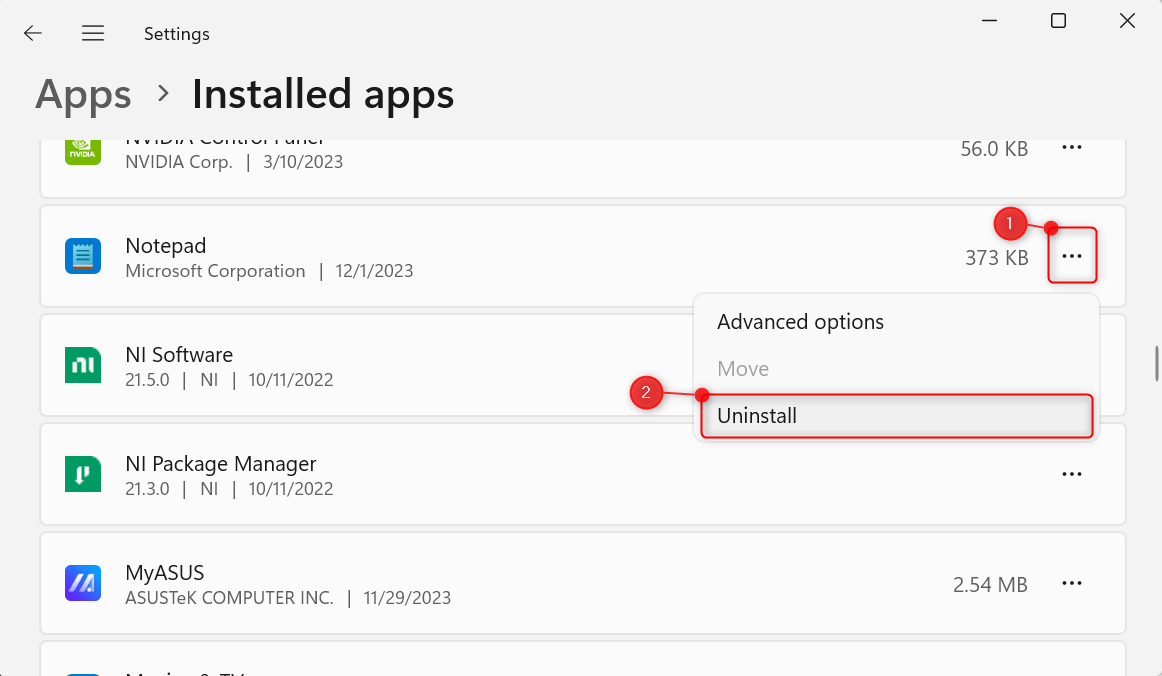 Note that some apps might have the Uninstall option grayed out. They’re important system apps, so it’s best if you keep them.
Using DISM in PowerShell
DISM allows you to manage your machine’s operating system image, including the uninstallation and configuration of system apps. Here’s how you use it to remove system apps.
Right-click Start and choose Terminal (Admin). In the appearing User Account Control dialog, click Yes to proceed.
 This will open an elevated PowerShell tab in the Terminal app. Once there, type the following command and press Enter on your keyboard:
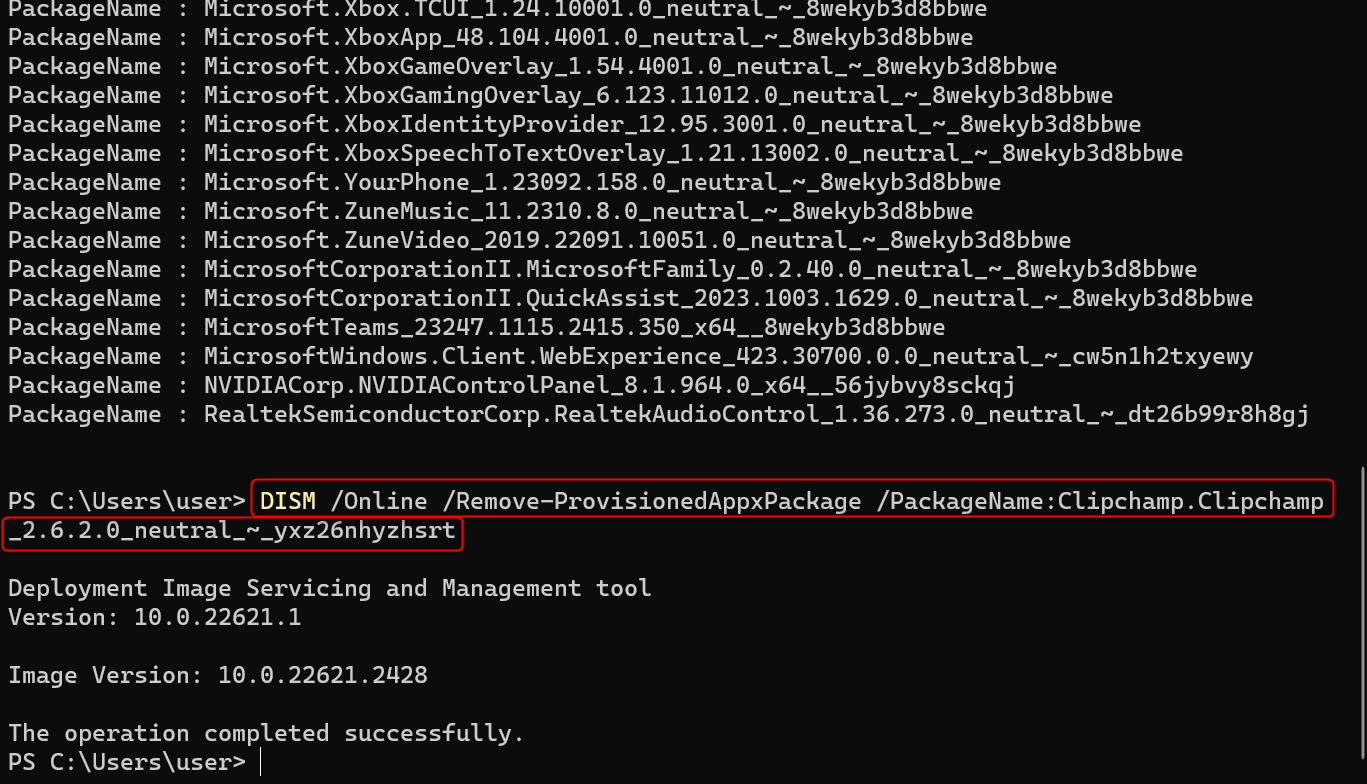
DISM /Online /Get-ProvisionedAppxPackages | select-string Packagename
PowerShell will display a list of the packages that came with Windows 11 upon installation. Find the app you want to remove and highlight its package name. Then, press Ctrl + C to copy it to your clipboard.
 After copying the package name, type the following command:
DISM /Online /Remove-ProvisionedAppxPackage /PackageName:[copied-package-name]
Make sure to replace [copied-package-name] with the one you copied earlier. To finish, press Enter.
Using Windows10Debloater via PowerShell
Aside from JunkCtrl, another popular and free tool to use is Windows10Debloater. While it’s made specifically for Windows 10, the tool still works with Windows 11. What makes it a good option is that you can access it purely from PowerShell.
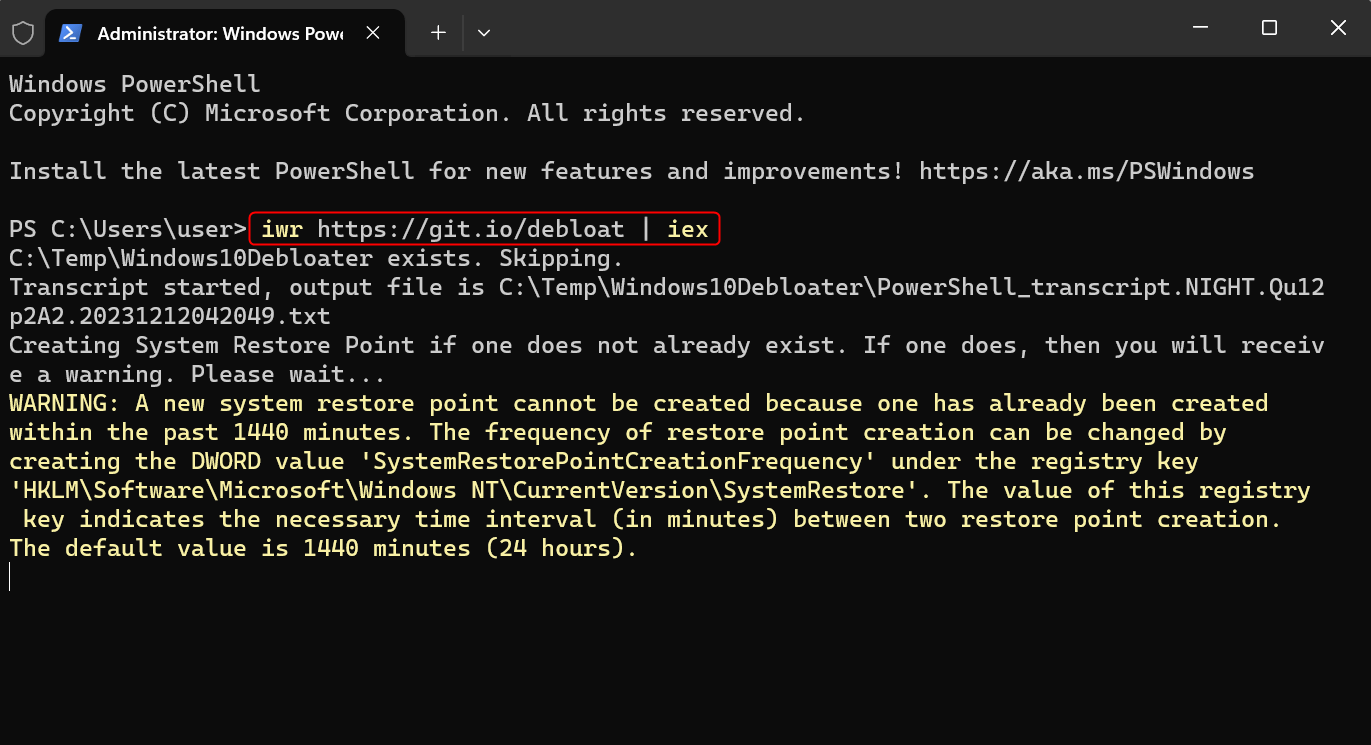
Right-click Start and choose Terminal (Admin) from the Power User Menu. In the User Account Control prompt, grant access permissions by clicking Yes.
Once you’re in PowerShell, run the following command:
iwr https://git.io/debloat | iex
A system restore point will automatically be created for you first. This allows you to revert your adjustments if you change your mind later.
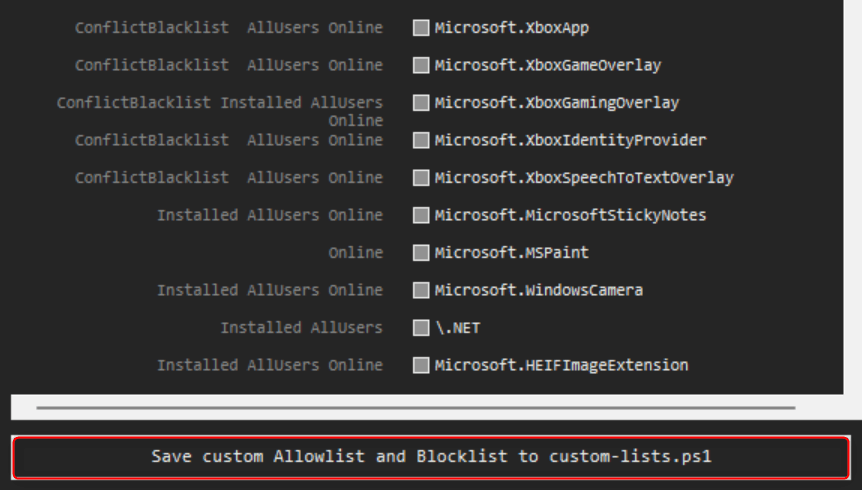
 Wait for Windows10Debloater to appear on your screen. Once it loads, under Debloat Options, choose Customise Blocklist. This opens a new interface where you can select and deselect the apps you want to remove.
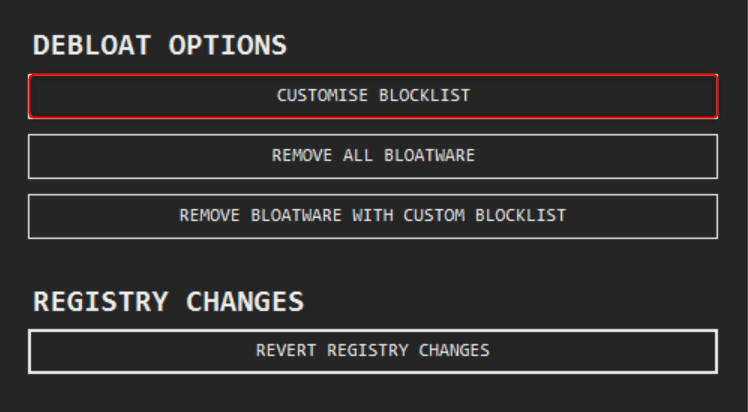 Mark the checkboxes of the apps and click Save custom Allowlist and Blocklist to custom-lists.ps1. If you don’t know which bloatware apps to uninstall, skip the steps to customizing your blocklist.
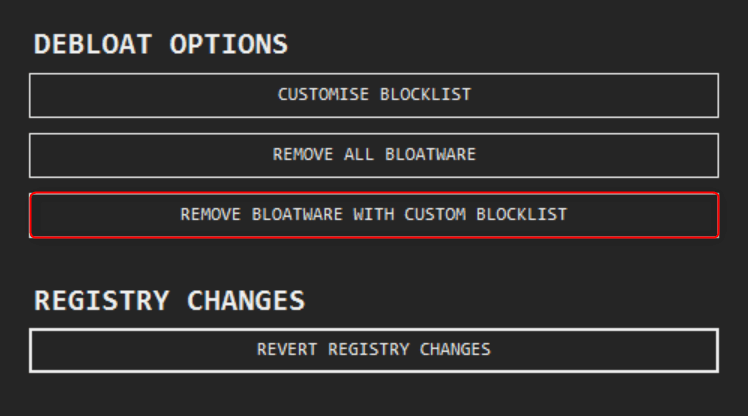
 Go back to the main interface of Windows10Debloater. Click Remove Bloatware with Custom Blocklist.
 All that’s left for you to do is wait for the process to finish and restart your Windows 11 computer.
And that’s how you remove junk system apps from your machine. You might also see some methods online telling you that Windows 11 can be installed directly without the bloatware. While it might work for some users, note that such a trick uses a bug in the operating system. Microsoft will likely have it resolved soon.