If you’re looking to get rid of FaceIt from your Windows 11 computer, use either Settings or Control Panel to remove the app. Both methods remove the app as well as its related files from your machine. Here’s how.
When you uninstall FaceIt, you don’t lose your account data. You can regain access to your data by reinstalling the app and logging in to your account. And, feel free to use the uninstall method below that’s convenient for you.
Delete FaceIt Using Settings on Windows 10 and 11
The Settings app on both Windows 10 and 11 allows you to find and remove your installed apps. Use this method to remove FaceIt from your computer.
Get Rid of FaceIt on Windows 10
If you’re a Windows 10 user, first, open the Settings app on your PC by pressing Windows + I keys at the same time.
In Settings, choose Apps.
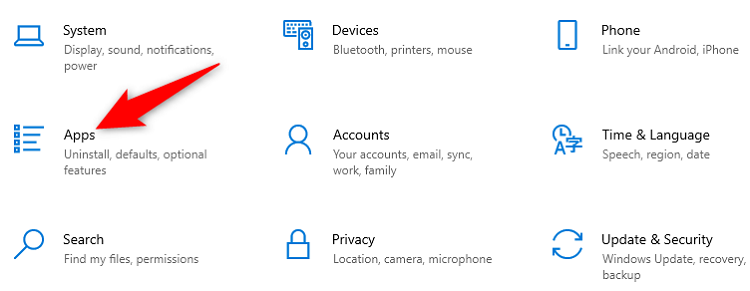
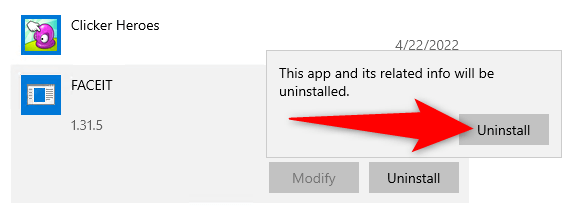
In the app list, find FaceIt and select it. Then click the Uninstall option.

In the prompt, choose Uninstall.
And that’s all. Windows 10 will remove the selected app from your system.
Remove FaceIt on Windows 11
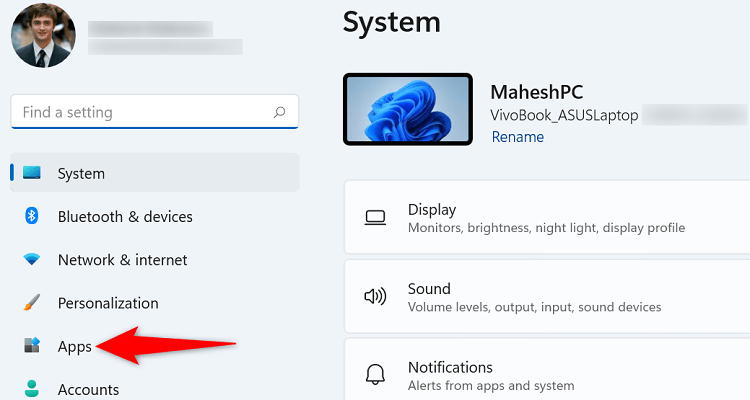
On a Windows 11 PC, first, launch Settings by pressing Windows + I keys at the same time.
In Settings, from the left sidebar, select Apps.
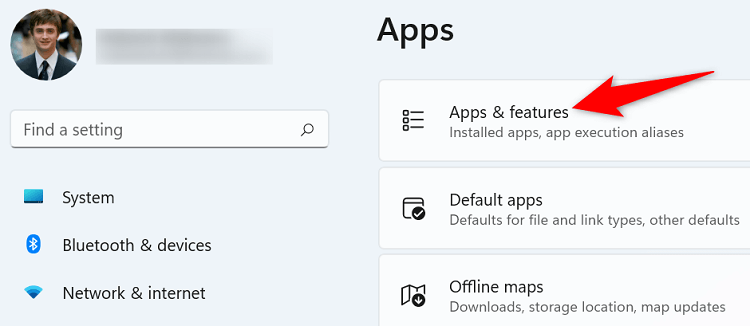
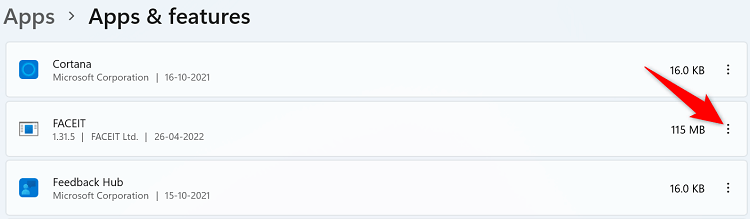
On the right pane, in the Apps menu, choose Apps & features.
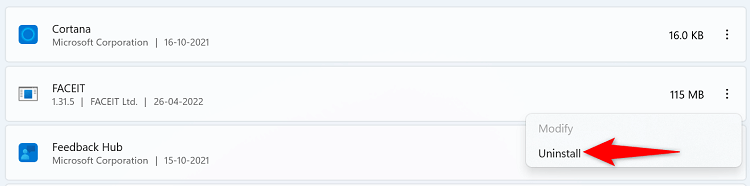
On the Apps & features page that opens, find the FaceIt app. Then, next to the app, click the three dots.
From the menu that opens, select Uninstall.
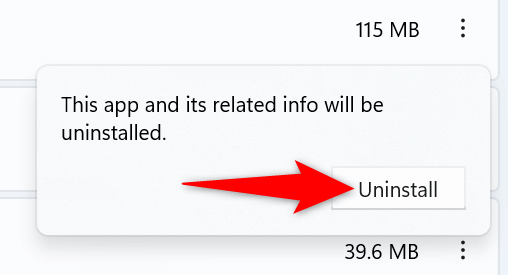
Choose Uninstall in the prompt.
And Windows 11 will remove FaceIt from your computer. Enjoy!
Remove FaceIt Using Control Panel on Windows 10 and 11
The traditional way to remove apps from Windows PCs is by using Control Panel. You can use this method to remove the FaceIt app as well.
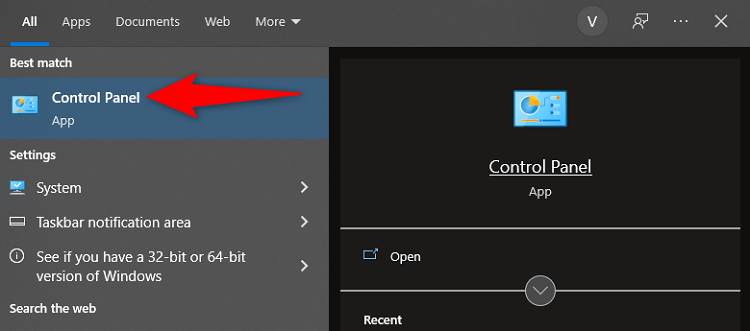
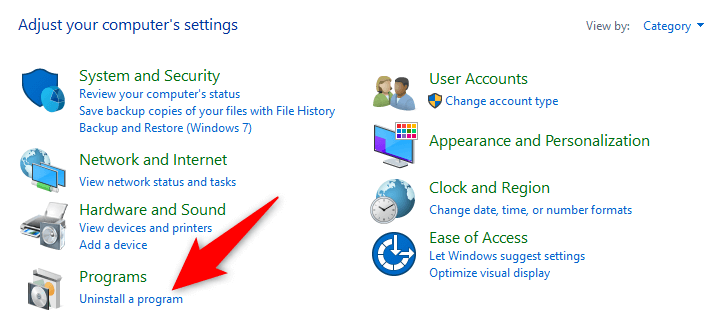
To start, open Control Panel. Do this by launching the Start menu, searching for Control Panel, and selecting it in the search results.
In Control Panel, beneath Programs, click Uninstall a program.
You’ll see a list of all your installed apps. Here, click FaceIt and then click Uninstall at the top.
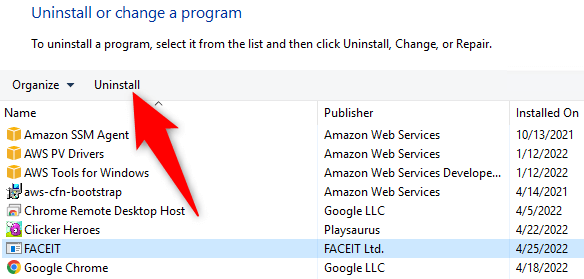
You’ll see FaceIt’s uninstall wizard. Follow the instructions in this wizard to successfully remove the app from your computer.
And you’re all set.