Temporary files are created by various apps and features on your Windows 10 computer. These files provide their respective apps with required configuration for them to work. This is not to say that the apps won’t work without these files. In fact, if your machine has accumulated a large number of these files, you can actually go ahead and remove these temporary files from your Windows 10 computer.
While you may not want to do it everyday, but it’s a good idea to take a quick look at the temp files folder once in a while and clean it up if it’s grown significantly. This shouldn’t affect any of the apps running on your computer and they’ll continue to work as they do.
You have multiple ways to remove temporary files from your Windows 10 computer. Depending on how you like to get things done on your computer, you can use any of the following methods to clean-up the temp folder on your machine.
Remove Temporary Files on Windows 10 Using Disk Cleanup
Disk Cleanup is one of the built-in utilities on your Windows computer that lets you clean-up many unwanted files on your machine. You can use it to get rid of the temporary files as well and the steps to do so are extremely easy. In fact, it’s just the matter of clicking a few options to delete your temp files.
Step 1. Launch the File Explorer utility by clicking on This PC on your desktop.
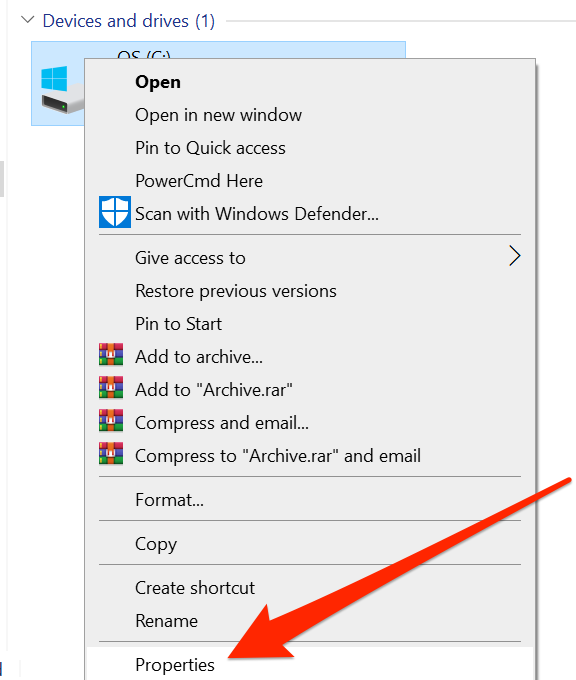
Step 2. Right-click on your main drive where your operating system is installed and select the option that says Properties. It’ll lead you to the app you’re looking for.
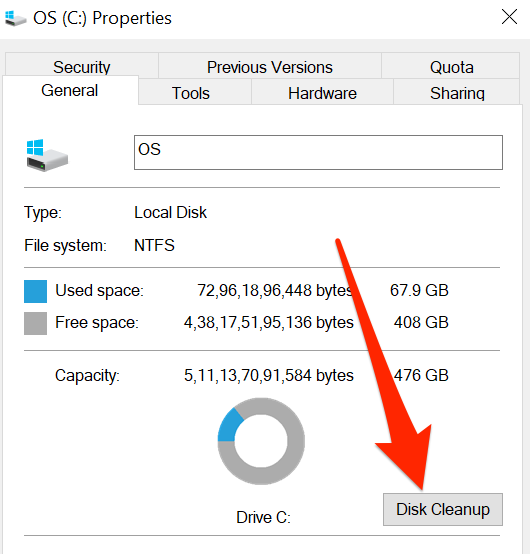
Step 3. A dialog box will open on your screen with several tabs at the top. You want to find the tab that says General and click on it, if you aren’t already there.
Step 4. You’ll find a button that says Disk Cleanup. Click on it to launch the utility on your computer.
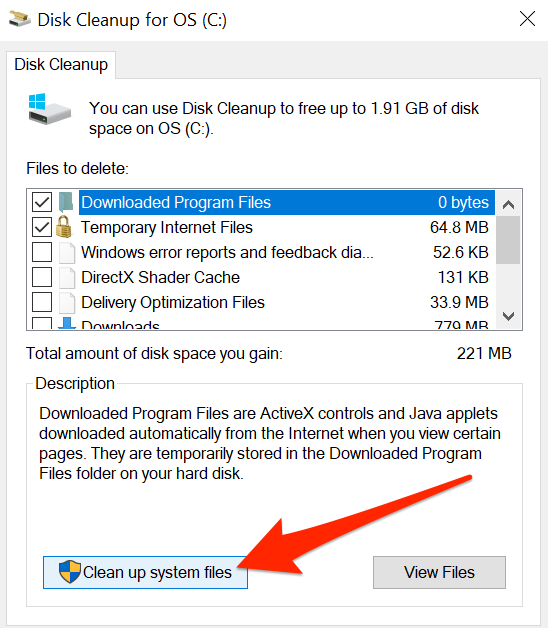
Step 5. When it launches, you’ll see the options to clear various files on your computer. You want to click on the button that says Clean up system files to be taken to the appropriate panel for removing temporary files.
Step 6. You’ll now have several options to remove files from your machine. Tick-mark the boxes for the files that you no longer wish to keep and click on the OK button at the bottom.
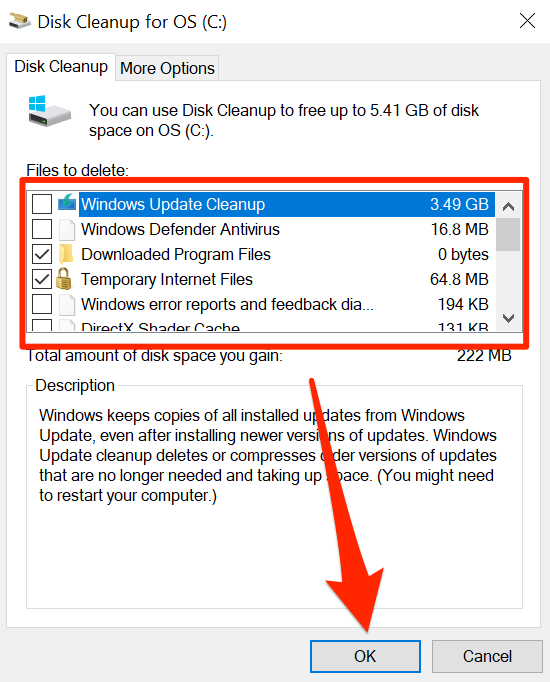
Step 7. A prompt will appear asking if you’d really like to delete the selected files from your computer. Click on Delete Files to continue.
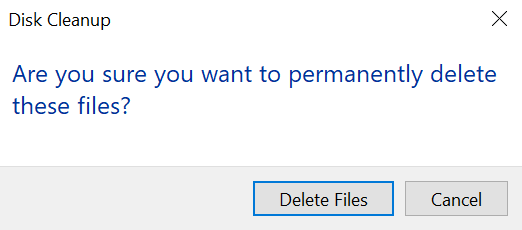
Your chosen temporary files will be removed from your computer.
Delete Windows 10 Temporary Files Using File Explorer
What Disk Cleanup does is it automatically finds temporary files and helps you delete them from your computer. As you can see in its behavior, it doesn’t let you specifically choose the files you want to remove. What if you only want to remove certain files and keep the others?
File Explorer can help you do it. You can use it to get to the temporary files folder and then manually select the files to be removed. This gives you more flexibility in terms of what you want to delete and what you’d like to keep.
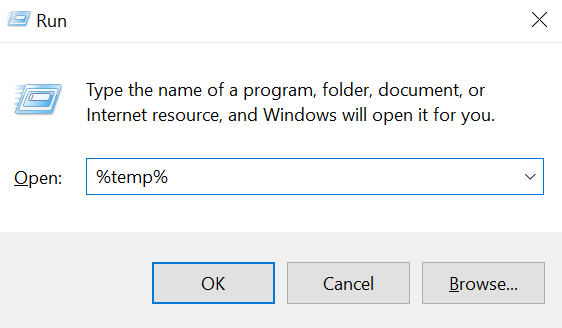
Step 1. Press the Windows + R buttons at the same time to open the Run dialog box.
Step 2. When it opens, type the following into it and press Enter. It’ll open the location where your temporary files are saved.
%temp%
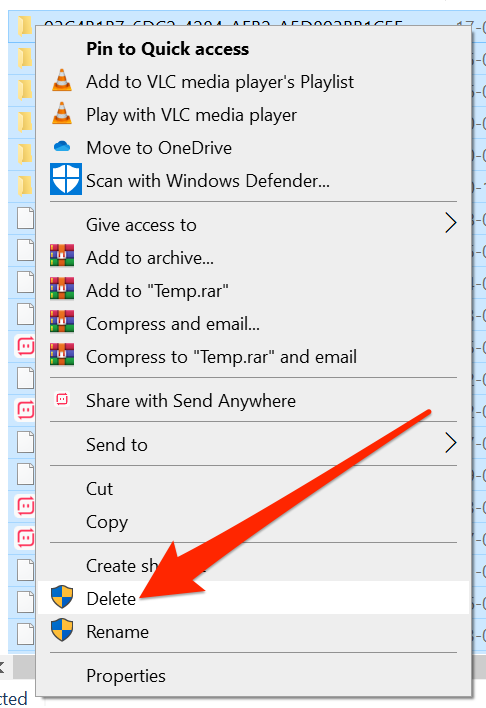
Step 3. The files that you see on your screen are all temporary files created by various apps and features. To delete these files, select the ones you want to remove, right-click on any one of them, and choose Delete. It’ll move the file to the Recycle Bin.
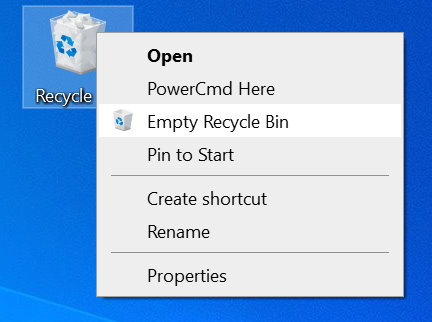
Step 4. Once you’ve removed your selected files from the folder, close the folder. Then, right-click on the Recycle Bin icon on your desktop and choose Empty Recycle Bin. It is to ensure that your files are permanently deleted from your computer.
You are all set. The temporary files have been successfully removed from your Windows 10 computer.
Use the Settings App to Remove Temporary Files on Windows 10
When it comes performing tasks like cleaning up temp files, you can use the Windows 10’s Settings app as well. It also features the capabilities to find these files and help you remove them from your machine.
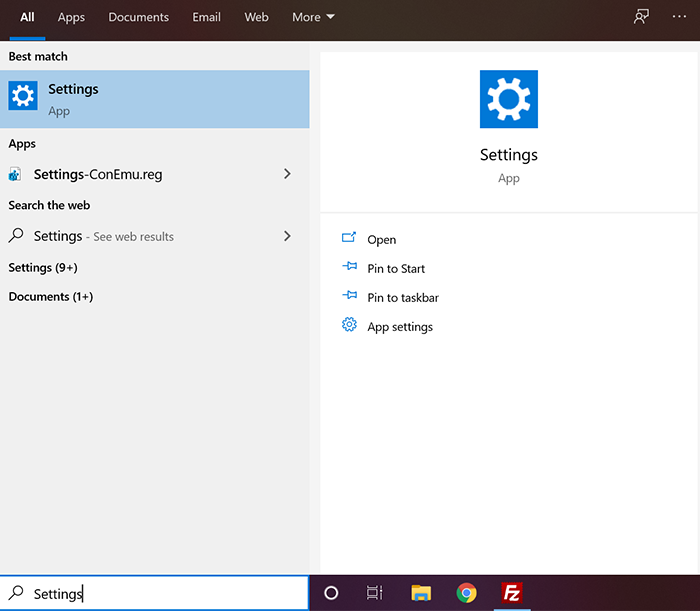
Step 1. Search for Settings using the Cortana search box and click on it when you see it in the search results.
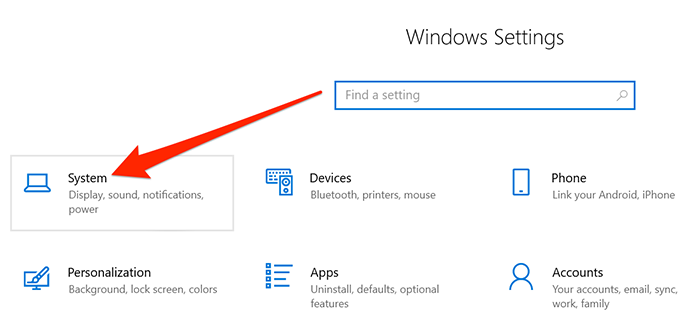
Step 2. Click on the System option on the following screen to manage your system settings.
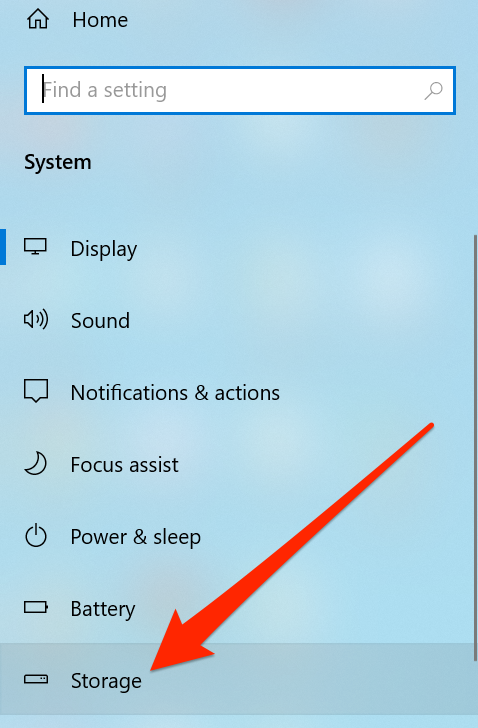
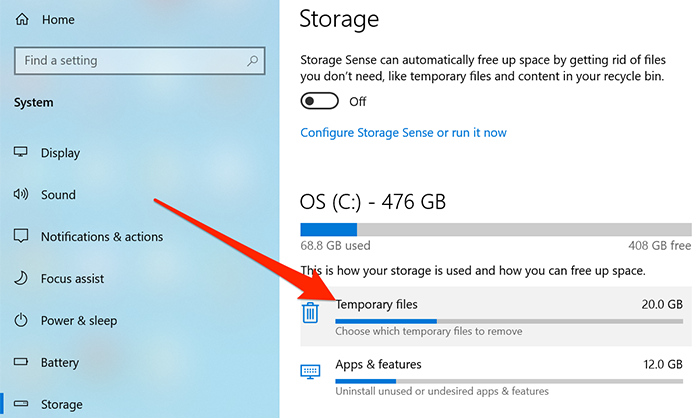
Step 3. Find the option that says Storage in the left sidebar and click on it.
Step 4. On the right-hand side pane, you’ll find various file types and the amount of memory they occupy on your machine. Click on Temporary files option as that’s what you want to remove from your computer.
Step 5. The following screen shows the types of temporary files available on your computer. Select the ones you want to remove and click on Remove files at the top.
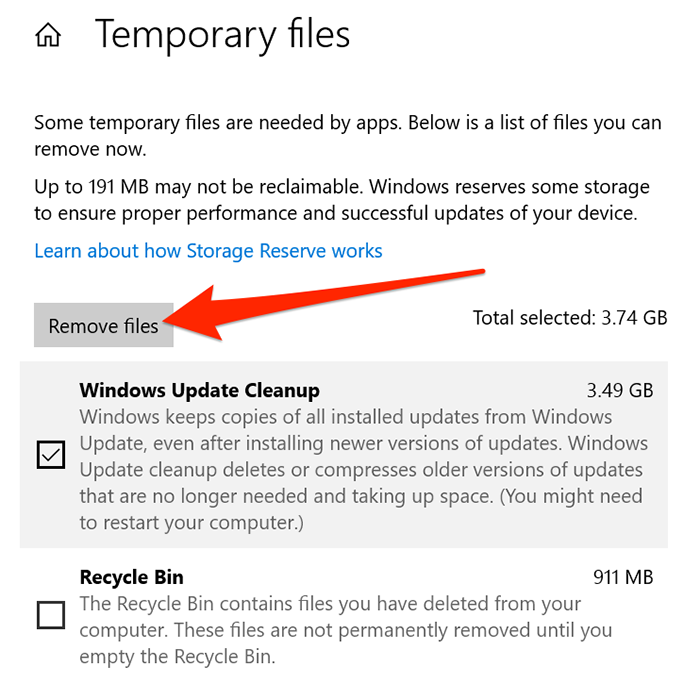
It’ll get the selected file types removed from your machine.
If you ever run out of space on your computer or if you just don’t like keeping junk files anywhere on your machine, there are ways to remove temporary files from your Windows 10 based computer. You can go with any of the aforementioned methods to get rid of these files from your computer.