
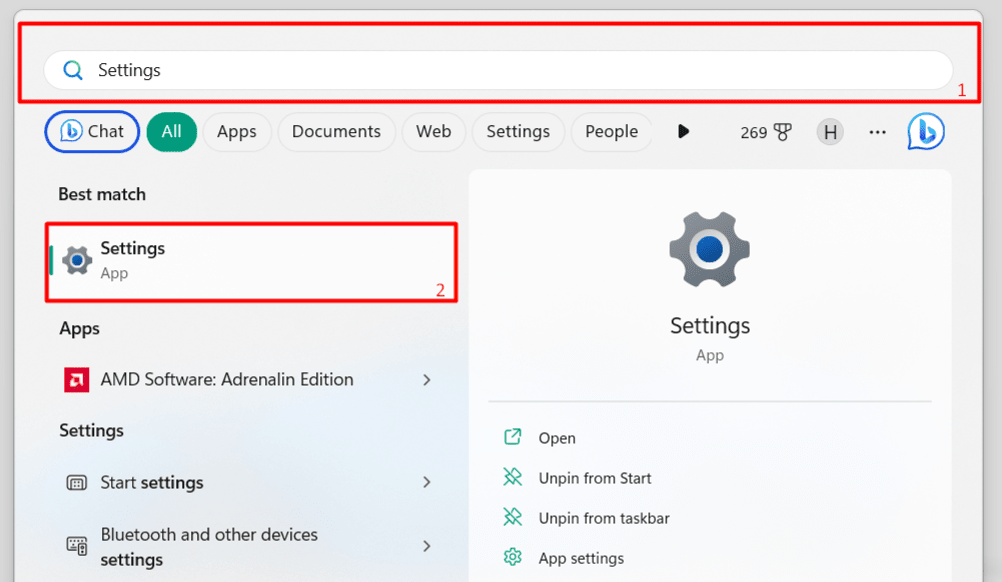
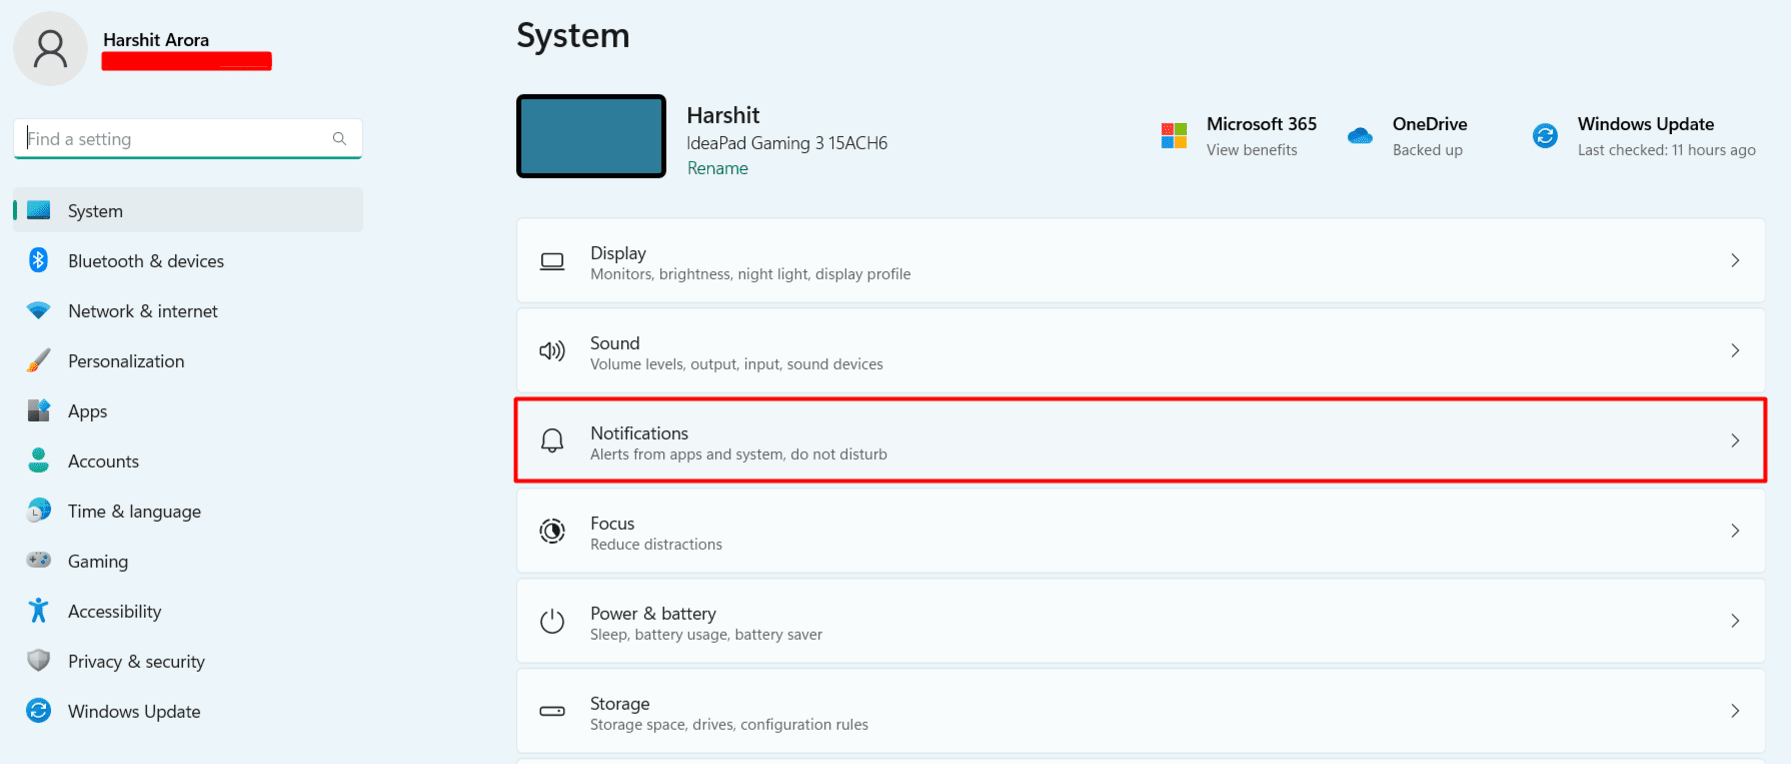
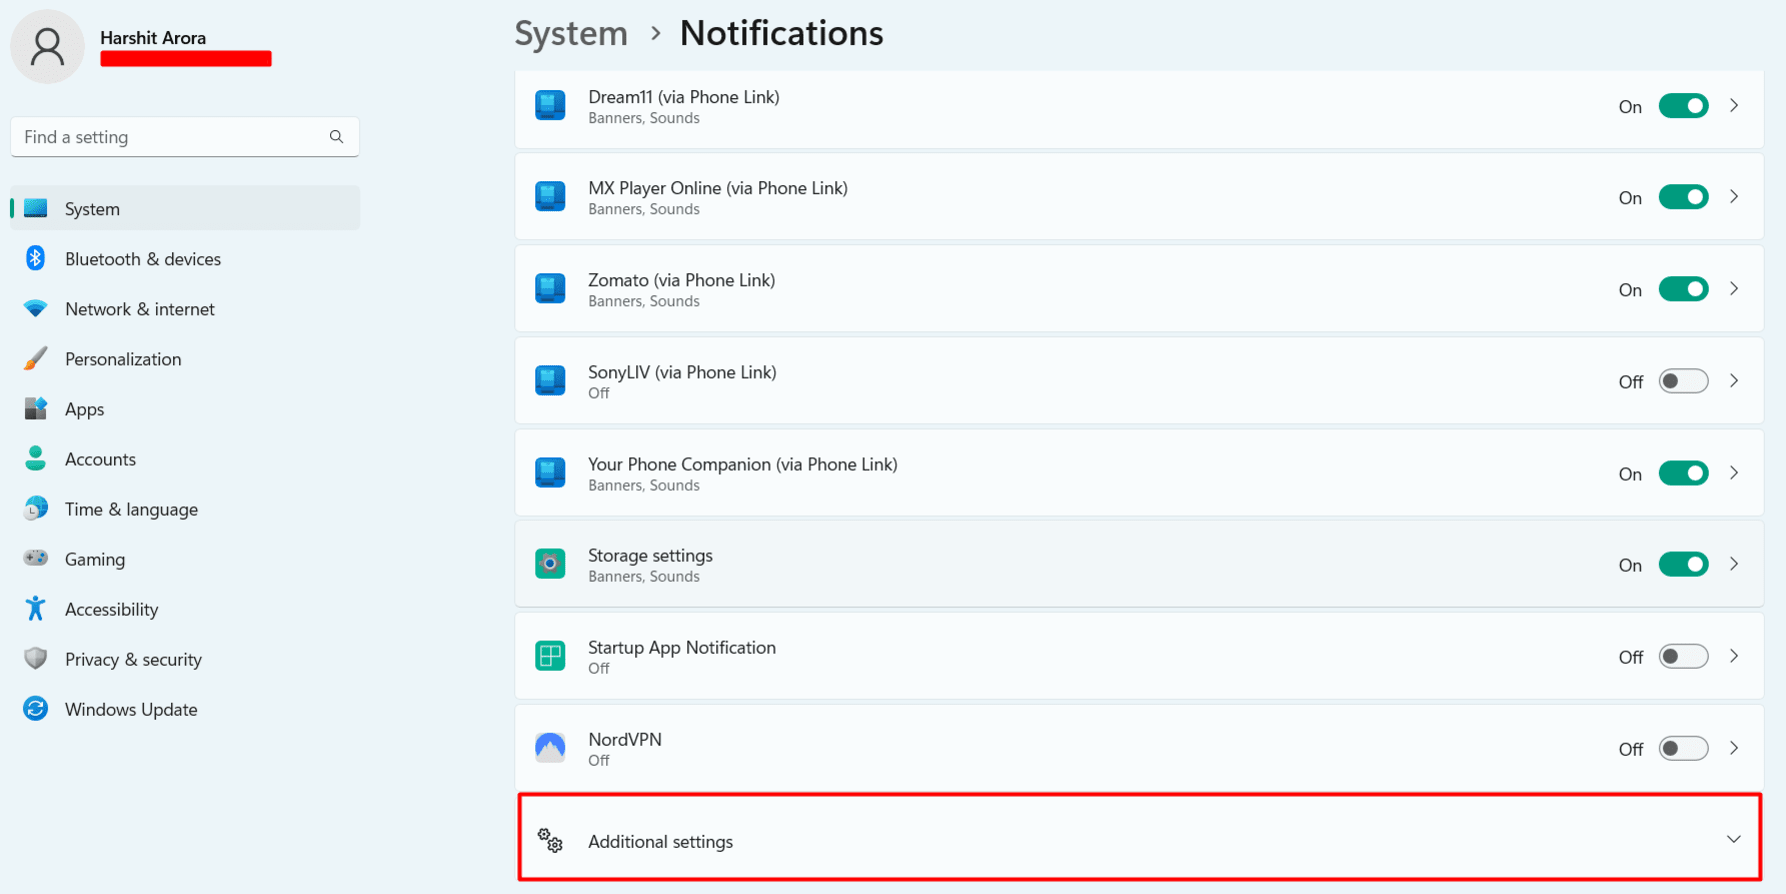
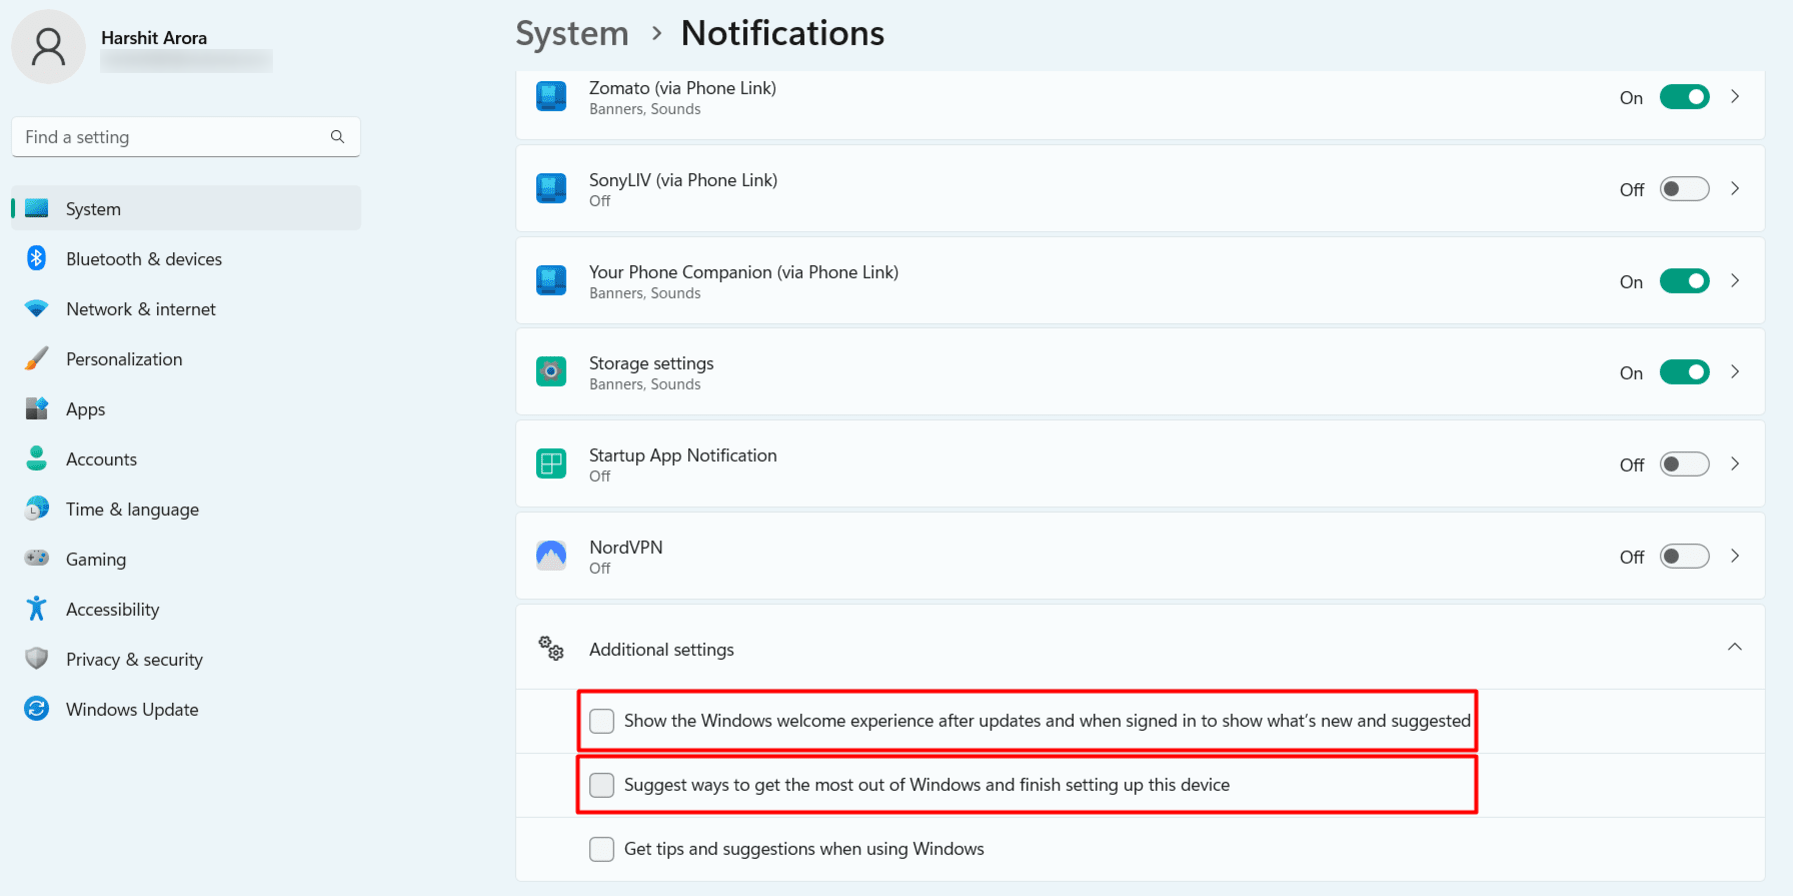
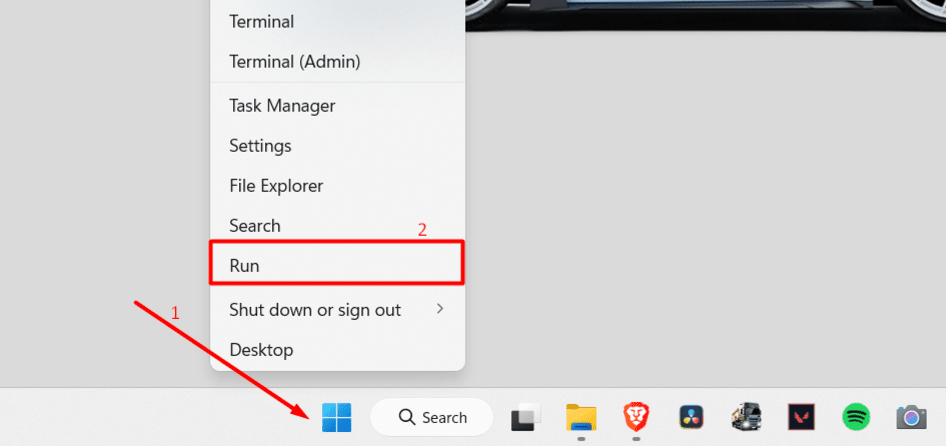
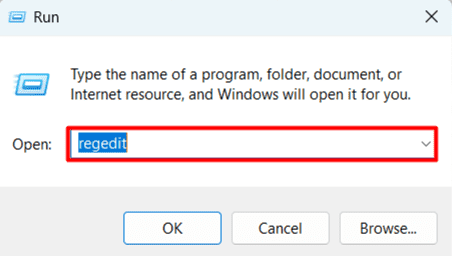
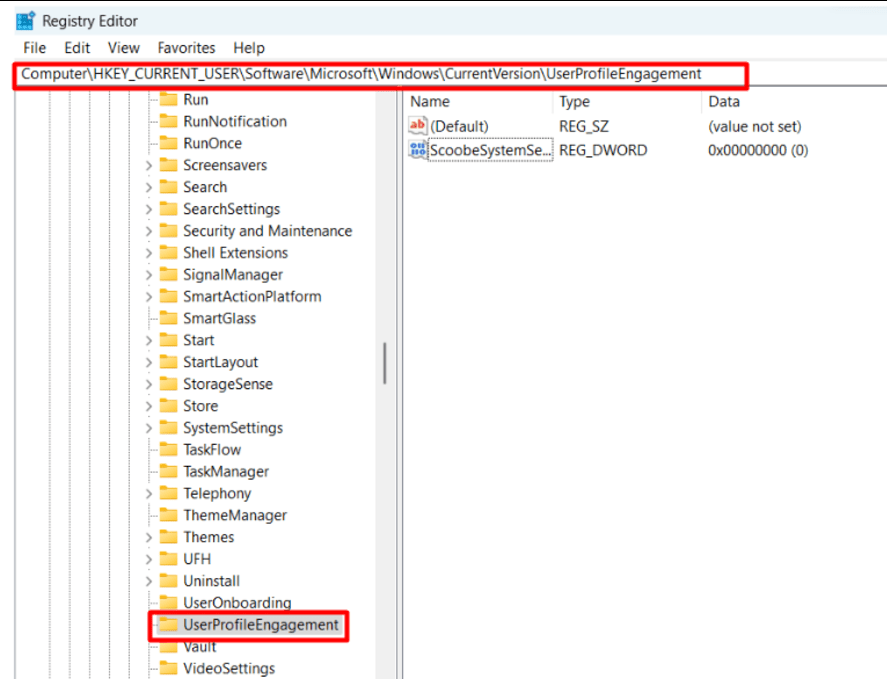
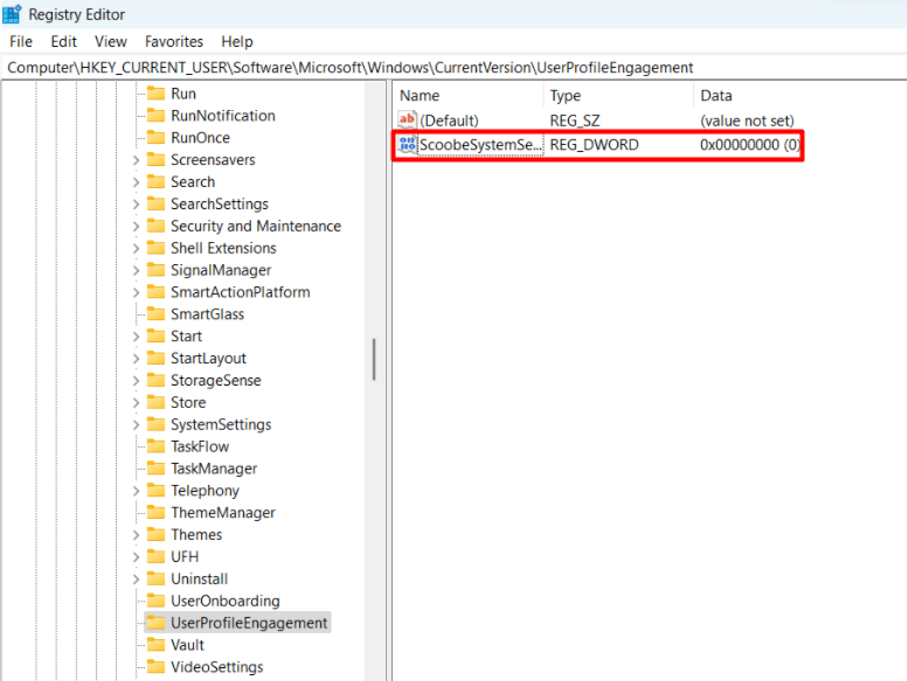
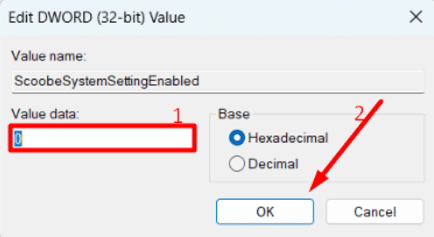
Do you keep encountering the “Let’s Finish Setting Up Your Device” wizard when signing in to your Windows 11 PC? If so, we can understand your frustration. Luckily, you don’t have to see that screen ever again—if you don’t want to—by following a few easy steps to turn off that wizard on your PC. Here’s how you can do that on your computer. One way to turn off Windows 11’s “Let’s Finish Setting Up Your Device” wizard is by using the Settings app. This graphical method lets you easily and quickly disable the wizard so it doesn’t pop-up the next time you log in to your PC. We highly recommend using this method as opposed to using the registry method below. To start, open your PC’s Start menu by clicking the Start menu icon at the bottom of your screen. Type Settings in the search box and choose Settings under the Best match section in the results. In the left sidebar, select System. On the right pane, choose Notifications Next, scroll down to the bottom of the window and click Additional settings to expand the section. Untick the following boxes to turn off “Let’s Finish Setting Up Your Device” on your Windows 11 PC: Before using this method, please know that making the wrong changes to the registry can make your Windows 11 PC unusable. So, only use this method if the first one above doesn’t work. To start, right-click your Start menu icon and select Run. Alternatively, press Windows + R. Enter regedit in the Run box and press Enter on your keyboard to open Registry Editor. On the left side of the registry, go to the below path or use the location bar at the top to get there: Once there, look for ScoobeSystemSettingEnabled on the right side and double-click it. Lastly, enter 0 in the Value data text field and click the OK button to save the changes. Close Registry Editor, and your annoying setup wizard is now disabled on your PC. In the future, if you want, you can re-enable the “Let’s Finish Setting Up Your Device” window on your Windows 11 computer. To do that, revert all the changes you previously made. For example, if you disabled the wizard using the Settings app, re-enable both Show the Windows welcome experience after updates and when signed in to show what’s new and suggested and Suggest ways to get the most out of Windows and finish setting up the device options. If you turned off the wizard using the Registry Editor program, set the ScoobeSystemSettingEnabled key back to its default value, which is 1. Windows 11 displays the “Let’s Finish Setting Up Your Device” window to inform you about your operating system’s powerful capabilities that you could be missing out on. By constantly prompting you with the wizard, Windows wants to ensure you have properly set up your PC. Getting the “Let’s Finish Setting Up Your Device” window every time signing in to Windows 11 can be very frustrating. Luckily, using the two methods shared in this guide, you can bid goodbye to that annoying wizard on your Windows PC. Enjoy!
Using Windows 11’s Settings App
Using Windows Registry Editor
HKEY_CURRENT_USER\SOFTWARE\Microsoft\Windows\CurrentVersion\UserProfileEngagement
Can You Re-Enable “Let’s Finish Setting Up Your Device” on Windows 11?
Why Does Windows 11 Display a “Let’s Finish Setting Up Your Device” Window?
Conclusion