
- To check your BIOS version graphically, open the Start menu, find System Information, choose System Summary in the left sidebar, and look for BIOS Version/Date on the right.
- To use command line, press Windows + R, type cmd, press Enter, type wmic bios get smbiosbiosversion, and press Enter.
Regardless of why you need it, finding your BIOS (Basic Input Output System) version on Windows 11 and Windows 10 is extremely easy. You either use a graphical tool to see the version number or run a command from Command Prompt. We’ll show you various ways to get to your current BIOS version number.
Using System Information (Graphical Method)
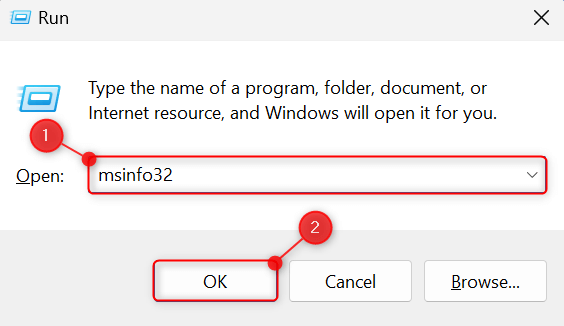
On your keyboard, press the Windows + R keys. This will open the Run utility on your PC. Type msinfo32 in the text field and click OK.
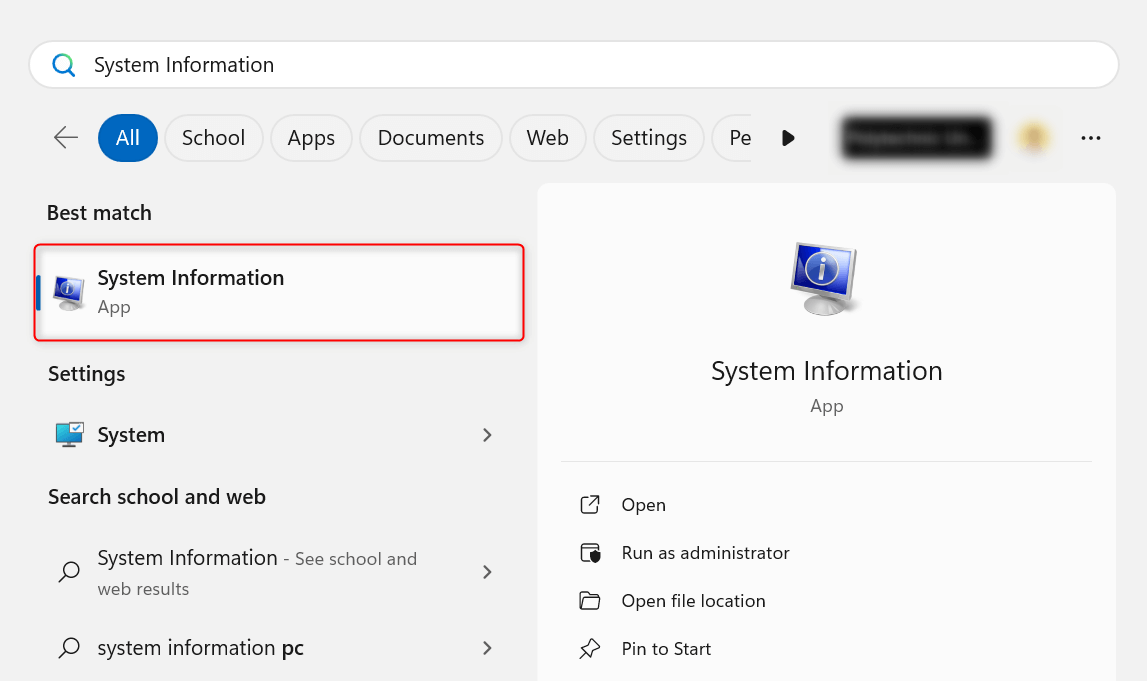
Alternatively, you can simply open the Start menu and search for System Information.
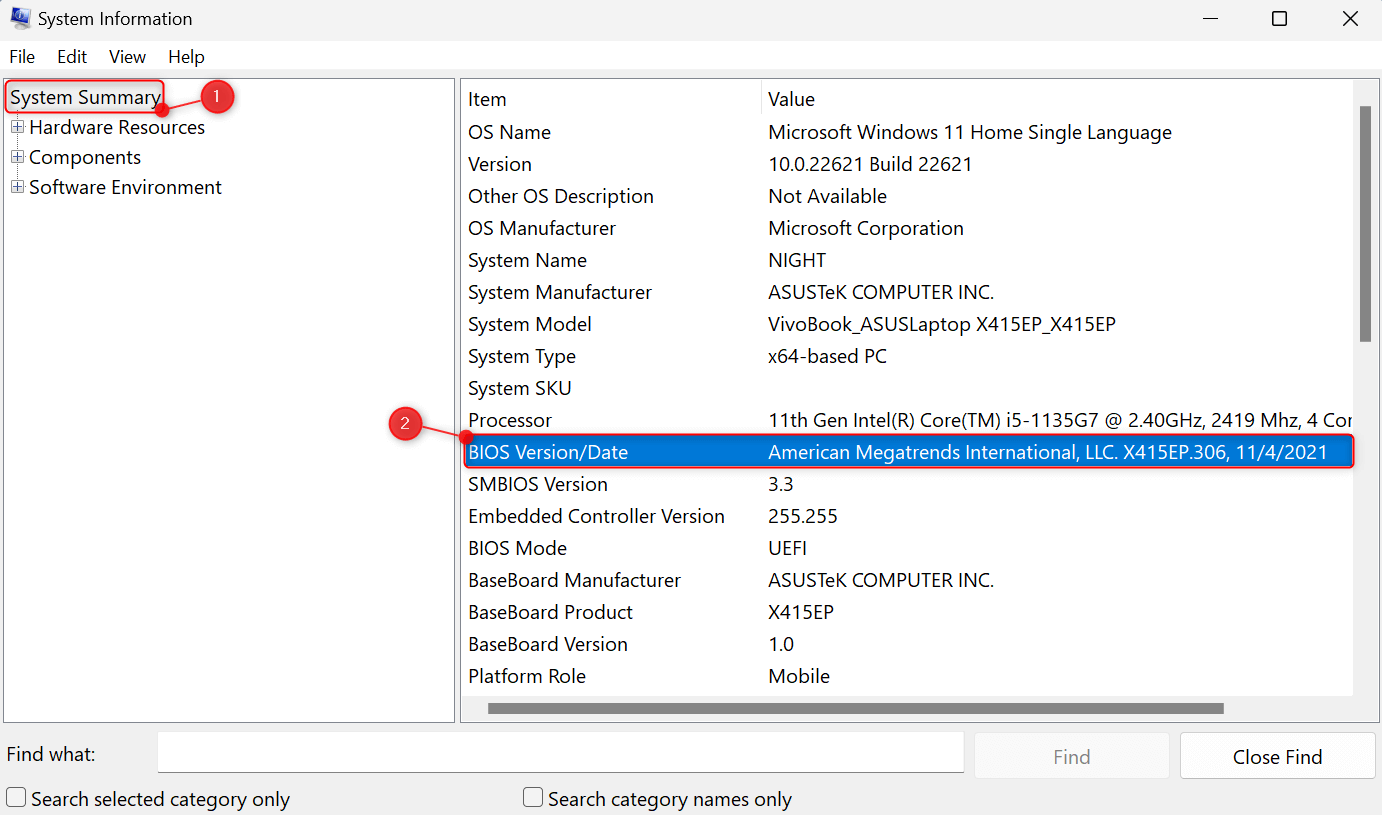
The System Information window will launch on your computer. On the left pane, choose System Summary. From the right pane, simply find BIOS Version/Date.
If you’re having a hard time locating that item, at the bottom of the window, type BIOS into the Find what field. Then, click Find.
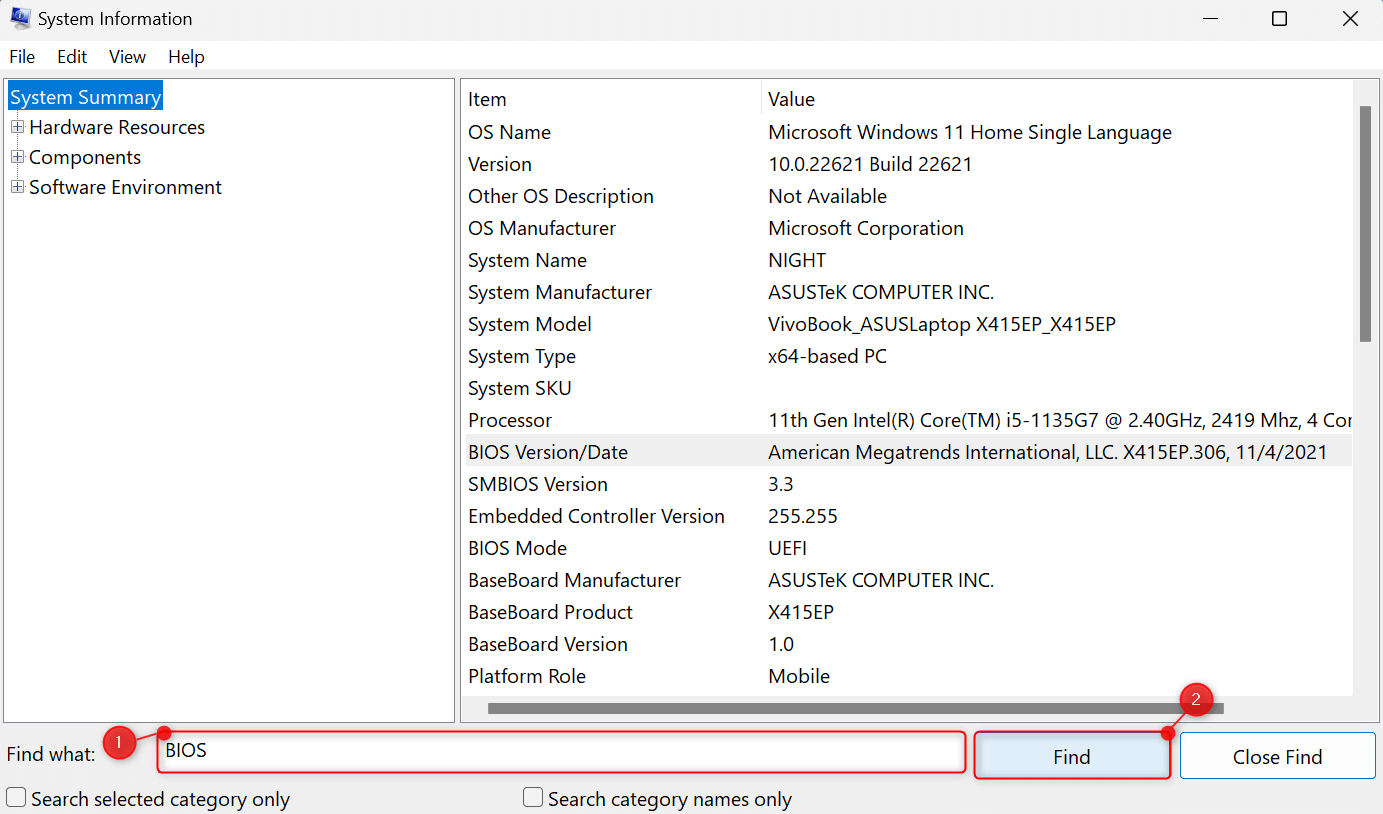
This will automatically search within the System Information app and highlight every detail related to your PC’s BIOS.
Using DirectX Diagnostic Tool (Graphical Method)
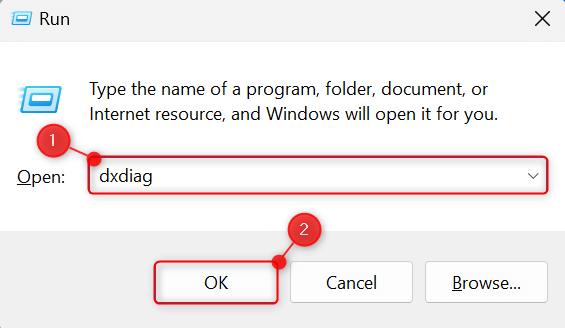
Press Windows + R on your keyboard. In the Run utility, type dxdiag and click OK. The DirectX Diagnostic Tool will appear on your desktop.
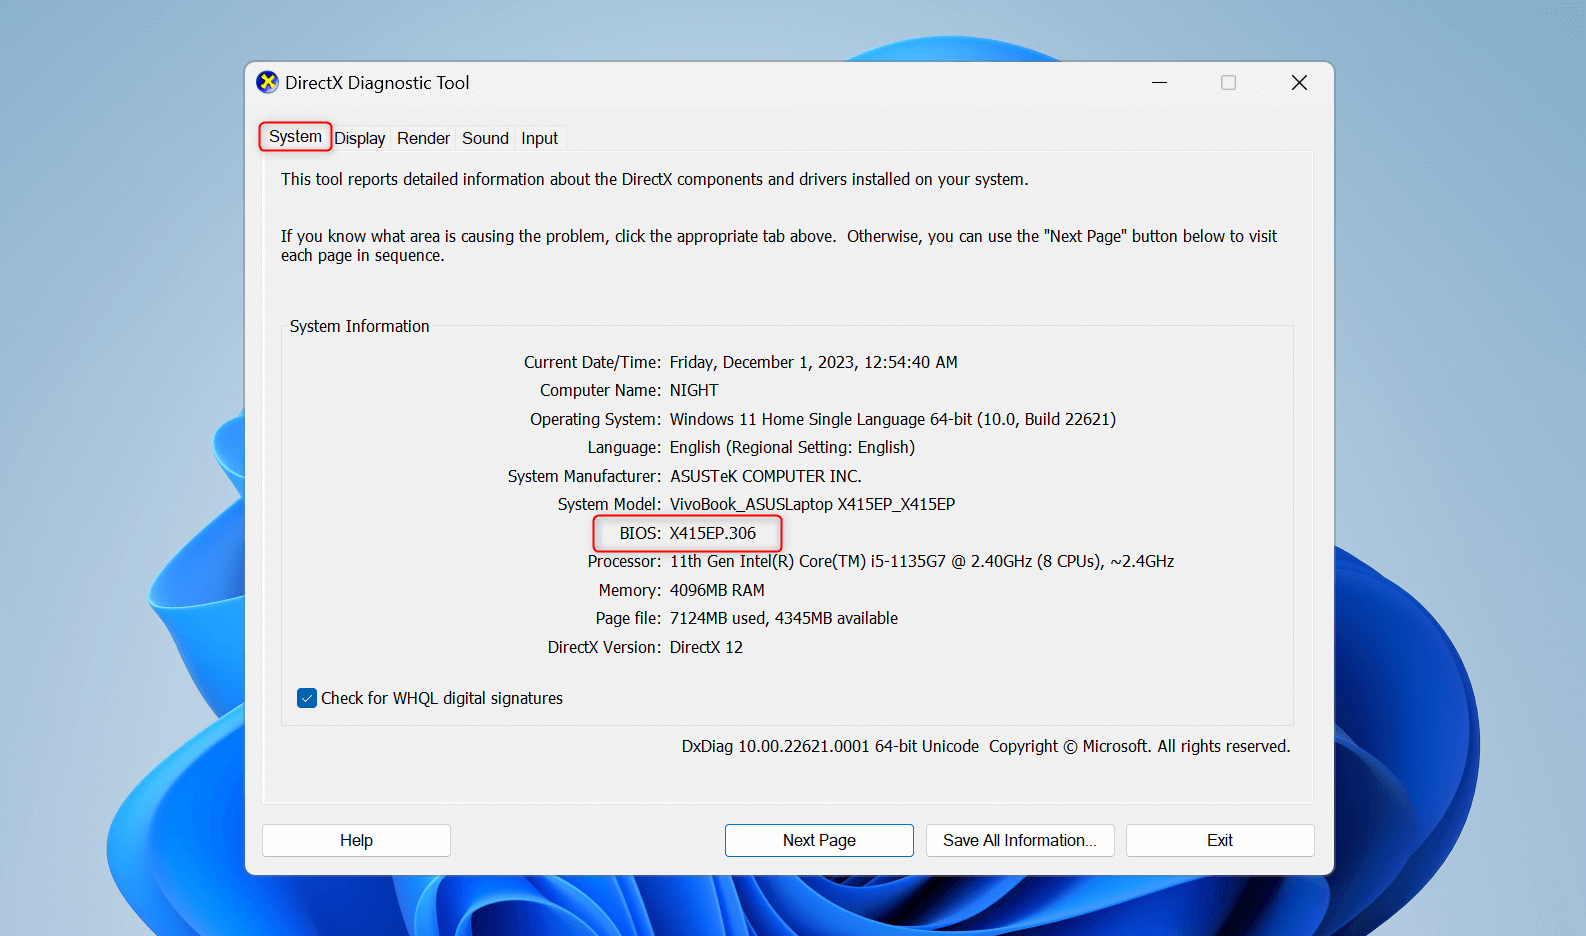
In the System tab, find the System Information section. The BIOS parameter displayed in the list will show you the version installed on your computer.
From Command Prompt (Command-Line Method)
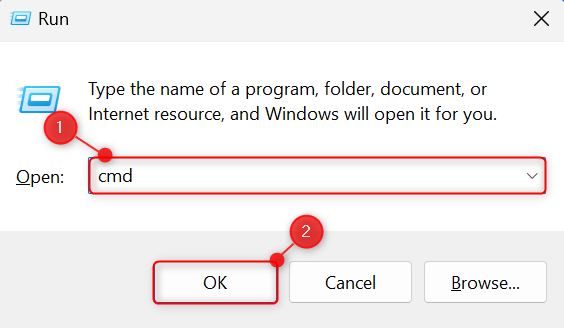
Press Windows + R on your keyboard to open the Run utility. Type cmd and press the Enter key.
On a Windows 11 PC, this will launch the Terminal app with a tab opened for Command Prompt by default. If you’re on Windows 10 and haven’t installed Terminal, it will open the old-style Command Prompt window. The commands will be the same, though.
In the command line, paste the following command and press Enter:
wmic bios get smbiosbiosversion
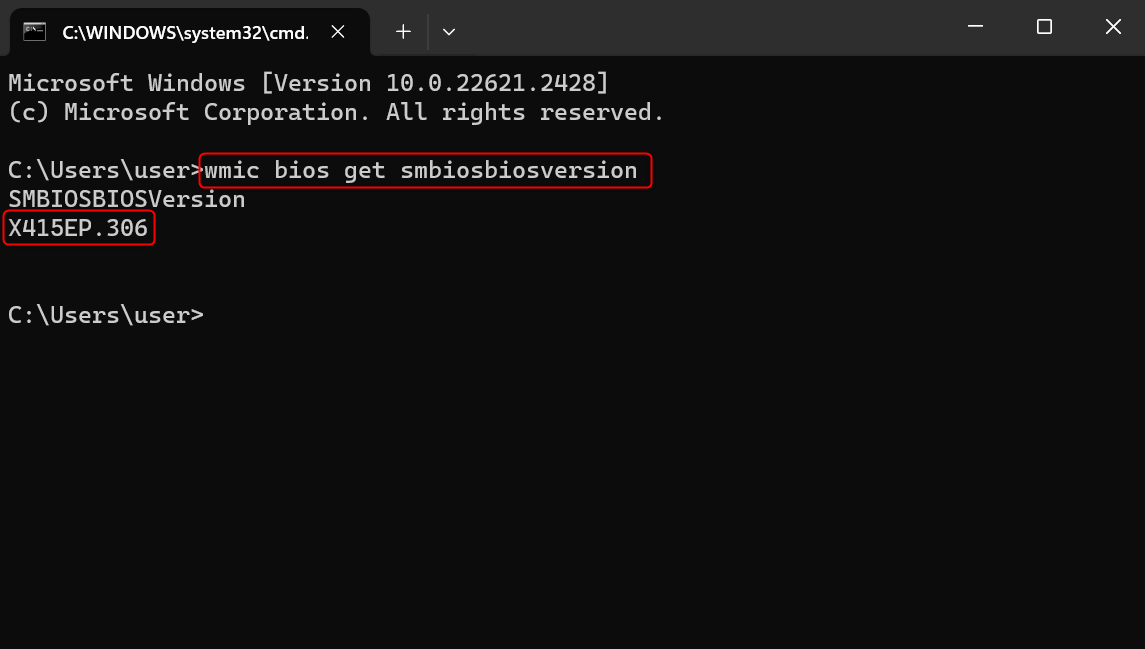
Command Prompt will directly display your BIOS version, as demonstrated in the above screenshot.
By Booting Into BIOS
If your PC doesn’t turn on and you can’t use the above methods, enter your machine’s BIOS itself to find the version number. Here’s how to do that.
Press the Windows + I keys on your keyboard to launch the Settings app.
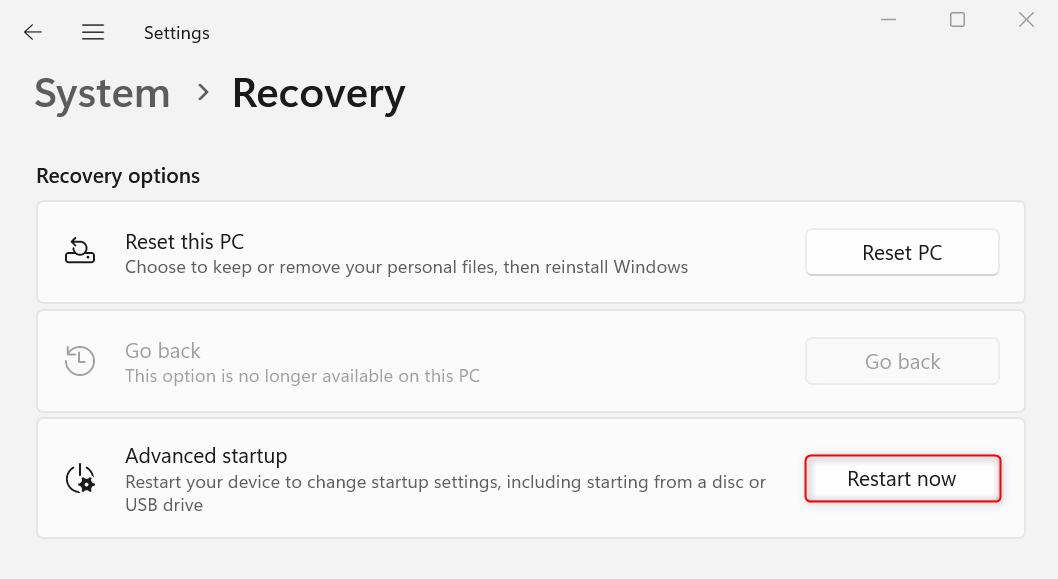
On Windows 11, go to System > Recovery. If you’re on Windows 10, go to Update & Security > Recovery.
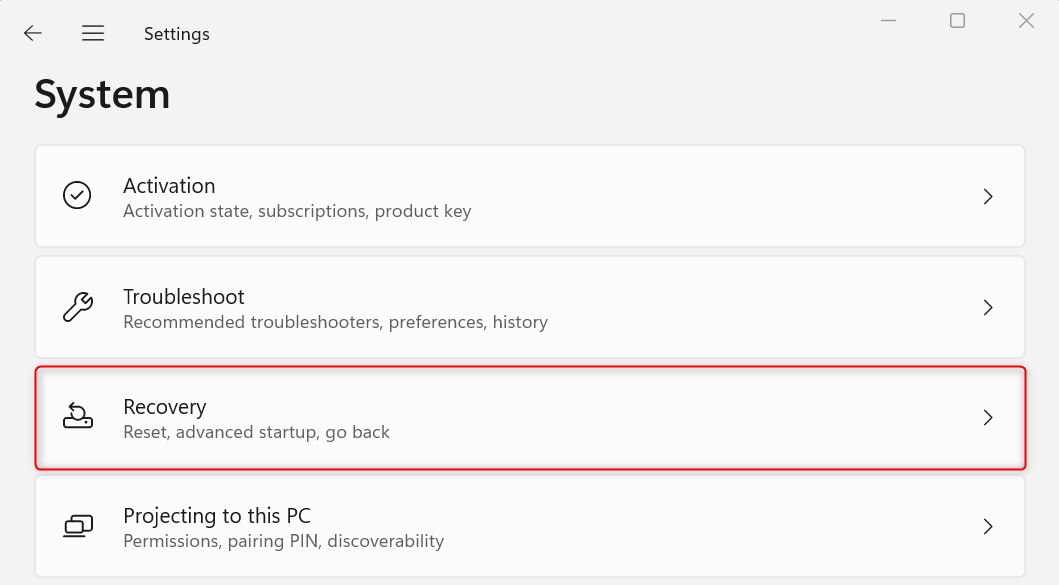
Find the Advanced startup option and click the Restart now button.
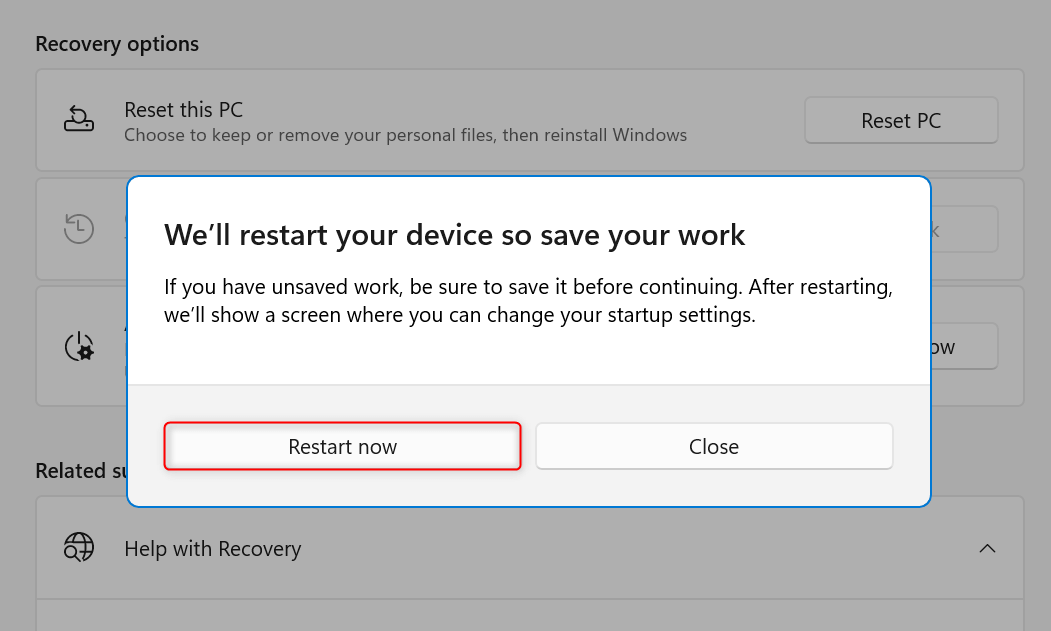
Windows will ask you to confirm the restart process. If you have no work left unsaved, click Restart now.
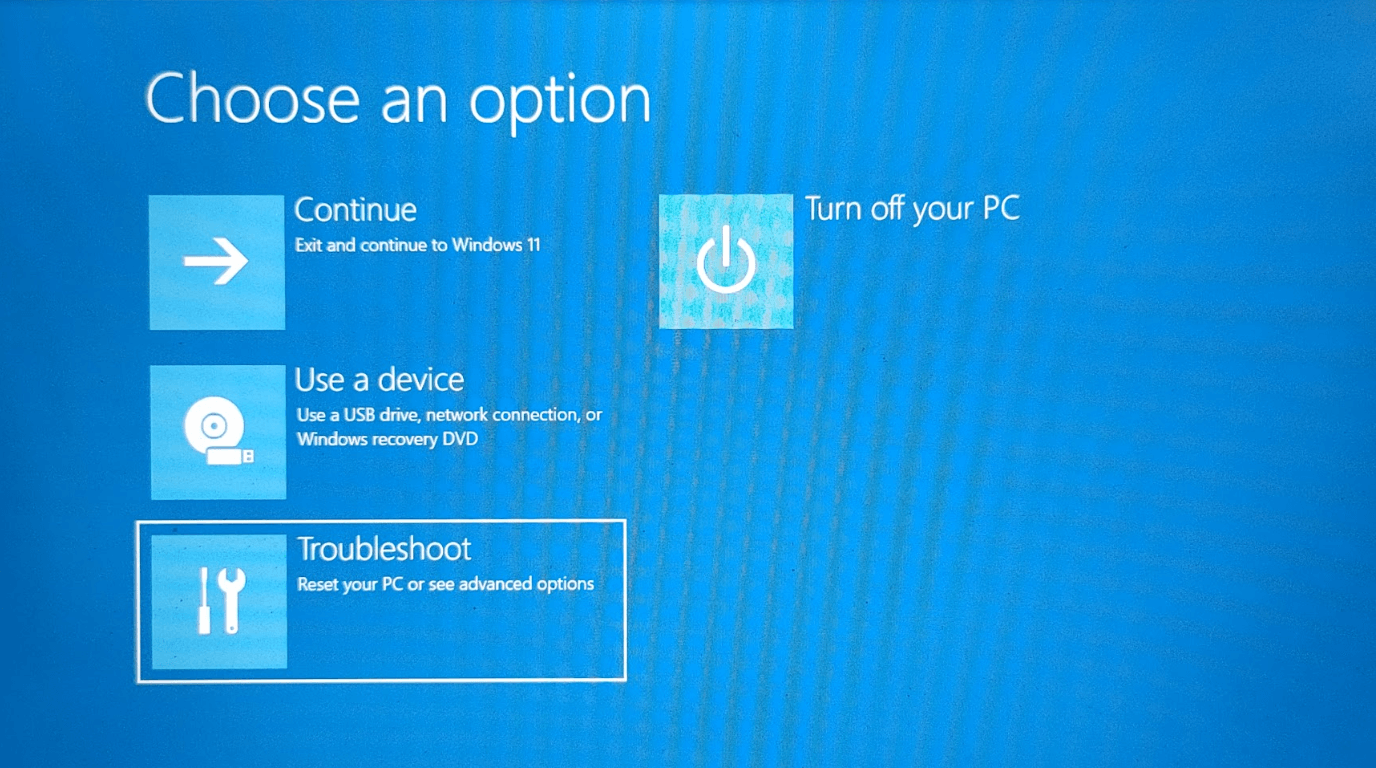
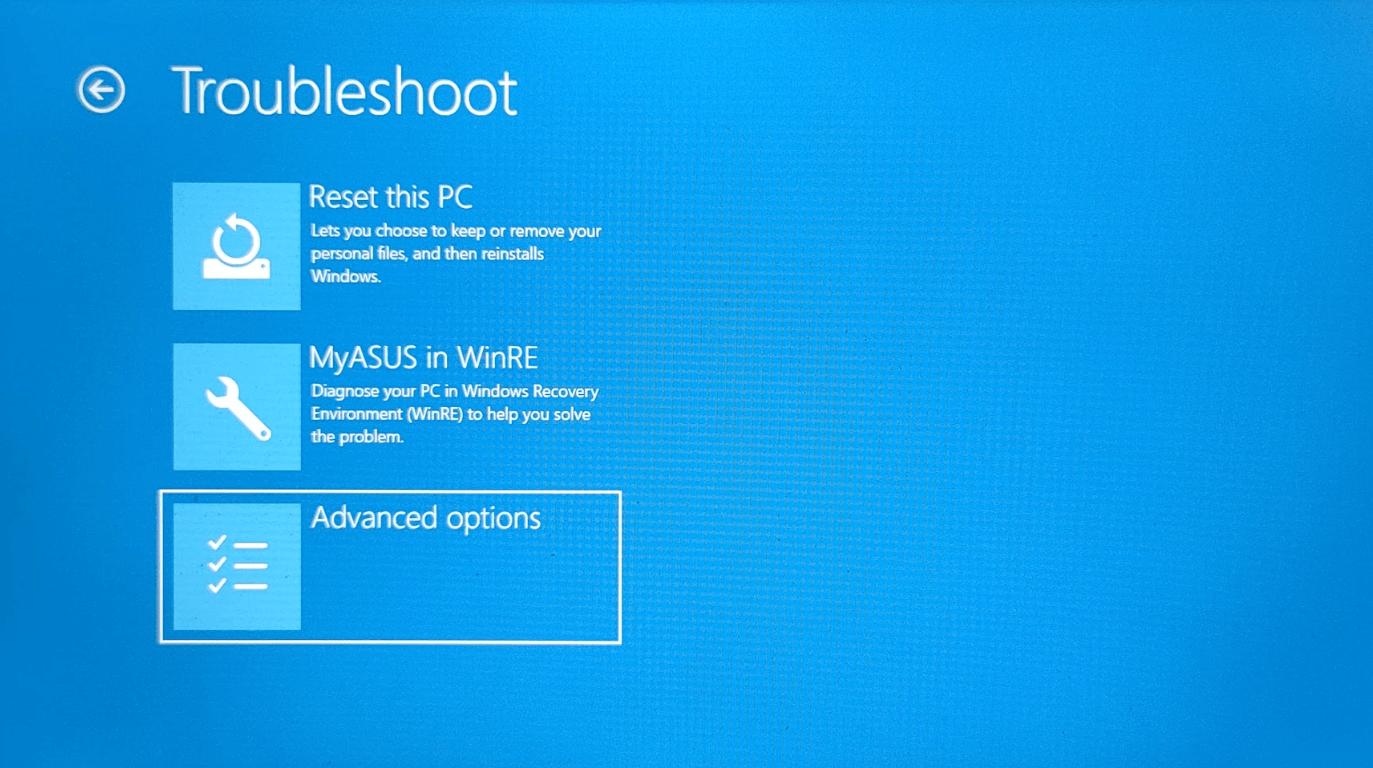
You will see a screen where you can access your startup settings, including your BIOS preferences. In the Choose an option interface, select Troubleshoot.
Then, in the Troubleshoot section, choose Advanced options.
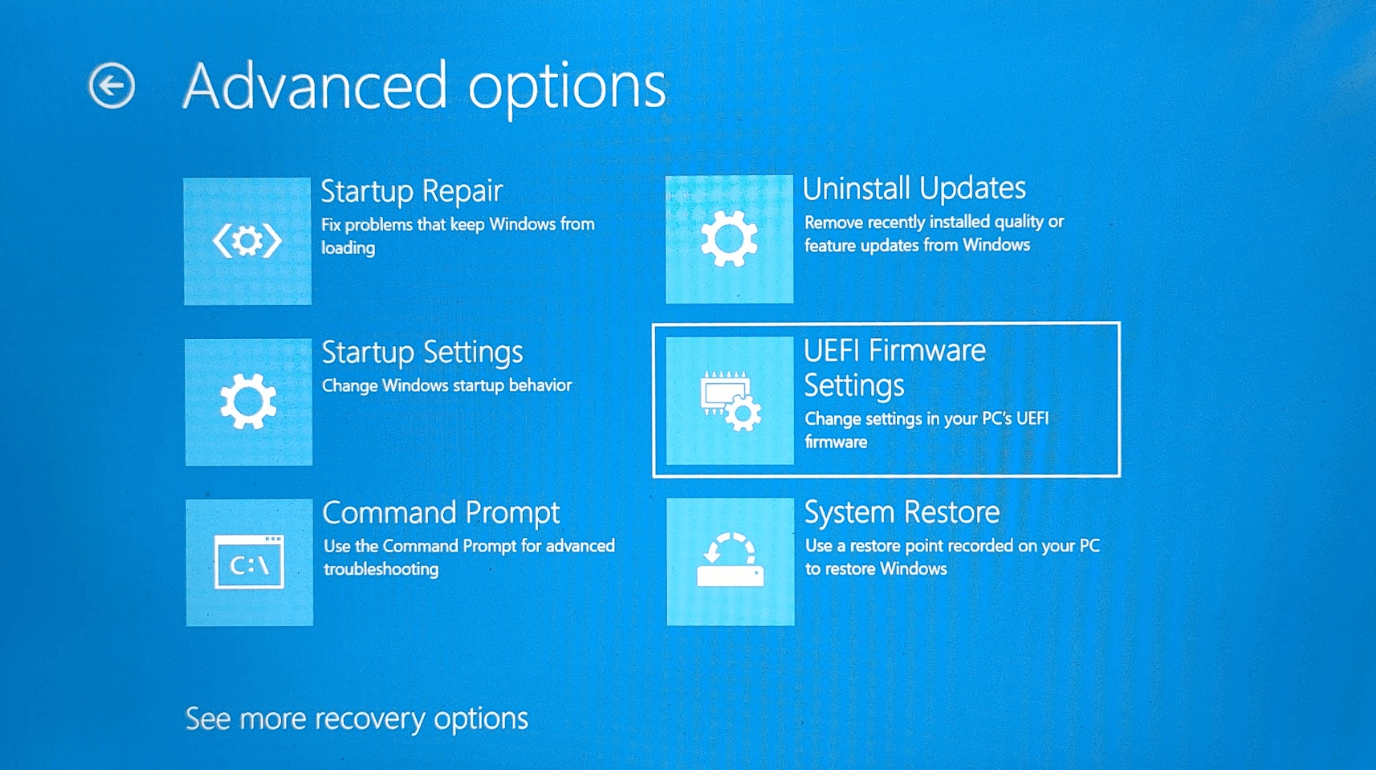
From the Advanced options screen, click UEFI Firmware Settings. This will finally open the installed BIOS utility on your PC.
Note that this exact interface will vary depending on the manufacturer of your computer. Here’s a sample BIOS utility on an Asus laptop:
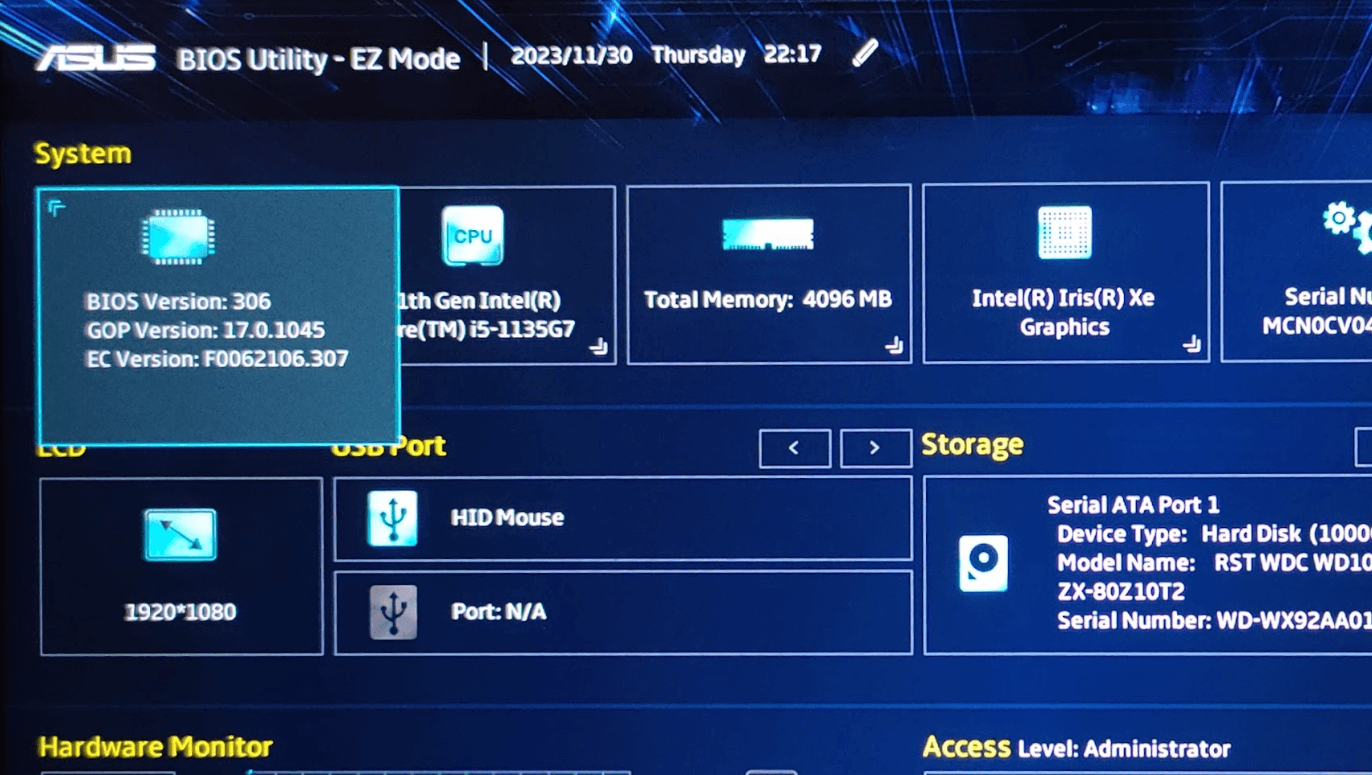
Simply find the option for your BIOS version, typically located with other system information. Unless you’re adept with tech, refrain from making any changes to your BIOS utility.
How to Update Your BIOS
The specific methods to update your BIOS would vary based on the manufacturer. Typically, they have a support page that guides you in installing BIOS updates. But for demonstration purposes, here’s how you update your BIOS on an Asus laptop (and here’s how to find the Power button on an Asus laptop).
Before starting this process, make sure that:
- Your computer is plugged into your AC source.
- You won’t shut down your PC during this process.
- You have temporarily disabled BitLocker Drive Encryption. If you didn’t, the setup wizard will automatically ask you to temporarily turn it off midway.
Step 1. Get Your Computer’s Product Name and Serial Number
Launch Command Prompt by pressing Windows + R and run the following command:
wmic baseboard get product, manufacturer, version, serialnumber
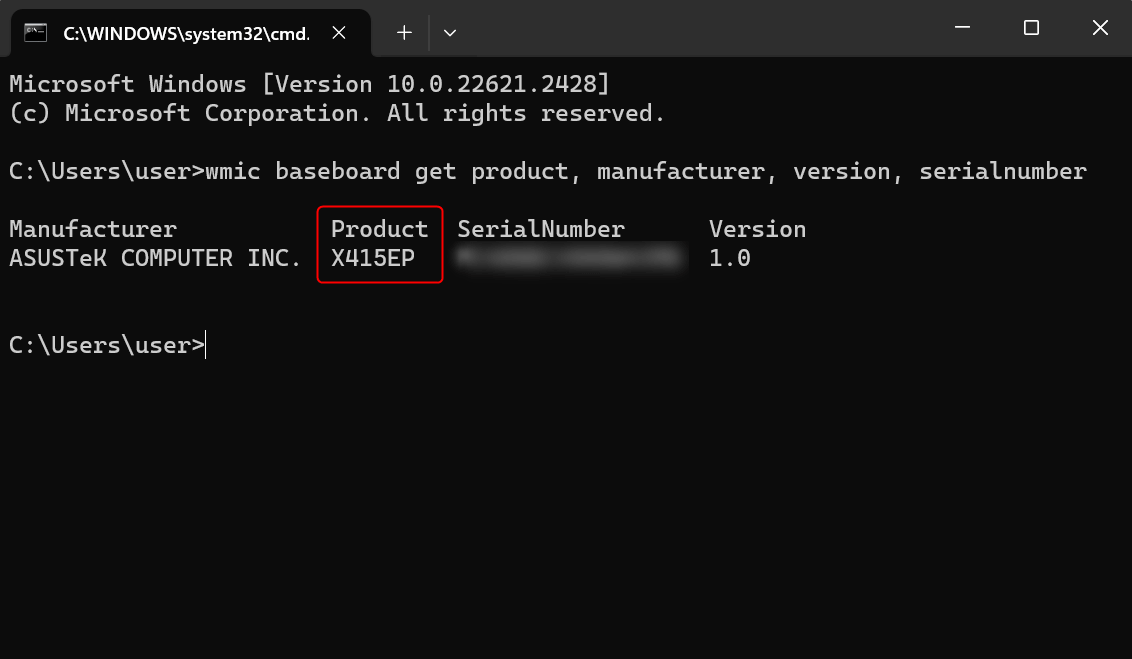
Copy the name under Product to your clipboard.
Step 2. Download the BIOS Update
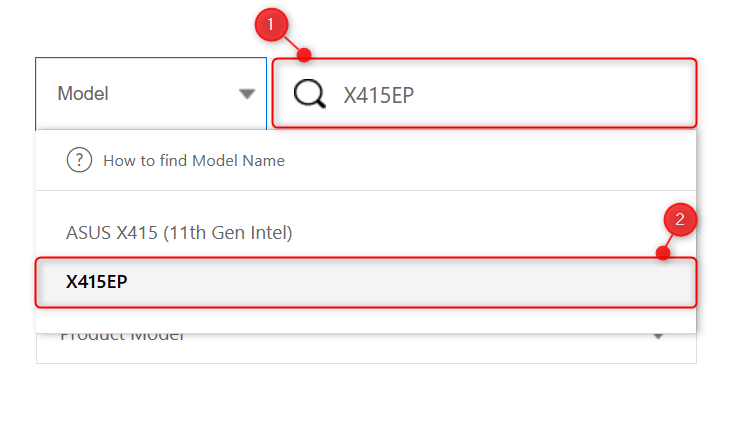
Launch your browser and go to the Asus Download Center. On the right of the Model field, paste your product name to the search bar. Select your product from the quick search results displayed.
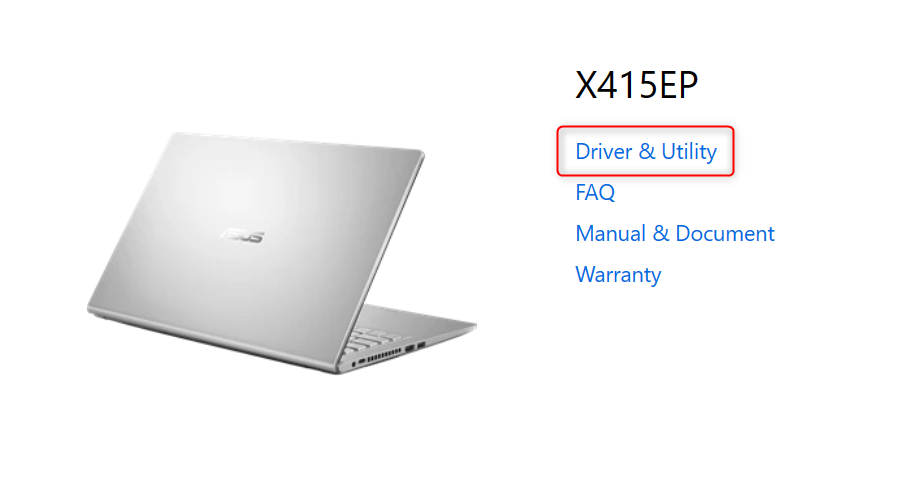
On the right portion of your screen, select Driver & Utility from the available links under your product. This will open another tab on your browser.
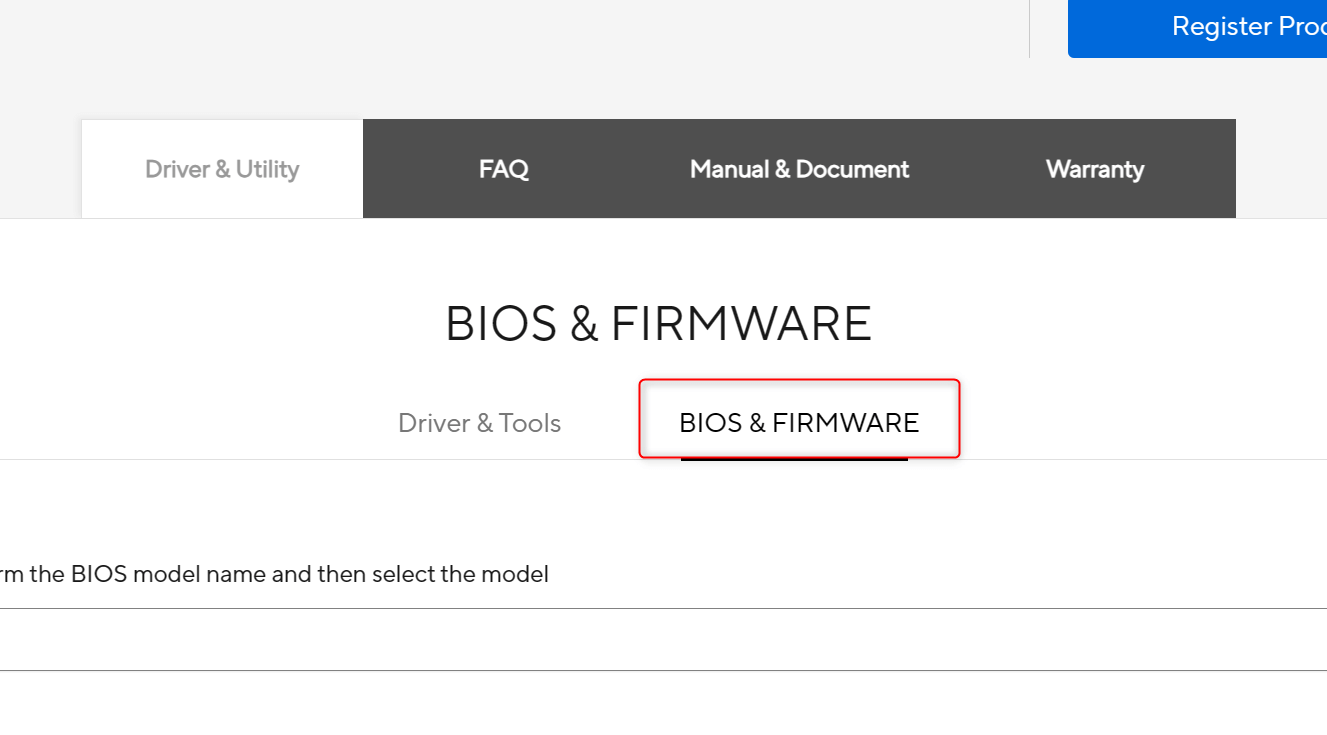
Switch to BIOS & Firmware.
From the drop-down provided, select your product name.
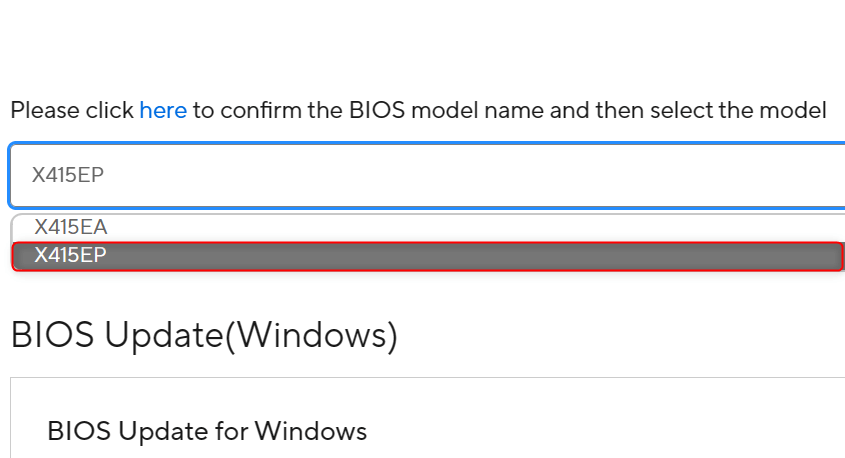
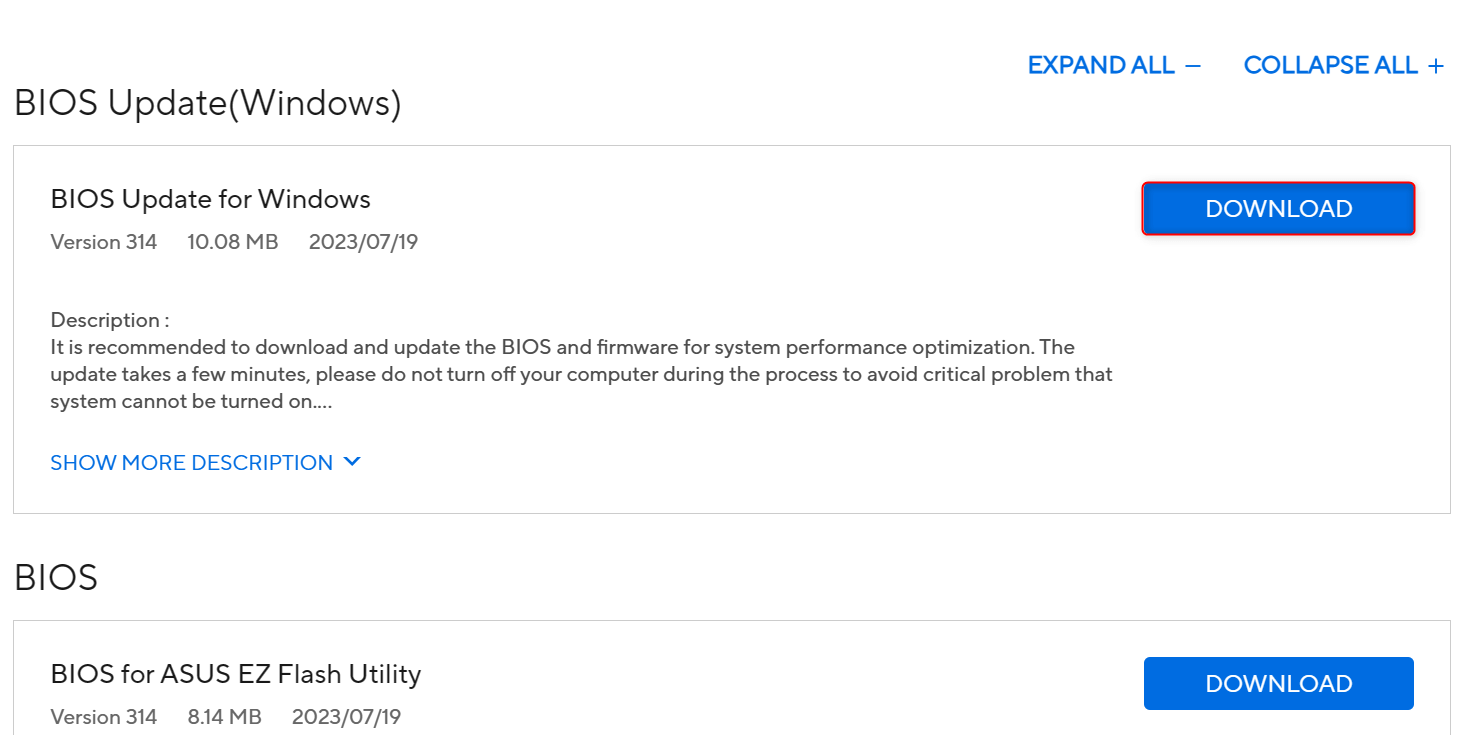
Under BIOS Update (Windows), find the latest BIOS version available for your computer. On its right, simply click its corresponding Download button.
Step 3. Install the Downloaded BIOS Update
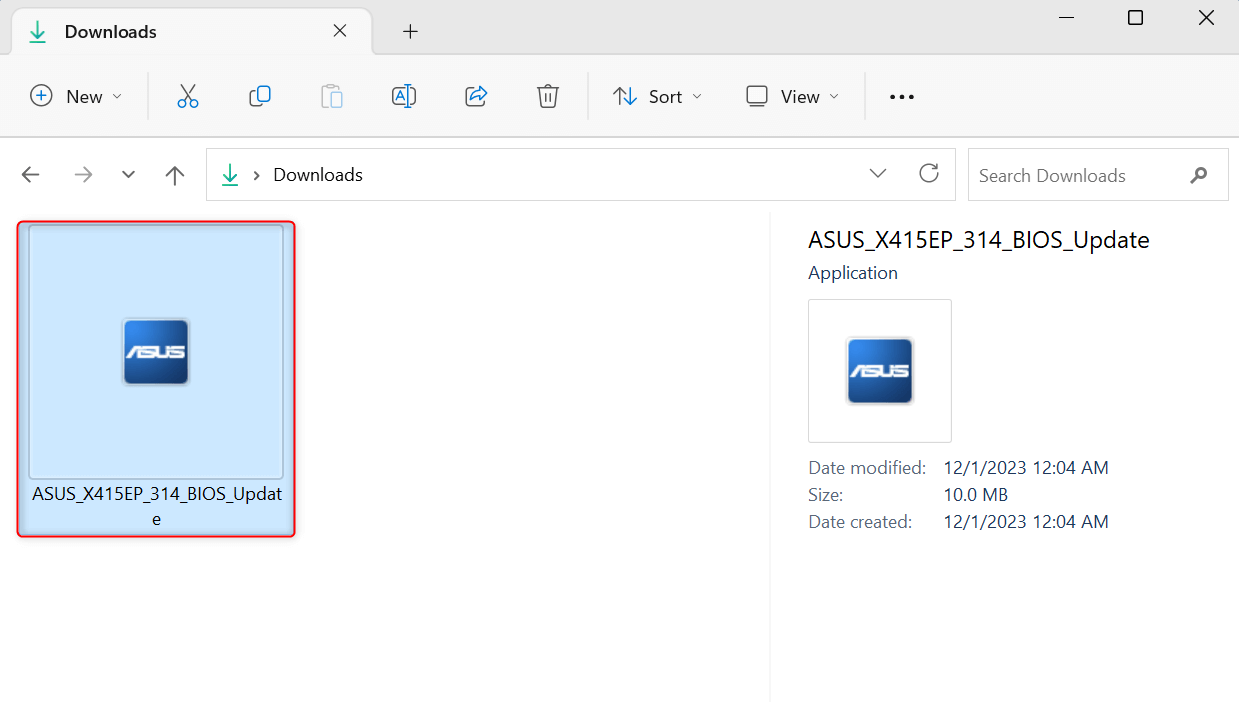
Go to your Downloads folder (or any other directory where you saved the BIOS update file). Launch the Asus BIOS Update executable file for your PC.
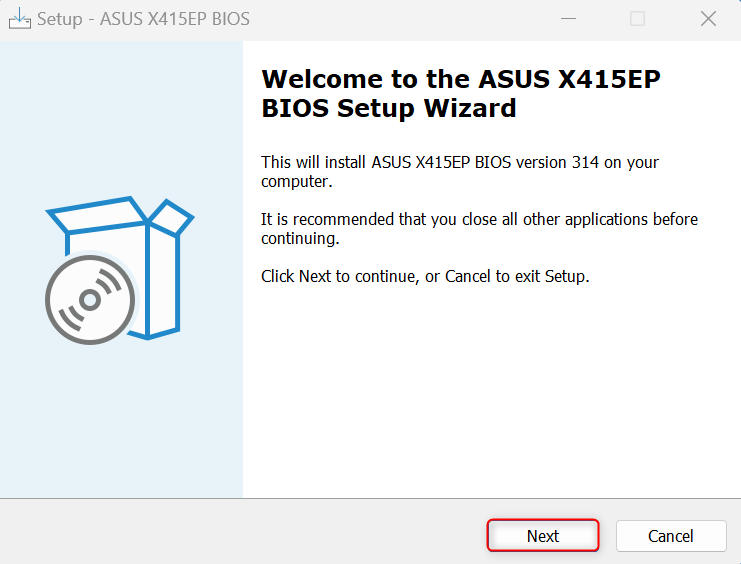
The User Account Control dialog box will ask you to confirm launching the file. Simply click Yes. An installation wizard will appear on your screen. On the starting interface, click Next.
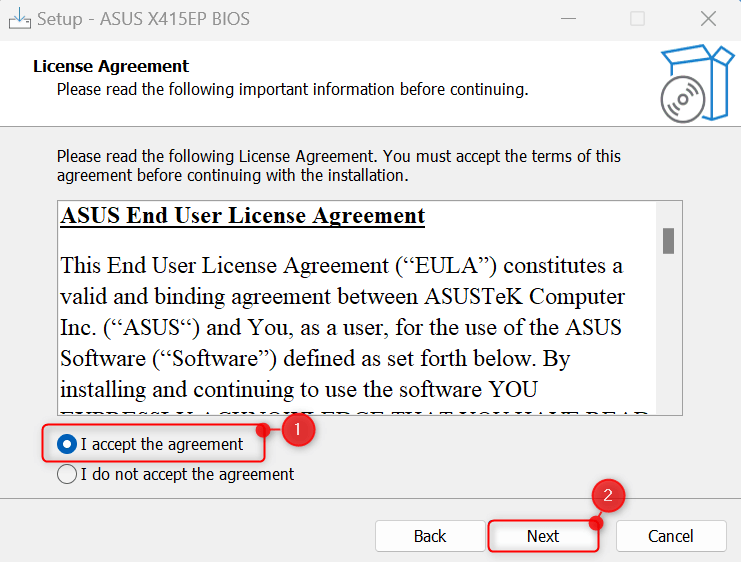
At the bottom portion of the window, choose I accept the agreement and click Next.
In the Install or Extract the source file section, choose Install and click Next.

Click Next again when asked to review the BIOS update information.
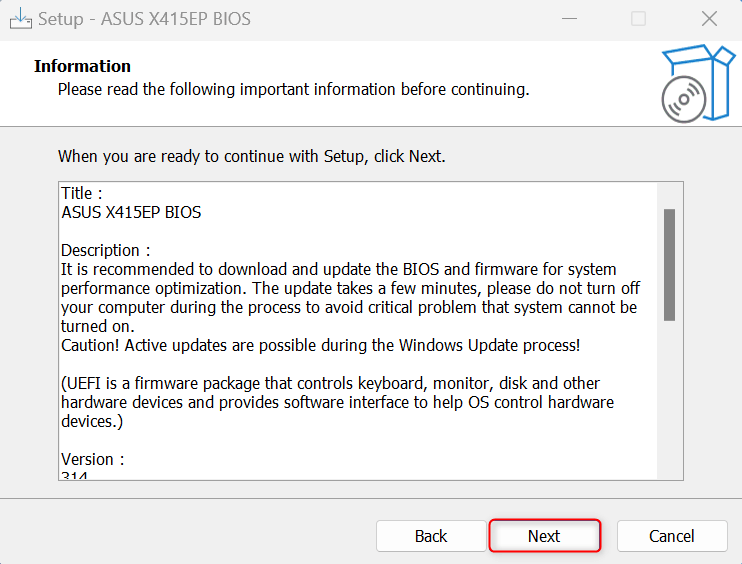
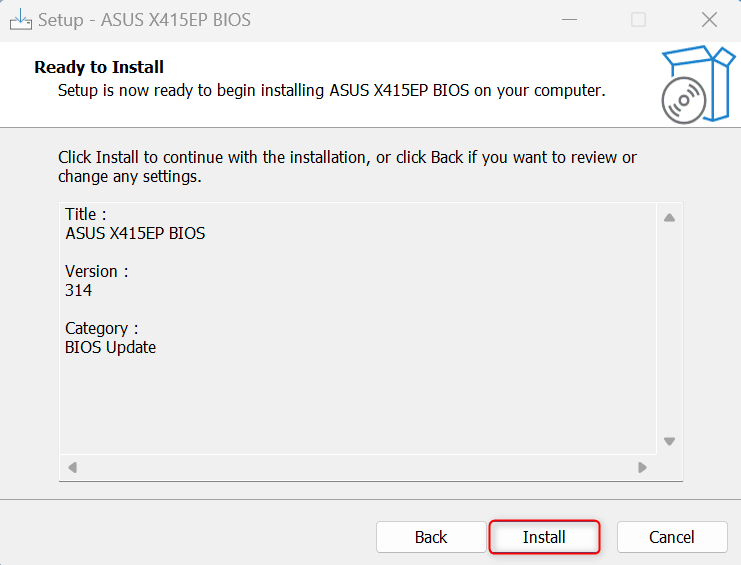
Then, in the Ready to Install section, click Install.
In the last section of the setup wizard, select Yes, restart the computer now, and click Finish.
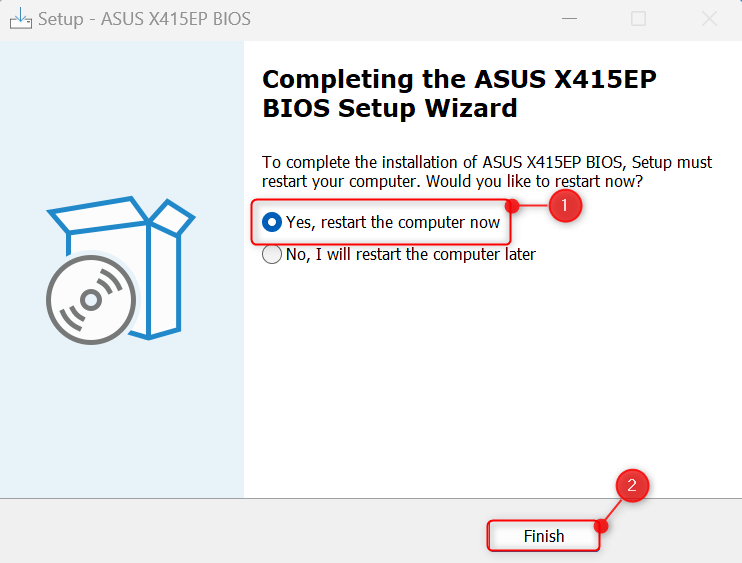
Simply wait for your computer to restart and finish updating your BIOS.
And that’s it. Checking your PC’s BIOS version isn’t as complicated as you think. If you see that it isn’t up-to-date, you should definitely go through the update process to keep your PC’s security and performance in its best condition. To find out the exact steps, visiting your computer’s manufacturer would be your best bet.