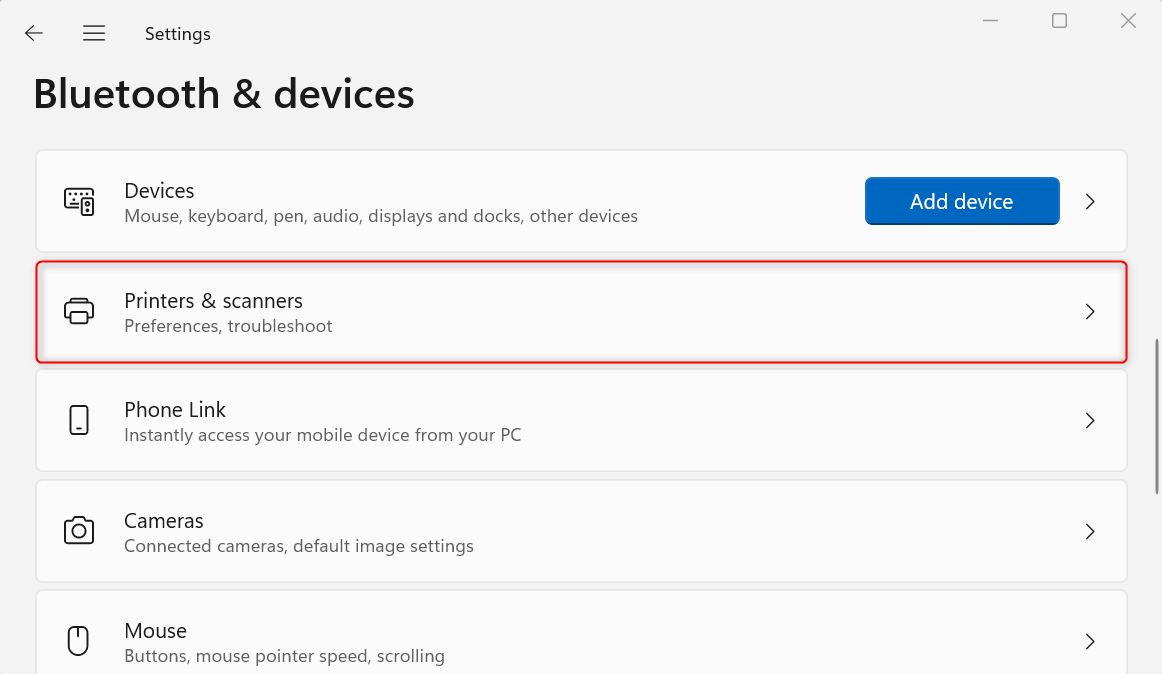
- Open Settings using Windows + I and go to Bluetooth & devices > Printers & scanners. Choose a printer and click its corresponding Set as default button.
- Windows manages your default printer by default. Turn it off under Printers & scanners > Printer preferences > Let Windows manage my default printer.
Want to set a default printer on Windows 11 but don’t know how to go about it? Whether it’s to save yourself from having to set it every time or prevent using the wrong printer, it’s easy to do that. We’ll show you how to set your default printer via the Settings app and Control Panel.
From Settings
When Windows manages your default printer, it automatically sets your most recently used printer at your current location as the default. This setting can be useful if you travel with your workstation between home and the office.
It’s fine to leave this feature on, but if you want more precise control over your printing devices, using manual settings will be better. Here’s what you should do.
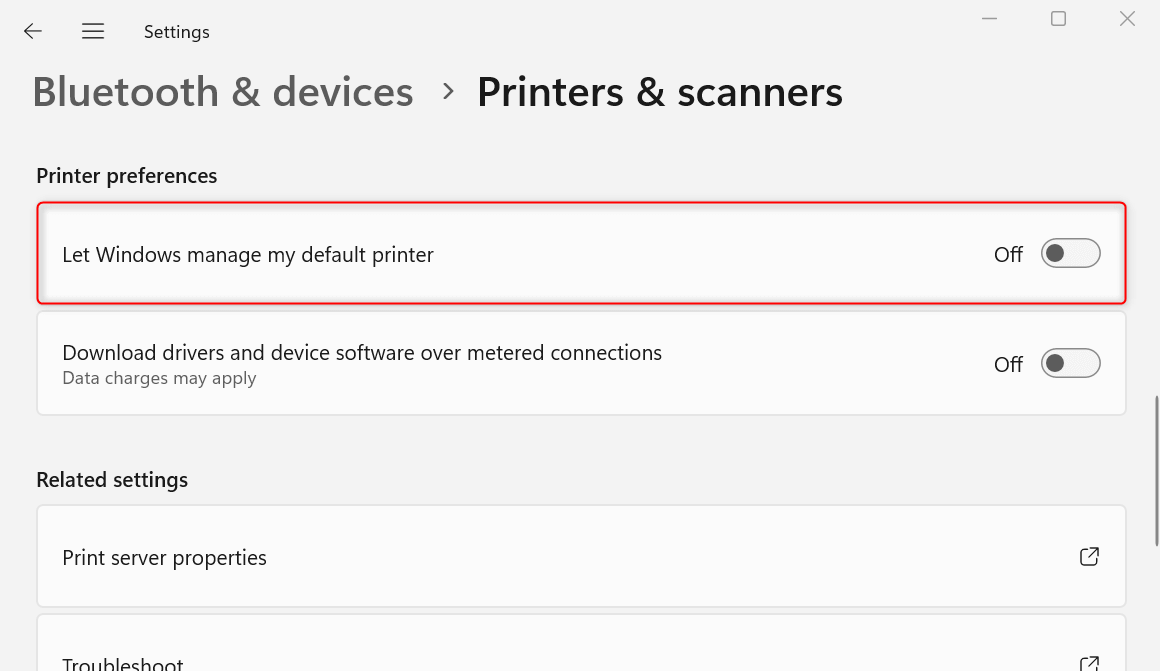
Press Windows + I on your keyboard to launch Settings. Go to the Bluetooth & devices submenu. Once there, find and choose Printers & scanners.
Scroll down to the Printer preferences section. Then, toggle off the button for Let Windows manage my default printer. This is an important step, as you won’t be able to manually set your default printer with this option left enabled.
Select the printer that you want to set as default. Then, in its specific settings, click Set as default.
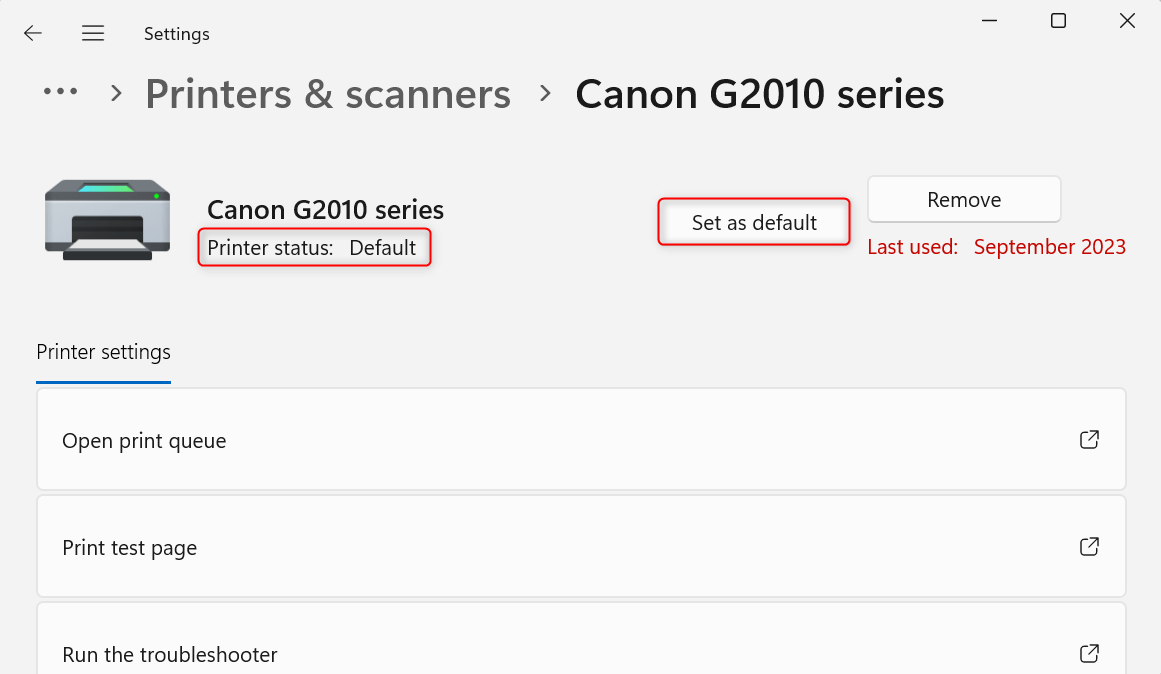
You successfully made your changes if you see that the printer status now displays Default.
Using Control Panel
If your version of Windows 11 still supports Control Panel, you can use it to set a default printer with the following steps.
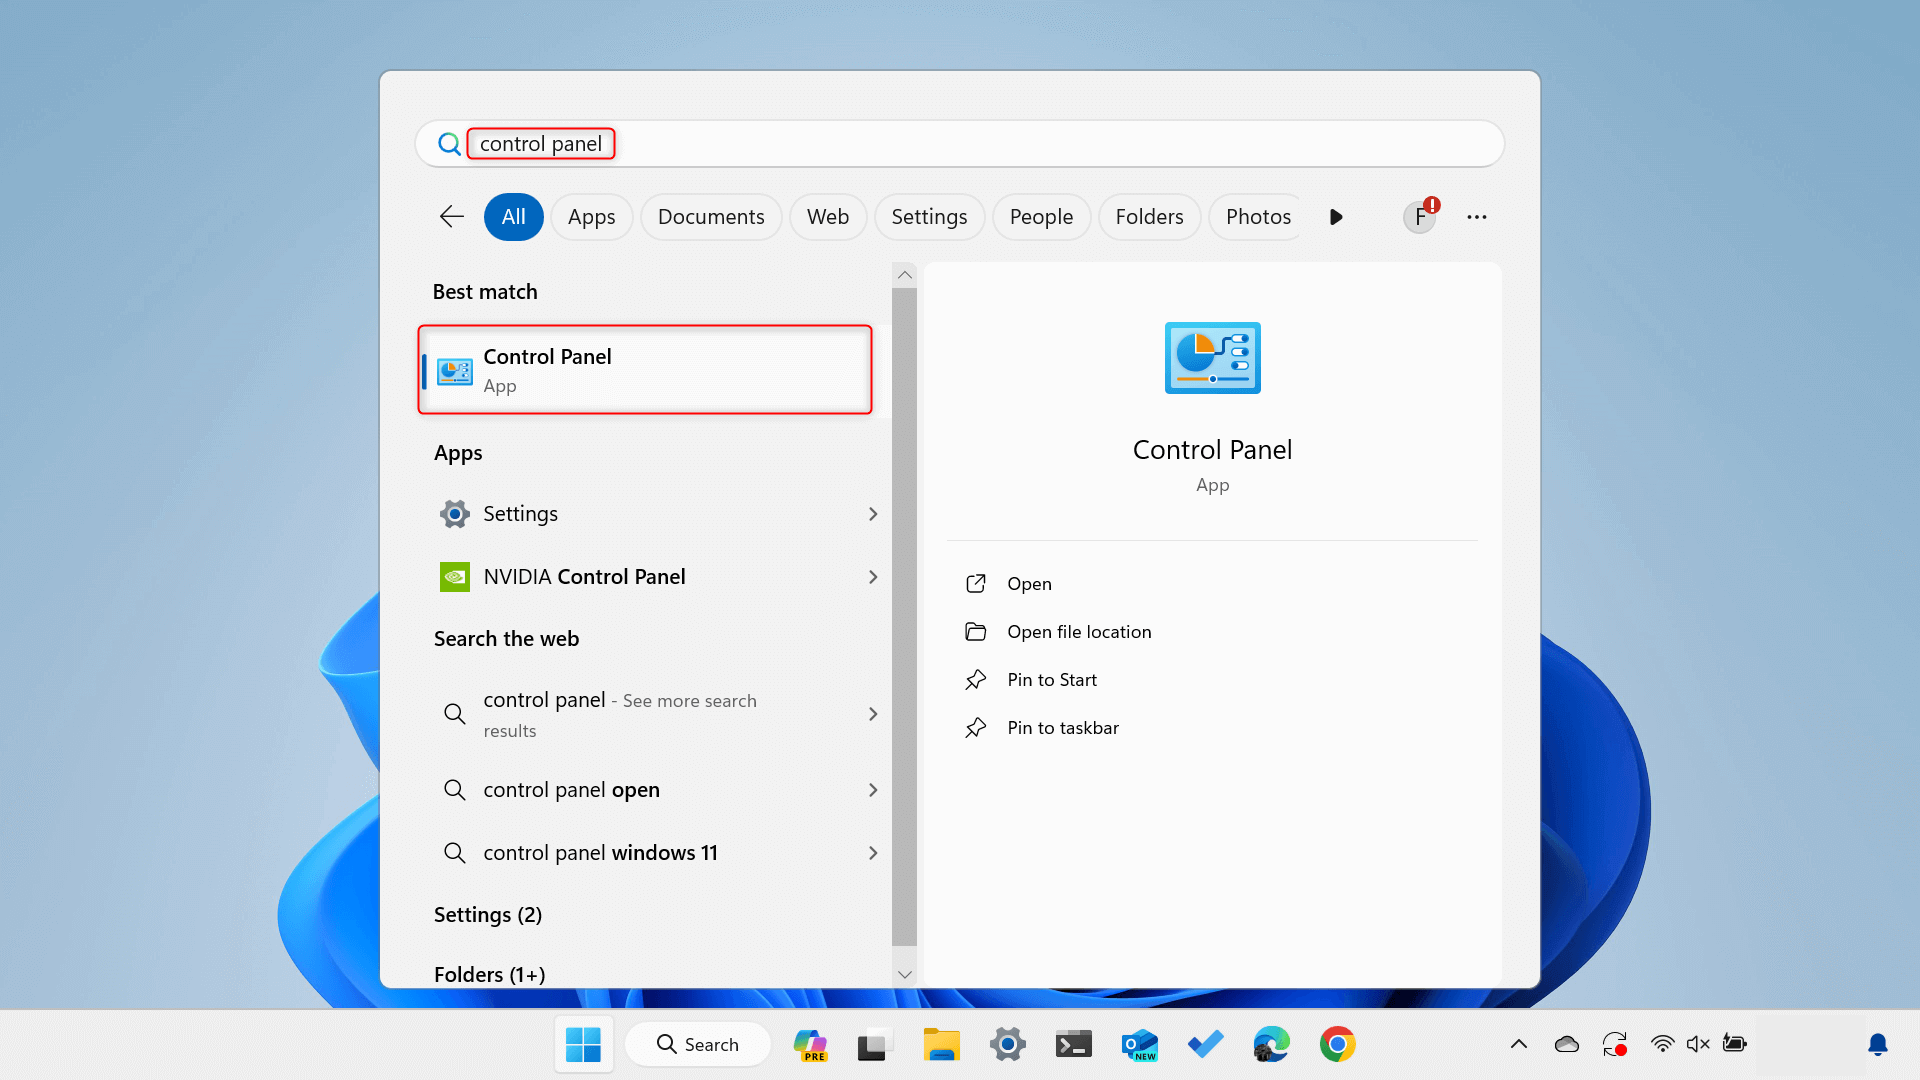
Open the Start menu and type control panel. From the search results, launch Control Panel.
When it opens, under Hardware and Sound, click the View devices and printers link.
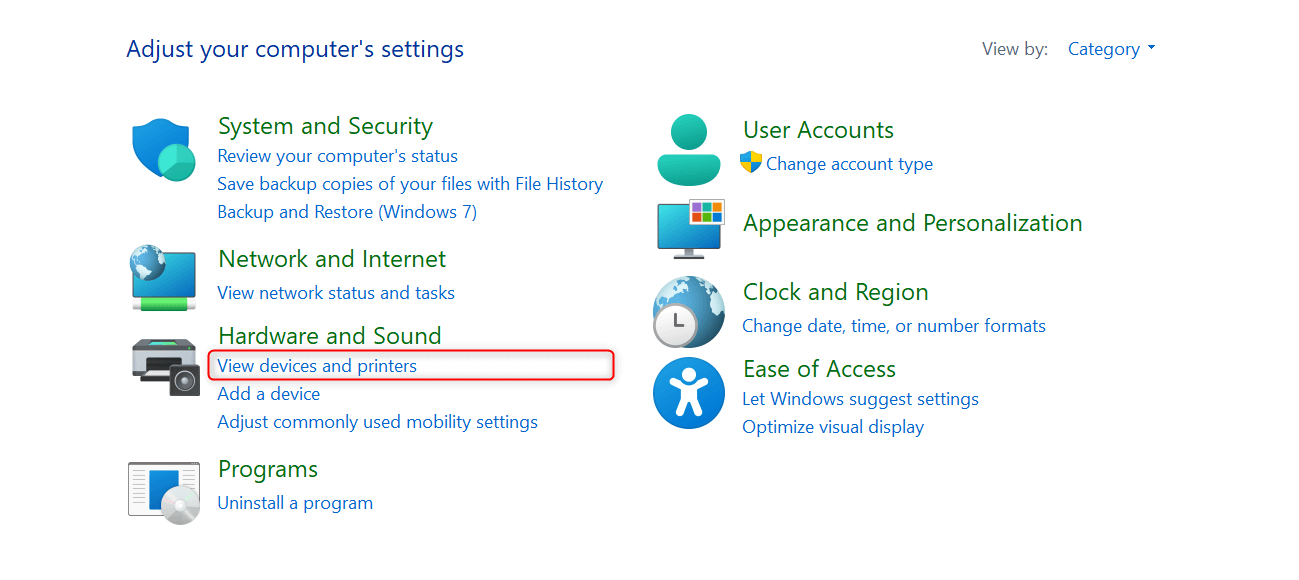
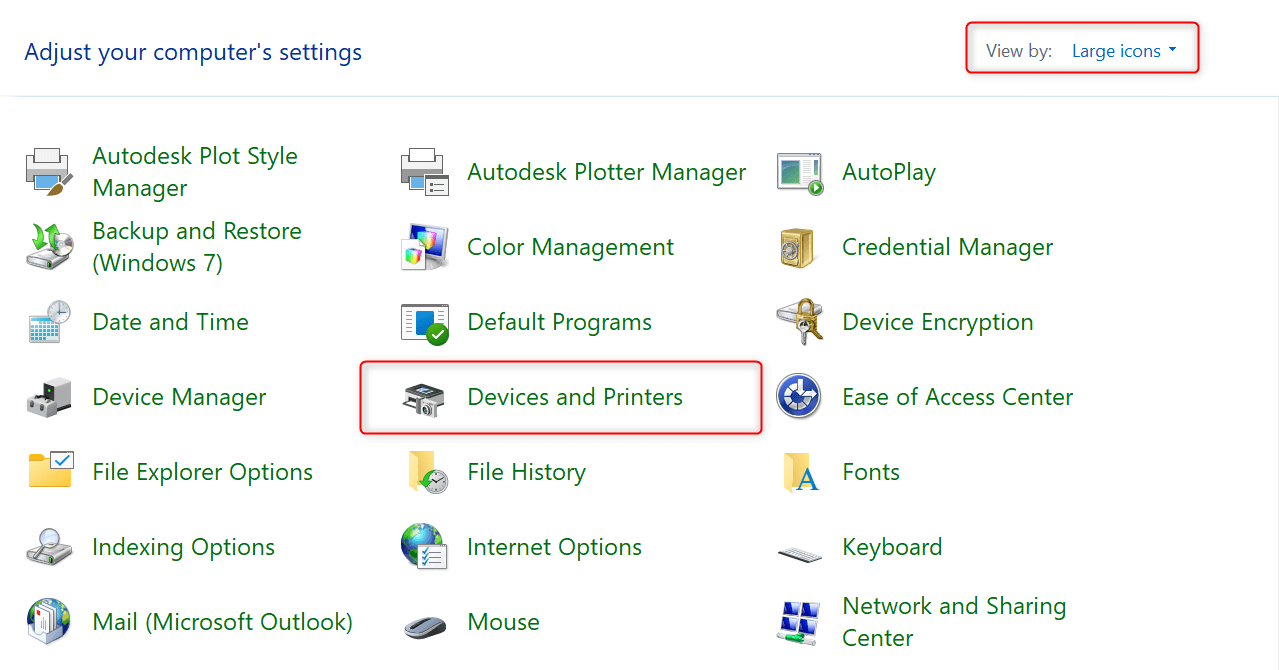
If you don’t see such an option, you might have your View by preferences set to icons. Simply click Devices and Printers.
Under the Printers section, right-click your preferred printer. From the context menu, choose Set as default printer. You’ll receive a warning that doing this will stop Windows from managing your default printer. Click OK.
In more recent Windows 11 versions, clicking the Devices and printers and View devices and printers options launches the relevant menus in the Settings app. If the same case occurs on your end, simply follow the steps discussed in the first method. This is the reason I haven’t been able to produce a screenshot above, as clicking that option launches Settings on my Windows 11 PC.
Microsoft has been phasing out the Control Panel since the October 2020 update for Windows 11. It’s gradually moving more features from the Control Panel to the redesigned Settings app.
And that’s how you set a default printer in Windows 11. Since we’re already talking about printers, you might also want to learn how to print envelopes in Microsoft Word while at it. Enjoy printing!