One of the many new features of Windows 10 is the PowerShell utility. Up until, you’ve been using Command Prompt to get your command and scripts tasks done. With Windows 10, you can now use the PowerShell program to run commands and scripts on your computer.
Some users complain that their PowerShell scripts are not running. If that’s also the case with you, it’s because the utility comes with certain restrictions. These restrictions need to be first made more flexible so your scripts can be executed.
Once you have done it, your scripts and commands will run without an issue. The following guide explains why the PowerShell script is not running, what are the PowerShell restrictions, and how you can change them.
Restriction Types to Run Scripts in PowerShell
Before you change your current restriction, you might be interested in finding out what all restriction types can be used with the utility. This section explains it to you.
PowerShell comes with four major restriction types and you can have any one of these enabled at any given time. Depending on what restriction you apply, PowerShell will act accordingly and will allow/prevent scripts from running on your computer.
The four restrictions are:
- Restricted – when this is enabled, none of your scripts will run as PowerShell will block them all.
- RemoteSigned – this’ll only allow those scripts to run that have been written on your computer.
- AllSigned – this will let you run all the scripts that have been signed.
- Unrestricted – this enables you to run just about any script in PowerShell.
Depending on what you want to achieve and how with PowerShell, you can change your current restriction type to any one of the four mentioned above.
View Current Restriction in PowerShell
If you aren’t sure what restriction PowerShell currently uses on your computer, you can find that out by running a command in PowerShell itself. It’ll let you know the current restriction policy that is in effect.
Step 1. Search for PowerShell using the Start Menu search and open it on your computer.
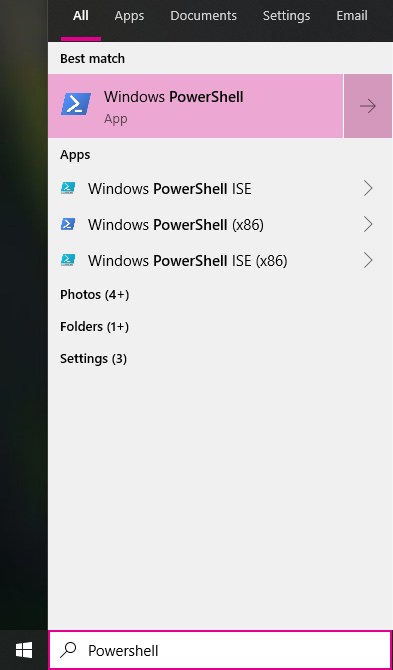
Step 2. When it launches, type in the following command and press Enter.
Get-ExecutionPolicy
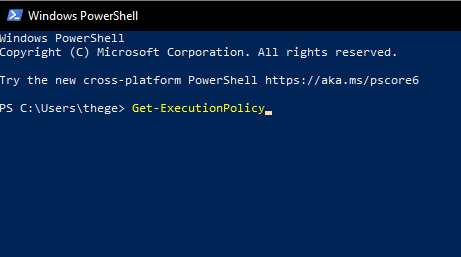
Step 3. Soon as the command is executed, you’ll see the name of the restriction policy that’s currently being used on your computer.
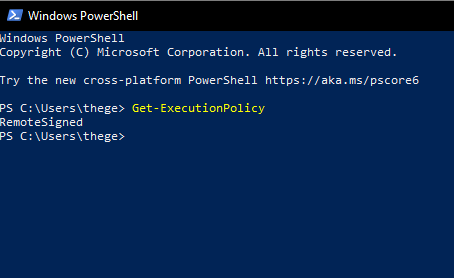
If it’s anything other than Unrestricted, that’s why your PowerShell script is not running on your computer. You need to change the policy to something less restrictive in order to run your scripts.
Remove Restrictions and Allow Scripts to Run Using Settings
One of the ways to fix the issue is by changing the policy from the Settings app. All you need to do is enable an option in the Settings and it’ll then let you run your scripts without an issue.
Step 1. Launch the Settings app from the Start Menu search on your computer.
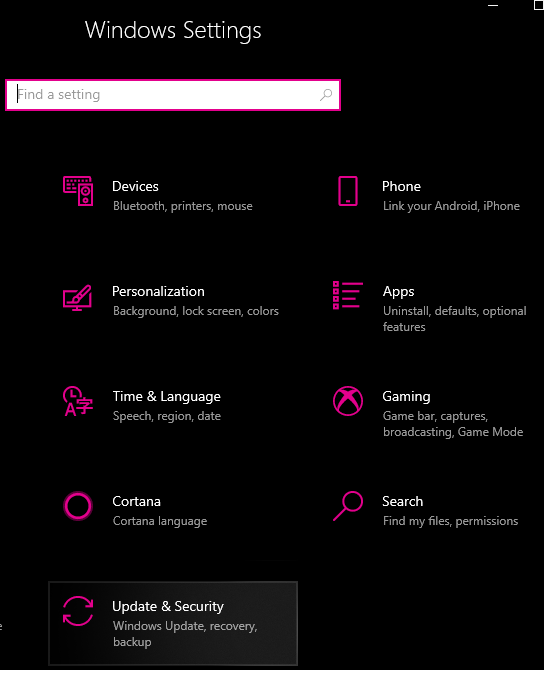
Step 2. Click on the item that says Update & Security on the following screen.
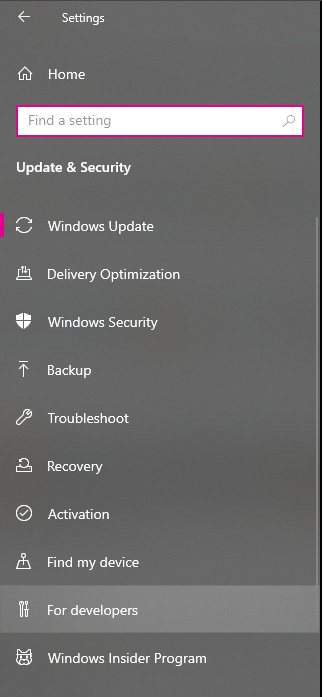
Step 3. Choose For developers from the left sidebar and it’ll let you view your developer settings. It’s where PowerShell options are also located.
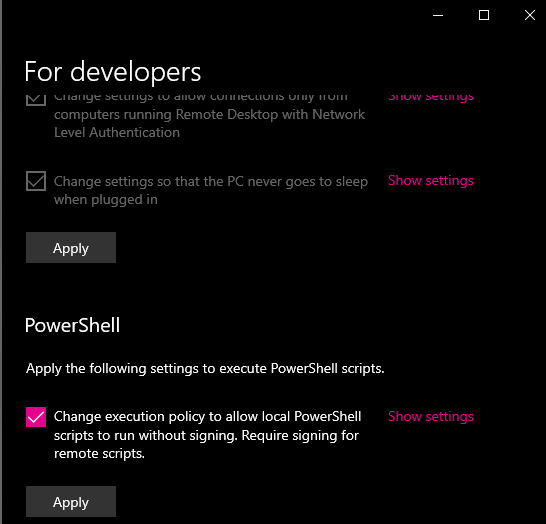
Step 4. Scroll down on the right-hand side pane and you’ll find a section labeled as PowerShell. Inside it, there’s an option that says Change execution policy to allow local PowerShell scripts to run without signing. Require signing for remote scripts. Enable this option and click on Apply.
It’s all set. From now on, your PowerShell scripts will run without any issues on your Windows 10 computer.
Use PowerShell to Change Current Restriction
If you prefer a command line environment to change your current policy type, you can do that from the PowerShell utility as well. All it requires you to do is run a command and your policy will be changed.
Step 1. Open the PowerShell utility on your computer.

Step 2. Run the following command in it and press Enter. It’ll change the policy to Unrestricted which will allow any script to execute on your computer.
Set-ExecutionPolicy Unrestricted
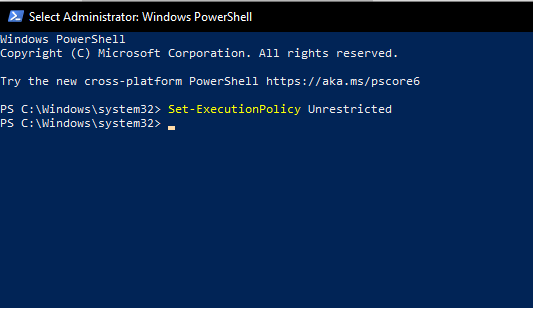
Step 3. You can then run the following command to see if the changes are in effect.
Get-ExecutionPolicy

You should no longer have any issues running PowerShell scripts on your computer.
Change Current Restriction Using Registry Editor
Windows Registry is a place where you can configure almost any option for your computer. You can use it to fix the PowerShell script not running issue as well by tweaking a registry option.
The following shows how to do it.
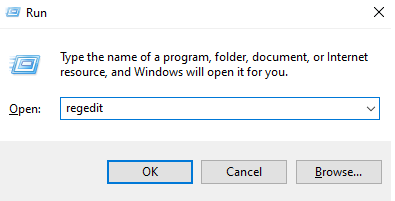
Step 1. Press the Windows + R keys at the same time, type in regedit, and press Enter.
Step 2. When the registry opens, head to the following path.
HKEY_CURRENT_USER\Software\Microsoft\PowerShell\ShellIds\Microsoft.PowerShell
Step 3. Right-click anywhere blank on the right-hand side area and choose New followed by String Value.
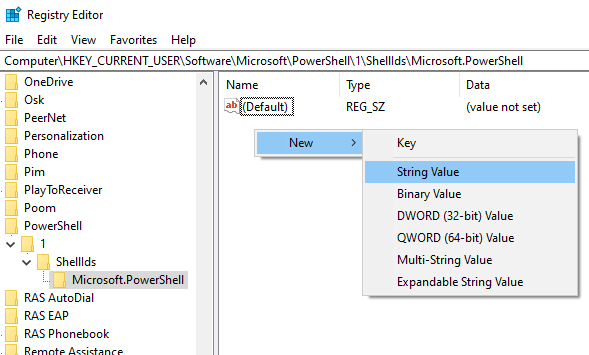
Step 4. Enter ExecutionPolicy as the name of the string and press Enter.
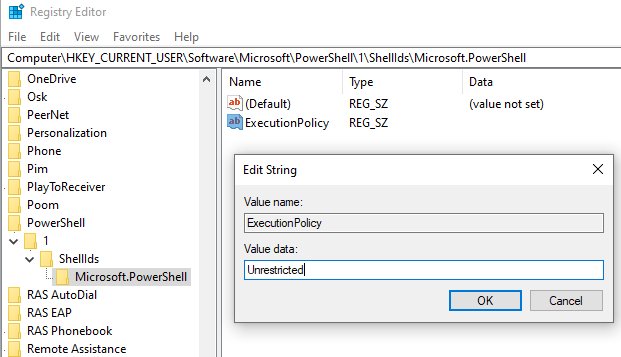
Step 5. Double-click on the newly created string to edit it. Enter the following in the Value data box and click on OK.
Unrestricted
Step 6. Close the registry editor.
Your current PowerShell restriction policy should now be Unrestricted meaning it’ll allow you to run any scripts you want on your computer.
With multiple methods available out there, you should be able to fix the PowerShell startup script not running issue without much hassle on your Windows 10 computer.