
- To resolve a 0x8096002a error and extract your archive, use a third-party extraction tool like 7-Zip.
- Moving your archive folder from one location to another might resolve permission conflicts causing the error.
- To identify the app or service causing the error, perform a clean boot.
Encountering an Error 0x8096002a when extracting archives on Windows 11? While there’s no single, specific reason for this issue to occur on your machine, there are effective ways to fix it. We’ll show you how you can easily extract your archives by using a third-party tool like 7-Zip, resolving file location issues, and doing a clean boot on your PC.
Use 7-Zip to Extract the Archive
If the built-in extraction feature in Windows 11 File Explorer persists in giving out an Error 0x8096002a, use a third-party tool like 7-Zip to extract your files quickly.
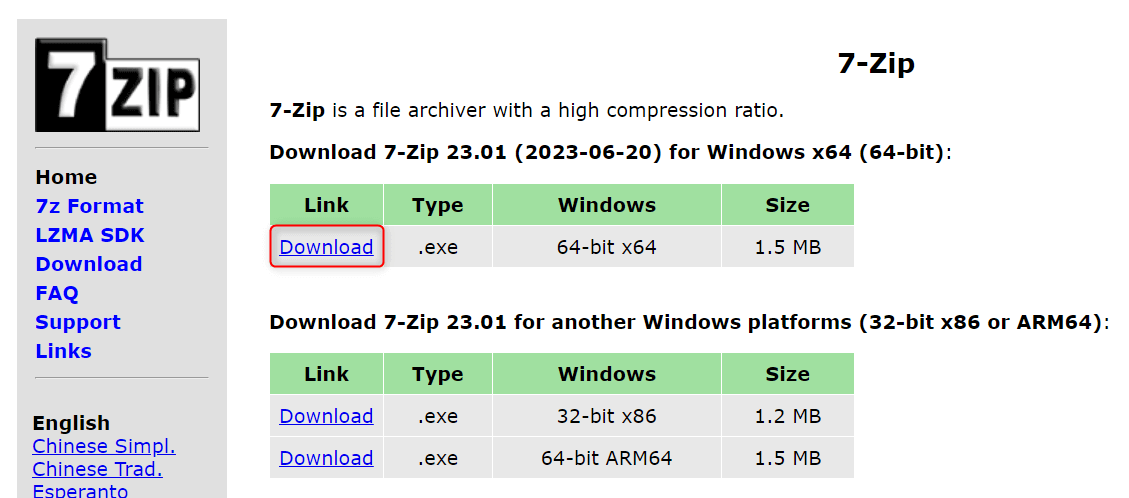
Go to the official 7-Zip website. From the available installer files, click the Download link for the one displayed at the top of the page.
Open your Downloads folder (or any other directory where you saved the installer) and launch the executable file. In the User Account Control dialog, choose Yes to confirm the installation process.
In the setup window, select an installation path and click Install. Close the dialog once done.

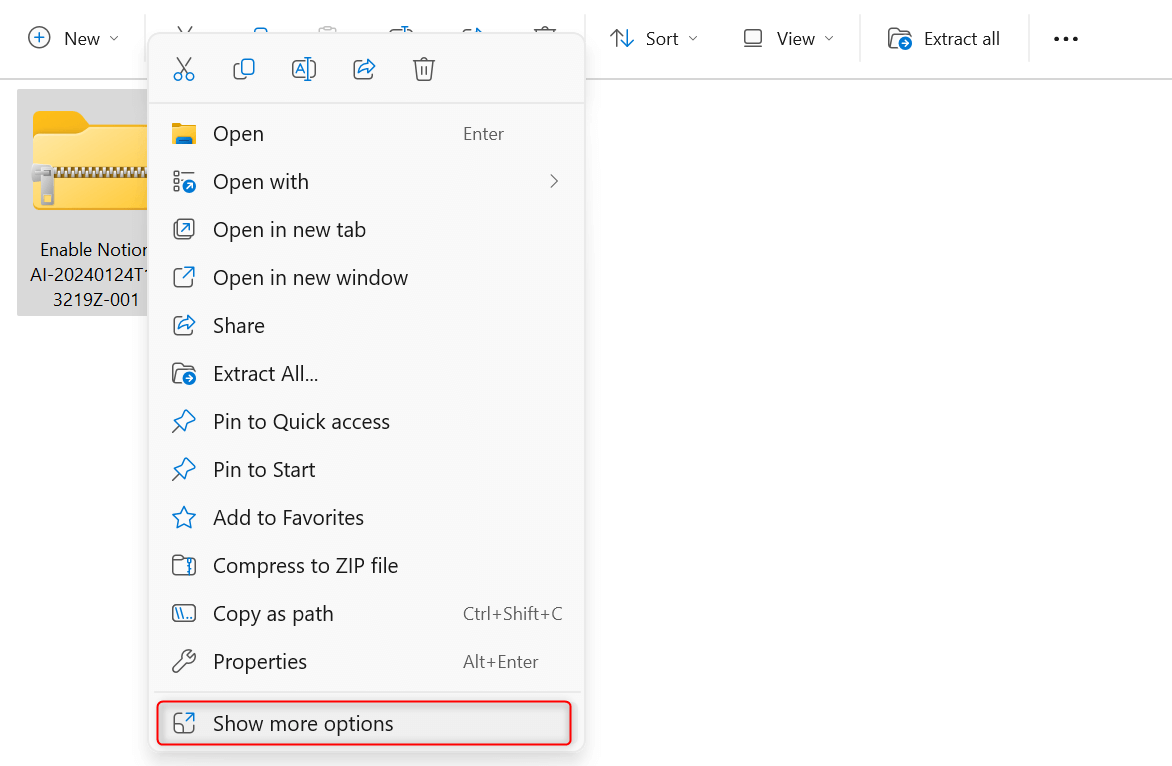
Go to the folder where your compressed file or archive is saved. Right-click your archive, and from the context menu, choose Show more options.
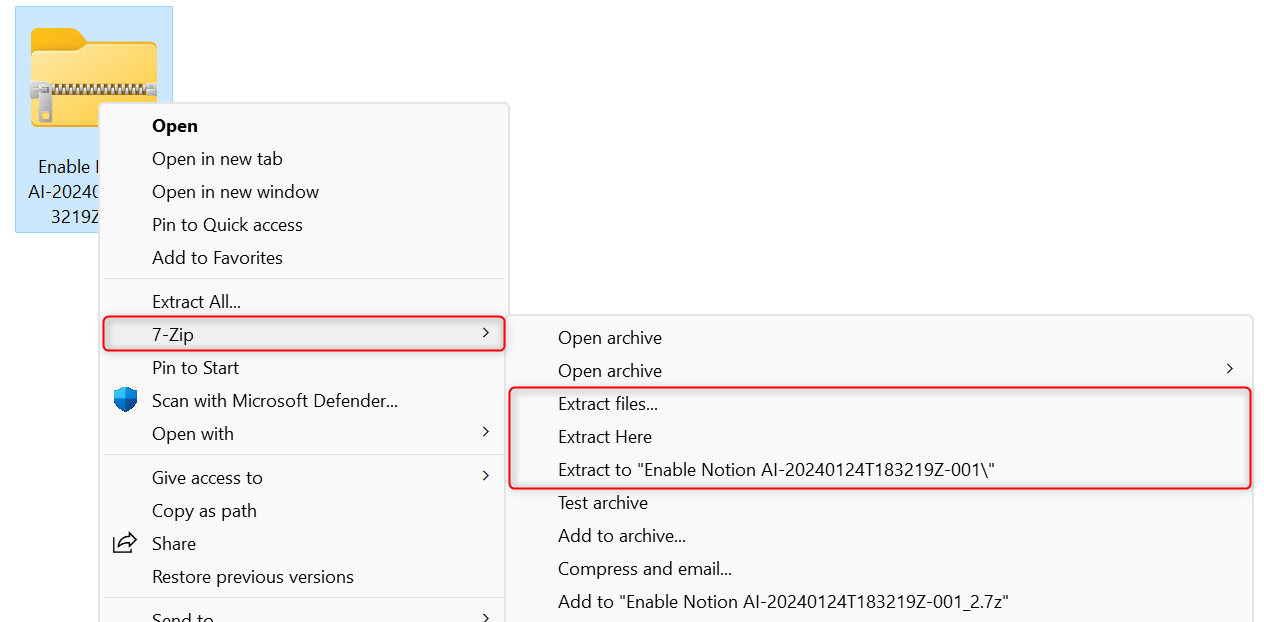
In the expanded menu, choose 7-Zip and select an extraction method. In this example, we selected Extract to [folder].
Your files will be extracted. If you prefer using another file extraction tool, make sure to choose a safe and reliable one.
Move the Archive to Another Folder and then Extract It
An Error 0x8096002a can also occur when the archive or compressed folder you’re trying to extract files from is located in a protected folder in your storage. To work around it, copy the archive to another location, such as your Downloads or Desktop folder.
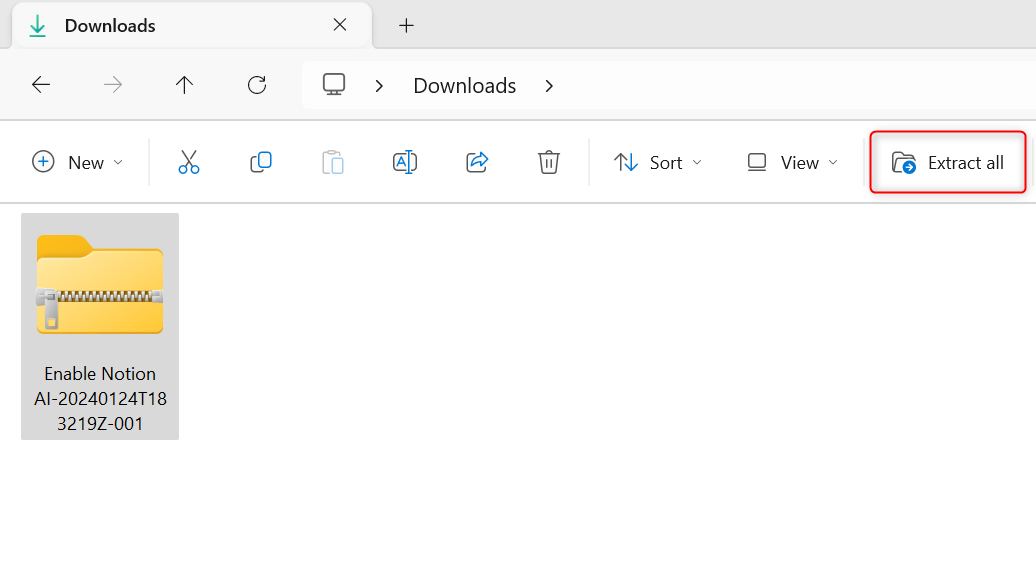
Once relocated, select the compressed folder and click the Extract all button in the menu bar. Alternatively, use 7-Zip to perform the extraction process.
If the error persists, it might be the ZIP file itself that is corrupted. In this case, you need to get a fresh copy of the archive.
Clean Boot Your PC and Then Extract the Archive
If both methods above don’t work for you, enter the clean boot environment on your PC before extracting your archive. This way, you can determine if a particular app or service is causing the error. Here’s how.
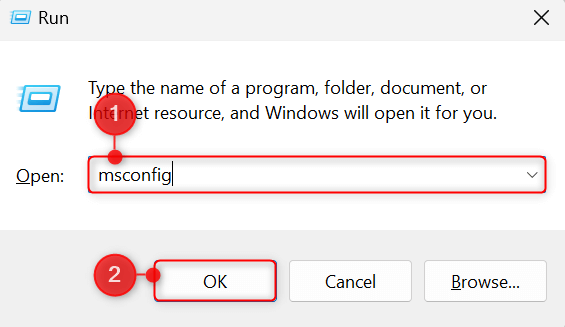
Press Windows + R to open the Run utility. In the Open field, type msconfig, and press Enter. This will open the System Configuration utility on your machine.
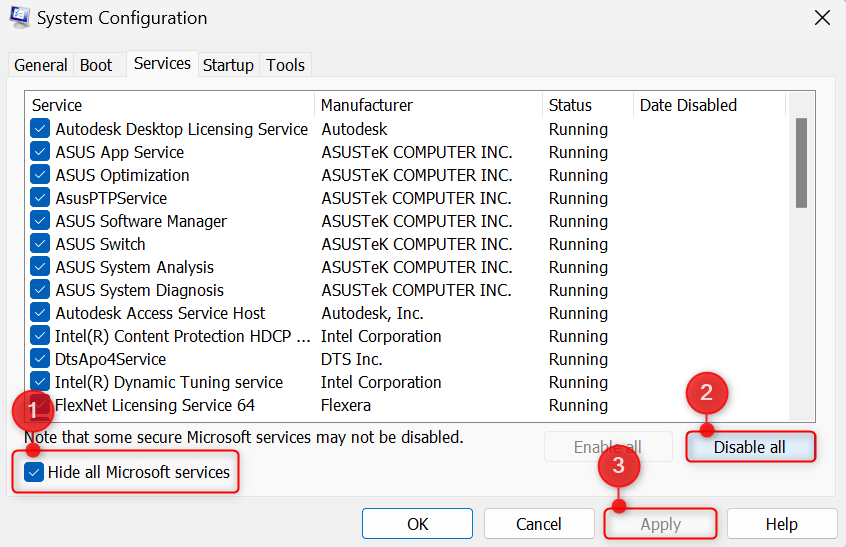
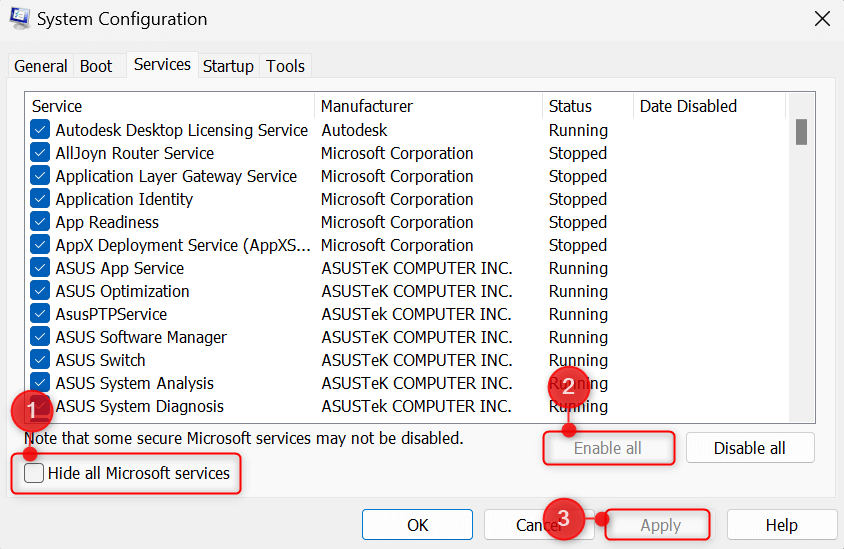
Switch to the Services tab and check the box for Hide all Microsoft services. Then, click the Disable all button. Once done, click Apply.
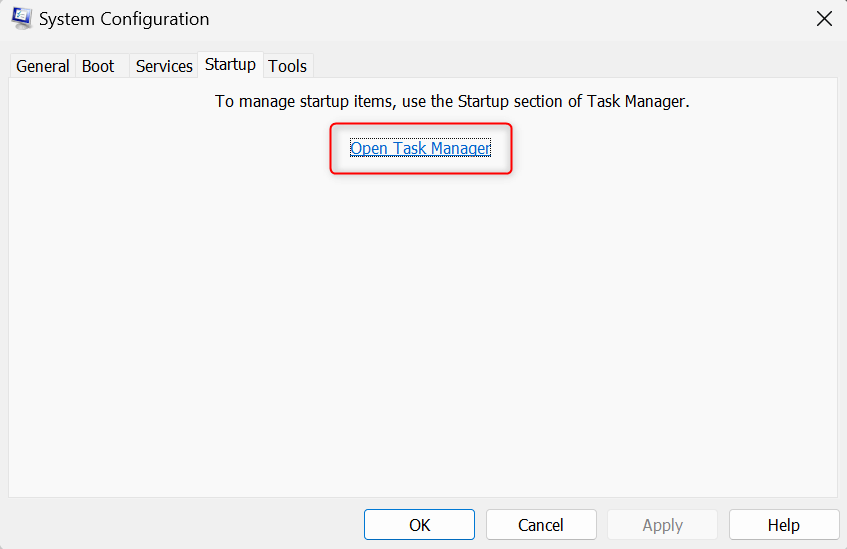
Next, go to the Startup tab. Click the Open Task Manager link.
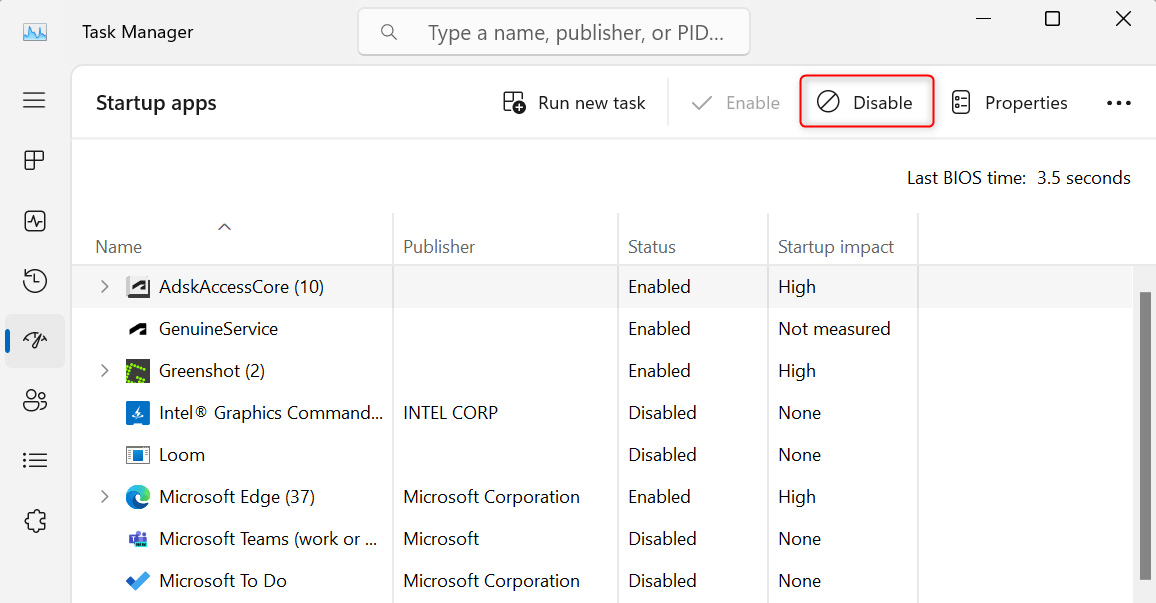
This will open the Startup apps tab in Task Manager. Here, select a startup application and click Disable. Repeat this process for all apps with the Enabled status.
Go back to the Startup tab in System Configuration and choose OK.

Restart your computer to enter the clean boot state. Under this mode, try to extract your archived files. If you’re still unable to extract them, there might be a specific Windows service causing issues for your PC. Find more information on how to determine problematic apps and services on Microsoft’s official support page.
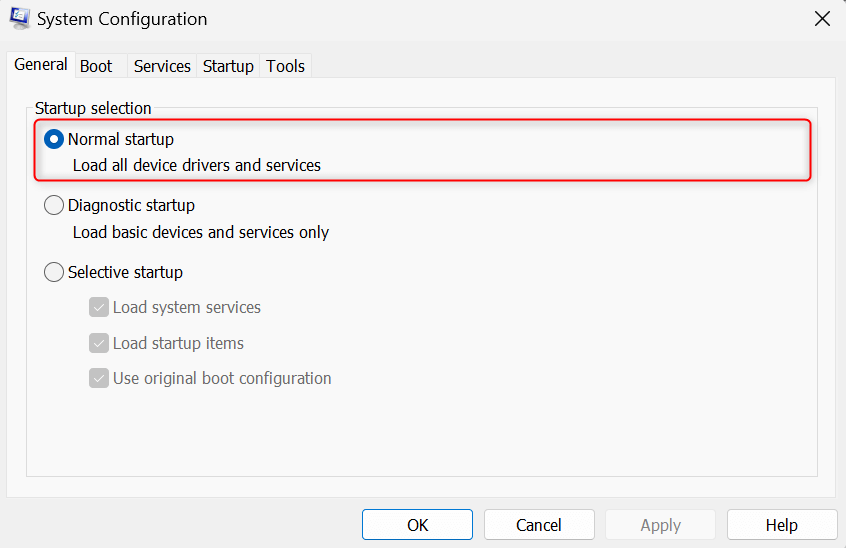
To exit the clean boot environment, launch System Configuration again. Go to General, and under Startup selection, choose Normal startup.
Switch to the Services tab. Uncheck Hide all Microsoft services and click Enable all. Then, choose Apply.
Switch to the Startup tab and click Open Task Manager. Then, re-enable all programs you’ve disabled earlier. Proceed as needed when asked to restart your machine.
And that’s how you work around an Error 0x8096002a when extracting archives on Windows 11. Keeping your operating system and drivers up-to-date is the best way to prevent such issues.