Whether you want to troubleshoot issues or install a fresh copy of the operating system on your computer, it’s easy to create a bootable Windows 11 USB drive with Rufus. We’ll show you how to use this tool whether you’ve already downloaded the Windows 11 ISO or not.
Why Use Rufus to Make the Bootable USB Drive
Rufus is a free and open-source tool that allows you to create bootable USB drives from ISO files. But, why exactly is it preferred when making bootable media for Windows 11?
- Faster than other methods: Rufus can complete the process much faster than Windows Media Creation Tool.
- Portability: You can run it from any computer without having to install it.
- Direct ISO downloads: Rufus lets you download your preferred Windows version (including Windows 11, 10, and 8.1) directly from Microsoft’s servers.
- Bypassing TPM requirements: This allows you to install the OS (operating system) on computers with mismatched hardware requirements.
What Items Do You Need?
Before you check out our methods in the next sections, make sure to prepare the following requirements:
- An empty USB flash drive: It should have a capacity of at least 8 GB and be free of any files. If you’re using a used flash drive, back up its contents first and format it. Regardless, they will still be erased during the process of creating a bootable USB drive.
- Windows 11 ISO file: Download your Windows 11 ISO file from the official Microsoft website. You can also choose to directly use Rufus to download the ISO file during the process.

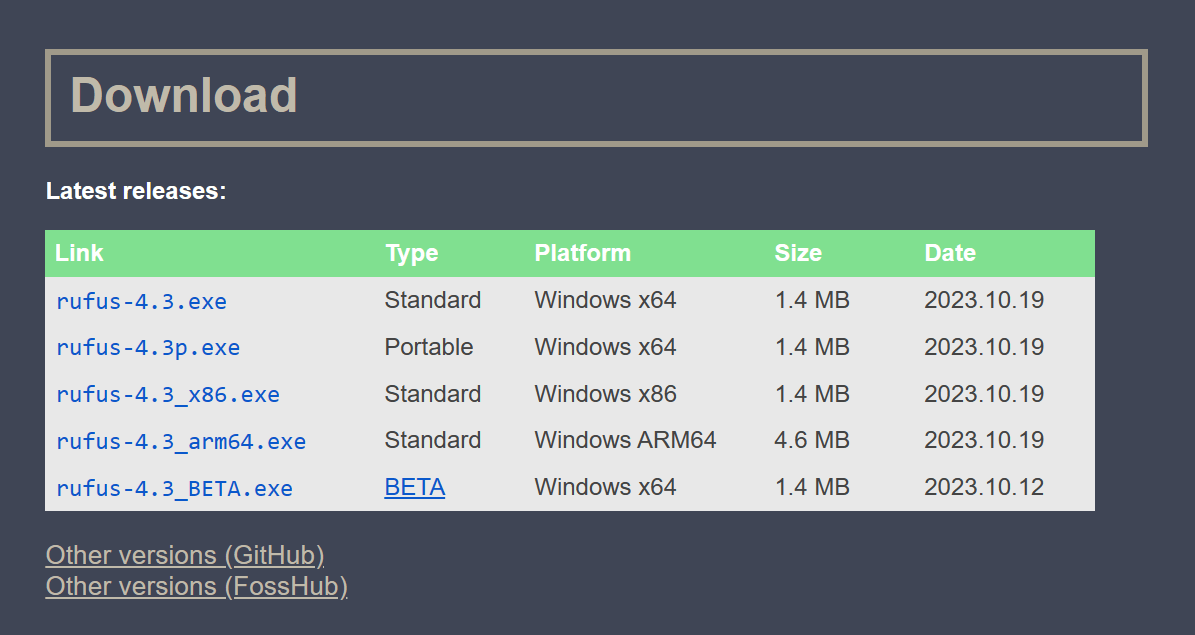
- Rufus: Go to the official Rufus website. Under the Download section, download the latest release compatible with your computer. Note that you need Windows 8 or later to use Rufus.
Use Rufus When You’ve Downloaded the ISO File
If you decided to download a Windows 11 ISO file first, you can transform it to a bootable USB drive via Rufus by following the steps below.
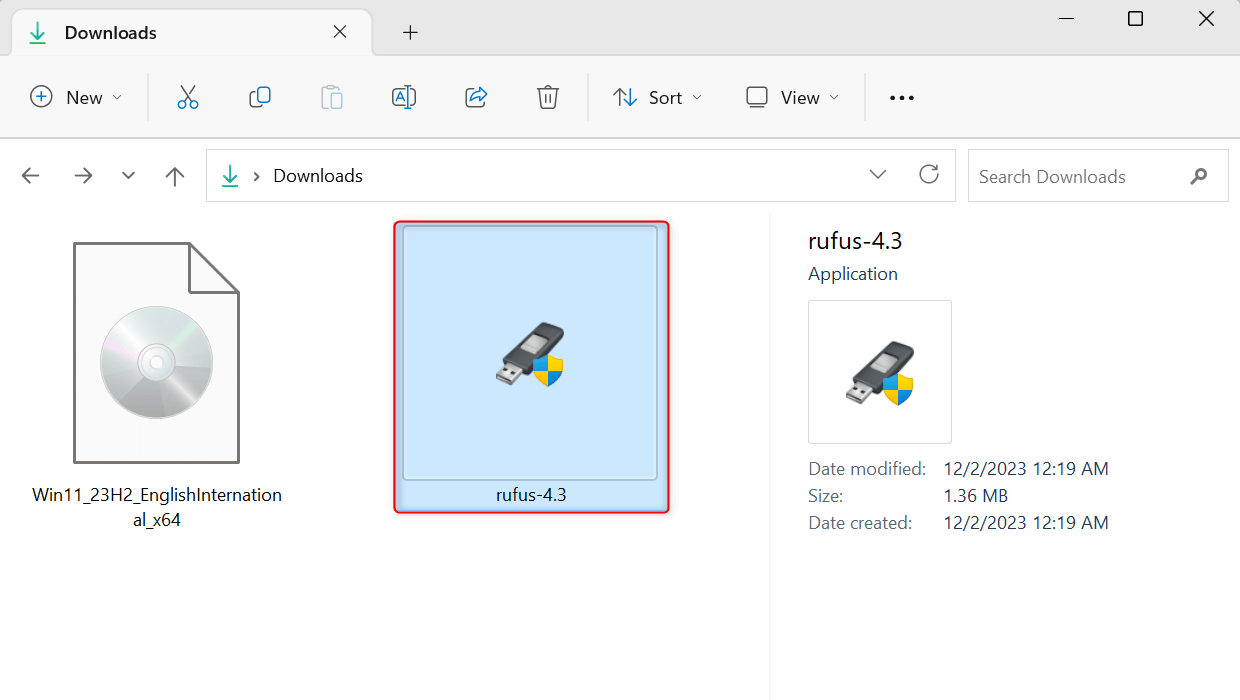
Plug in your USB flash drive to your computer’s USB port. Then, open File Explorer on your PC. From your Downloads folder (or any other folder where you saved it), find and launch the Rufus executable file.
When Rufus launches, under Device, open the drop-down selector and choose your USB flash drive.
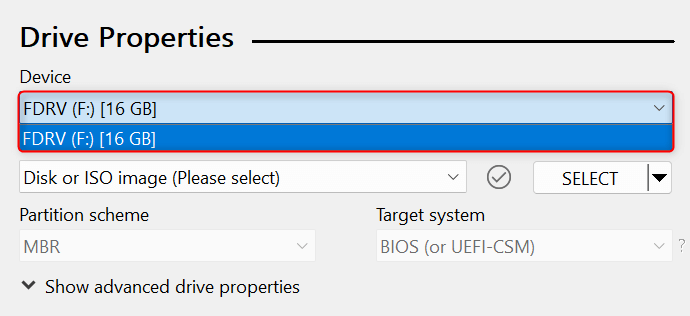
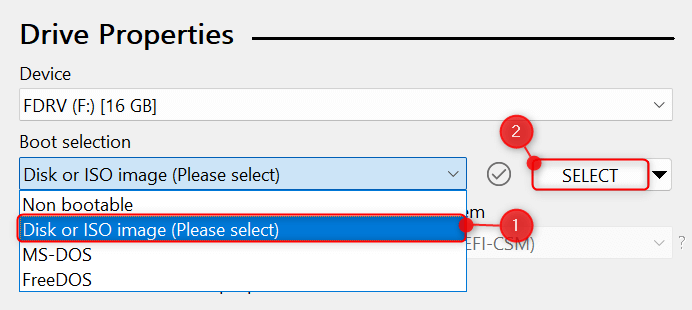
For the Boot selection section, choose Disk or ISO image (Please select). Then, click the Select button.
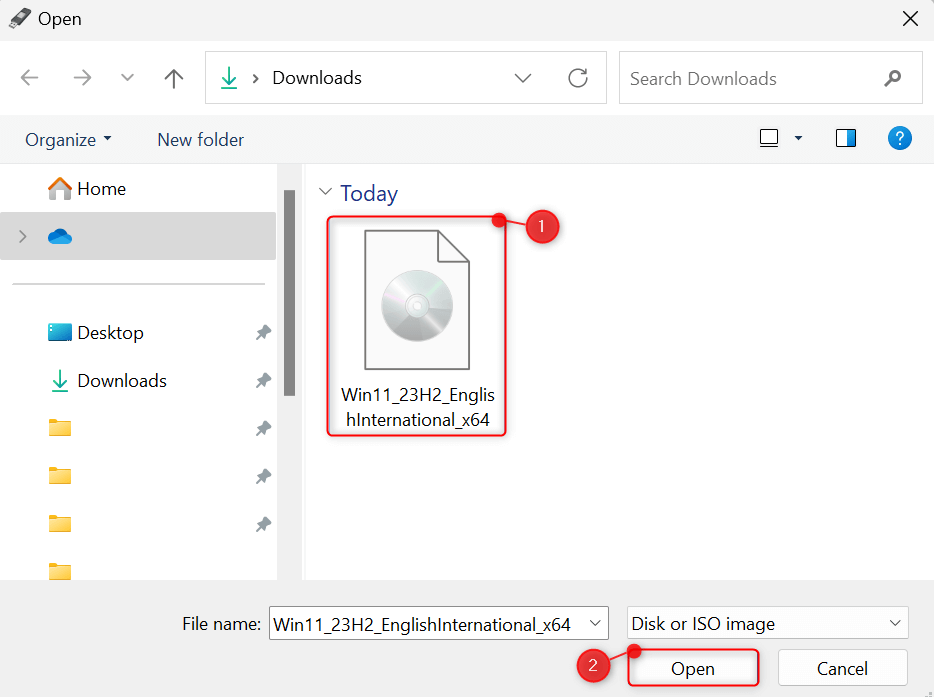
This will display a file selection interface where you can find and open your downloaded ISO file. Choose your file and click Open.
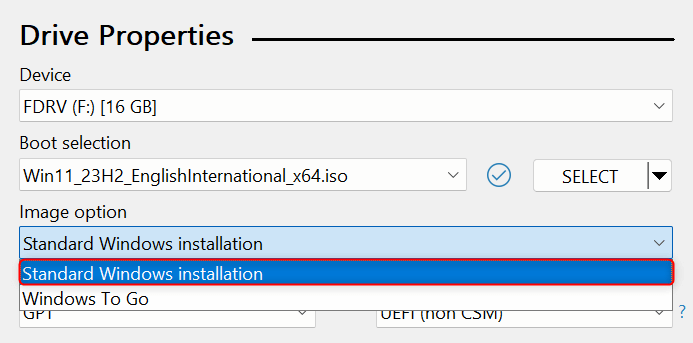
Once loaded, under Image option, open the drop-down menu and choose Standard Windows installation.
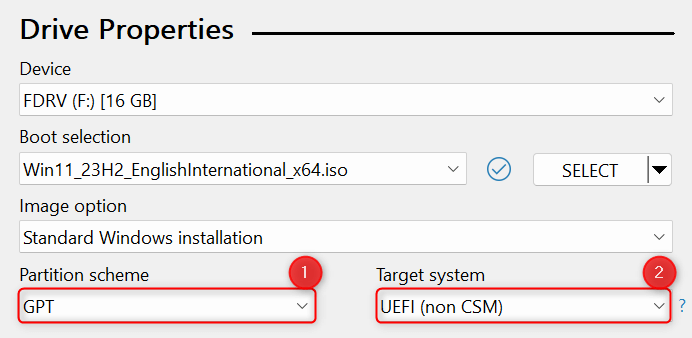
For the Partition scheme field, choose GPT. Then, for Target system, select UEFI (non CSM).
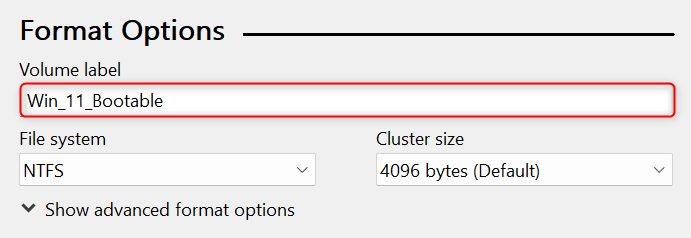
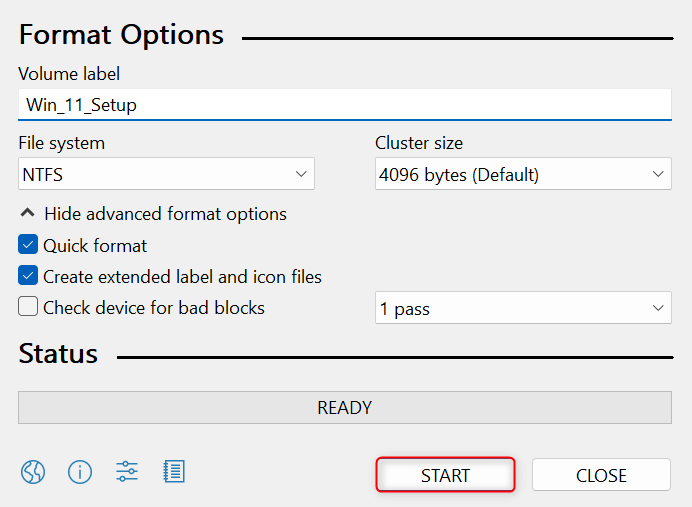
As mentioned, Rufus also wipes your USB clean before burning the ISO file. You can choose your preferences under the Format Options section. For the Volume label, simply give your USB flash drive a name, such as Win_11_Bootable.
While you can adjust your options for the File system and Cluster size fields, it’s best to leave them to their default values. Feel free to change them if you have specific requirements.
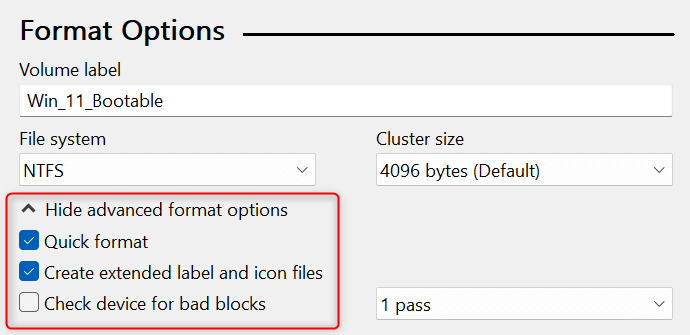
Expand the Show advanced format options menu. Then, check the boxes for Quick format and Create extended label and icon files.
Click Start.
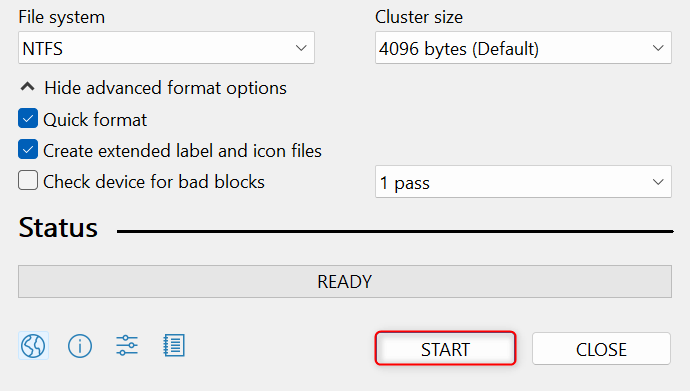
After clicking the Start button, you will see the Windows User Experience window, where you can customize your installation of the OS. Leave the options to their defaults and click OK.
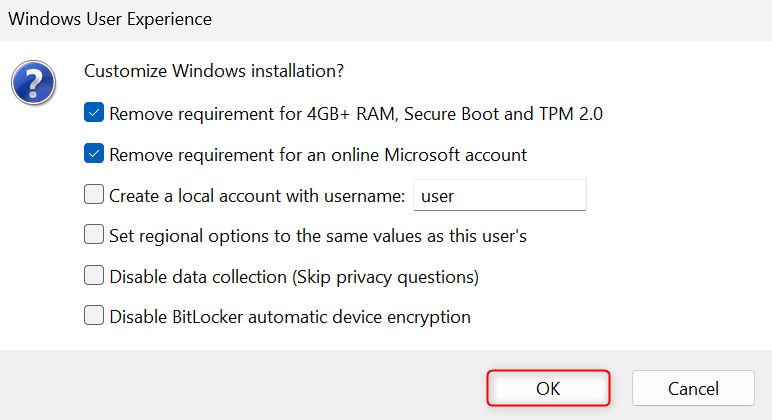
Bypassing TPM Requirements
To install Windows 11 on computers with unsupported hardware, such as mismatched memory resources, you must bypass TPM (Trusted Platform Module). Know that Windows 11 requires TPM 2.0 and other specific requirements.
You can see the option for this on the Windows User Experience window. By default, Rufus will select this automatically for you. To double-check, ensure that the option for Remove requirement for 4GB+ RAM, Secure Boot and TPM 2.0 is enabled. If you don’t need it, uncheck it.
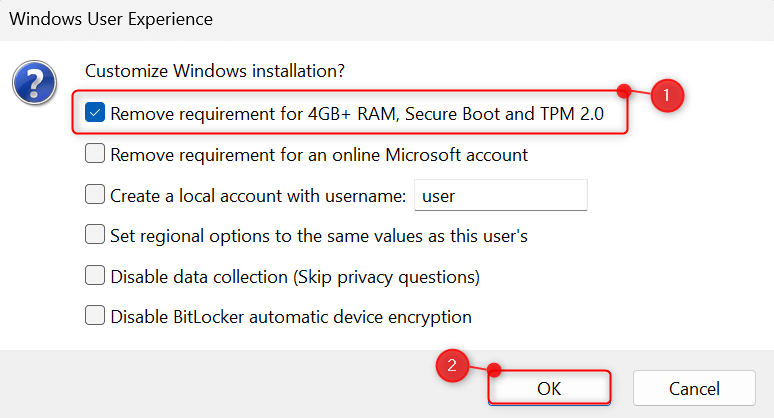
Then, click OK to finish.
Use Rufus When You Haven’t Downloaded the ISO File
Rufus allows you to download a Windows 11 ISO file directly within its interface. But the available versions might be limited—it usually loads the latest version. If you don’t have particular needs for the Windows 11 version, here’s how you use Rufus without preparing the ISO file beforehand.
Launch Rufus. Under Device, select your USB drive. Then, for Boot selection, choose Disk or ISO image (Please select). At the side of the Select button, click the drop-down arrow and choose Download.
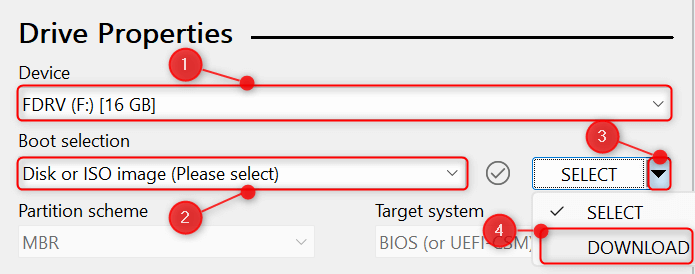
Click Download to let Rufus search and retrieve the latest ISO files for Windows. This will display the Download ISO Image window on your screen.
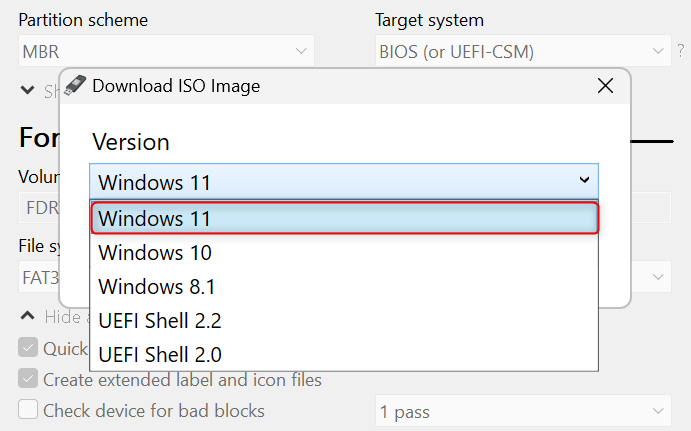
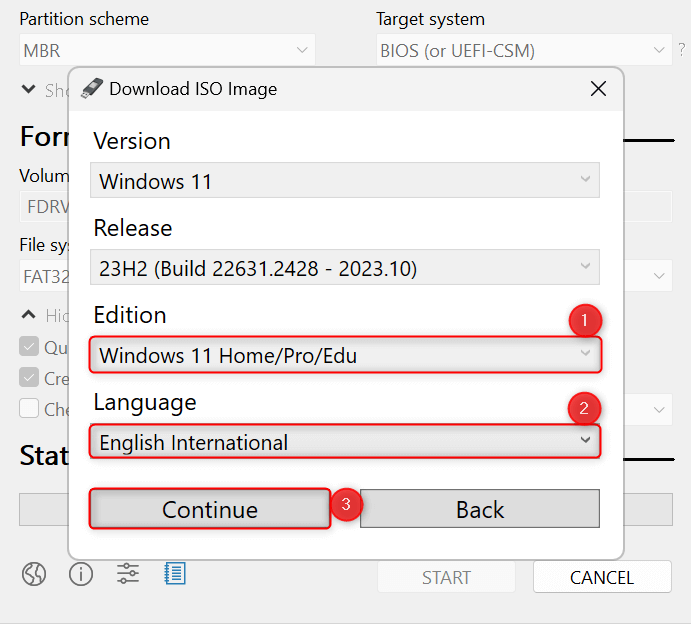
Under Version, select Windows 11 and click Continue.
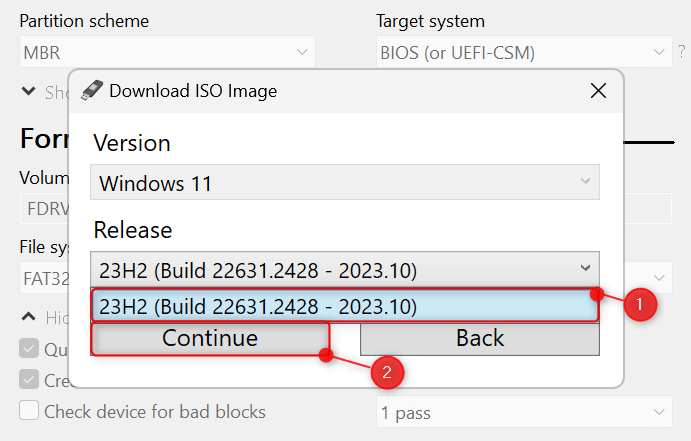
Then, under Release, choose whichever is made available to you and click Continue.
Similarly, for Edition and Language, select your preferred options and click Continue.
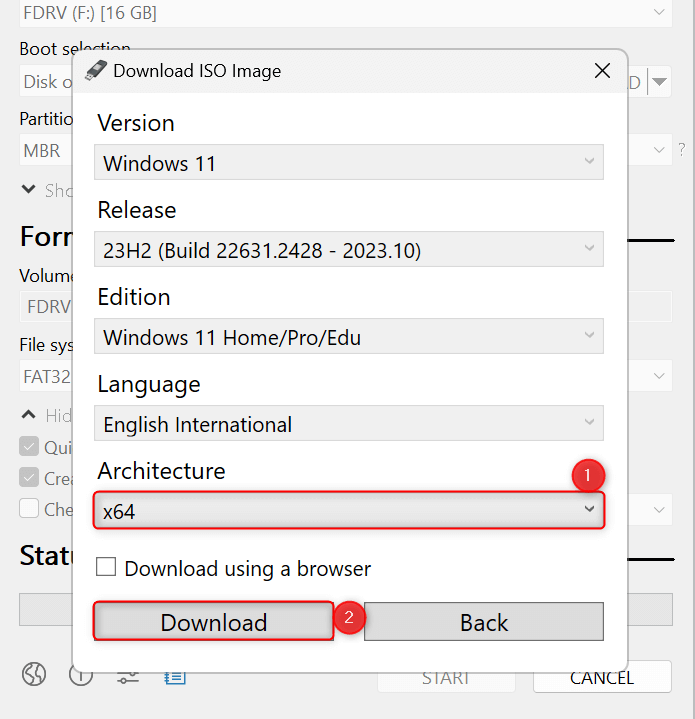
To finish your download preferences, under Architecture, choose x64 (this is required for Windows 11). Then, hit the Download button.
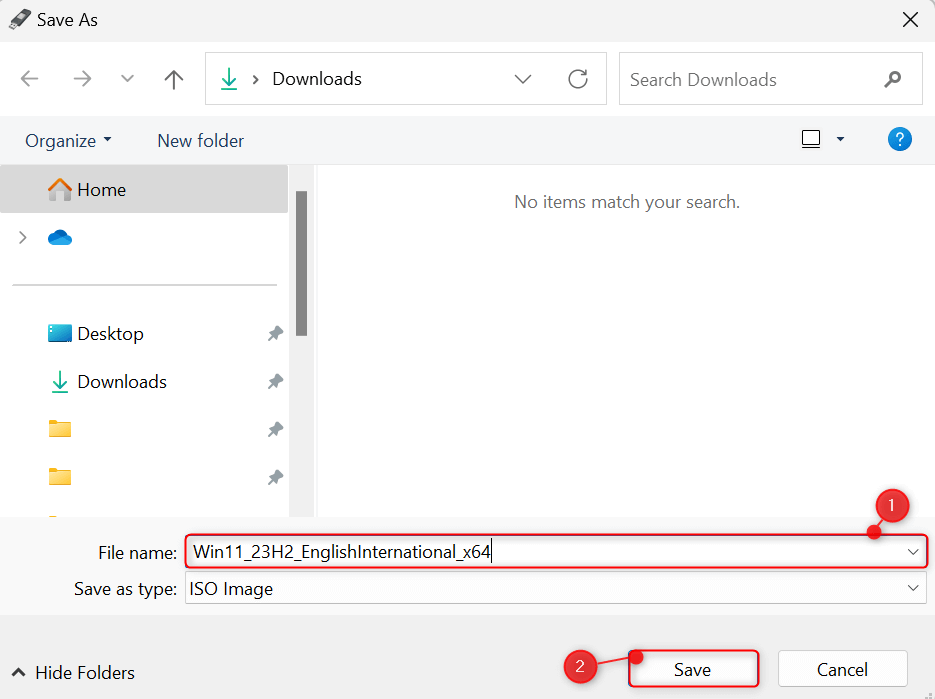
This will open the Save As interface, where you can save the ISO file to be downloaded. Give it a name (you can leave it to its default) and click Save. Then, simply wait for Rufus to finish downloading the ISO image.
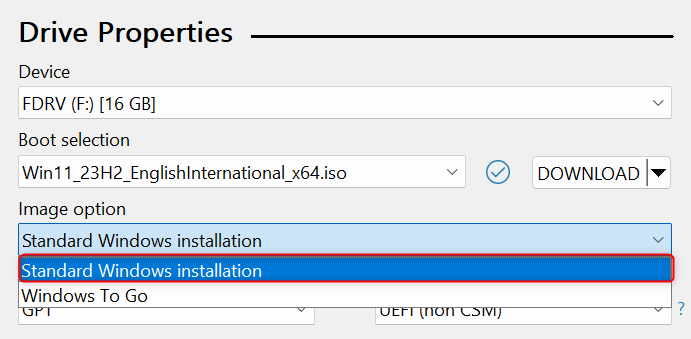
After the download process, under Image option, choose Standard Windows installation. Apart from this, under Drive Properties, leave the rest of the options as they are.
Under Format Options, choose your preferences, such as adding a volume label and selecting a file system. Once done, hit Start.
When the Windows User Experience appears, choose your installation preferences (optional). For example, you can enable or disable the option Remove requirement for an online Microsoft account. If everything’s to your taste, click the OK button to finish the process.

You can now use your bootable USB drive to troubleshoot another computer or install a fresh copy of Windows 11. Similarly, you can adjust these steps to create bootable media for other versions of the OS, such as Windows 10 and Windows 8.1. Enjoy!