
There are many reasons why you would want to change your username on Windows 10. One of these is privacy preferences. You may not be comfortable revealing your username or having it plastered on your sign-in screen. Another reason might be that you want to update your username for a change to log-in to your Windows 10 PC.
Luckily, there are multiple ways to do this. Depending on whether you use a Microsoft account or a local account with your PC, you will need to use an appropriate method to change the username on your computer.
Change Username in Windows 10 Using Settings
If you use a Microsoft account to log in to your Windows 10 computer, your account is synced from the cloud. You will need to update your account settings online if you want to change your username.
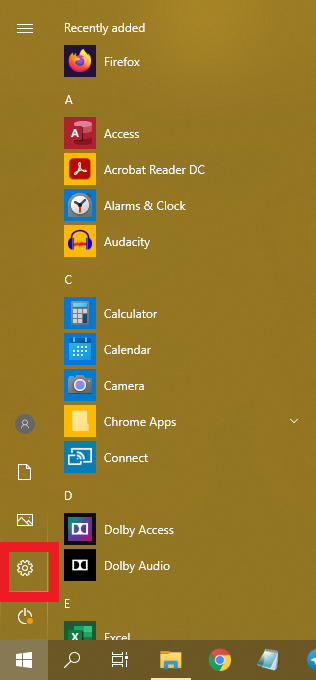
Step 1. Click on the Start Menu and open Settings.
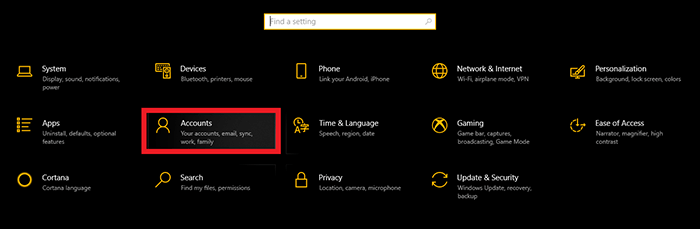
Step 2. Click on Accounts and go to the Your info tab under it
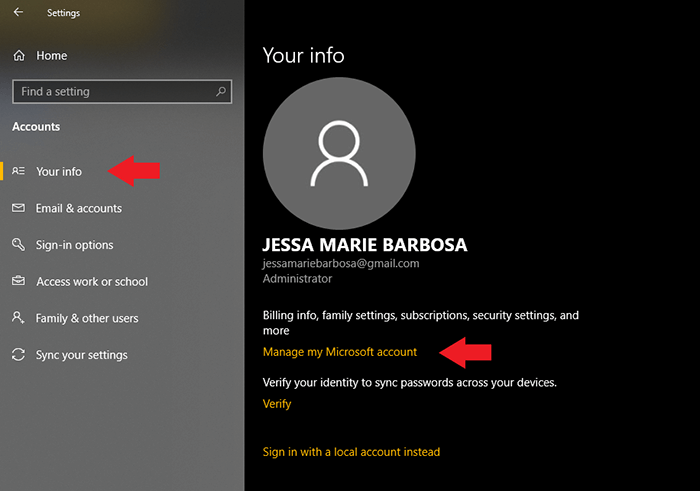
Step 3. On the right side of the pane, select Manage my Microsoft account.
Step 4. Use your login credentials to sign-in.
Step 5. Click on More actions.
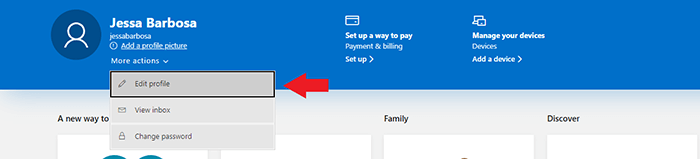
Step 6. Select Edit profile.
Step 7. Click on Edit name.
Step 8. Change your account name by entering your preferred First and Last name.
Step 9. Confirm the change by entering the challenge. This is a simple task to prove that you are not a robot.
Step 10. Click Save.
Step 11. Restart your device to apply the new changes to your username.
When your computer reboots, you may not immediately see the updated username. This usually happens due to sync delays. Wait for some time, and the username should update and appear on your machine.
Change Username in Windows 10 Using the Control Panel
This should be the preferred method if you use a local account rather than a Microsoft account with your PC. This involves using the Control Panel to change your username.
You have two methods to change your username using the Control Panel. Both are extremely easy to follow and produce the same results.
Changing the User Name with User Accounts
To change your username with the User Accounts panel, follow the below steps:
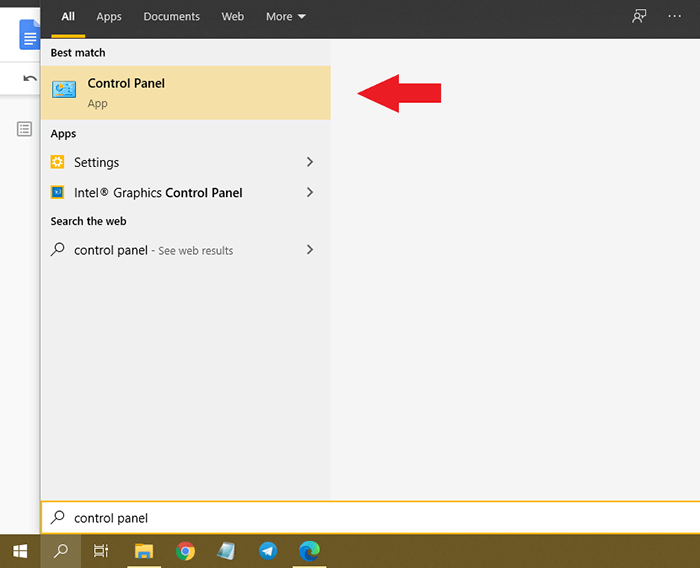
Step 1. Type Control Panel in the search bar.
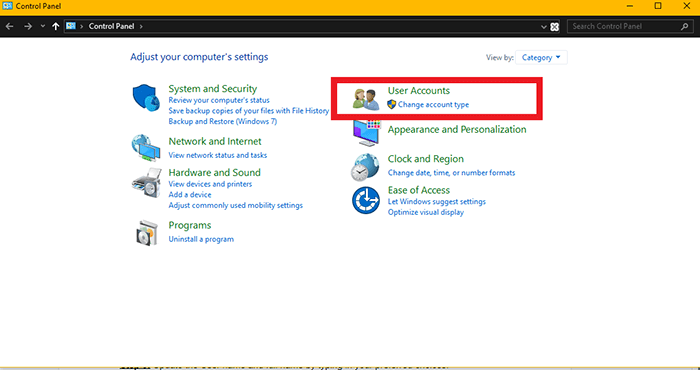
Step 2. Under User Accounts, click Change account type.
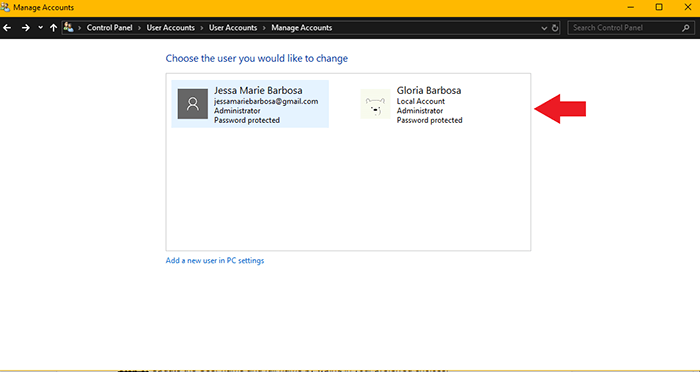
Step 3. Select the local account that you want to change.
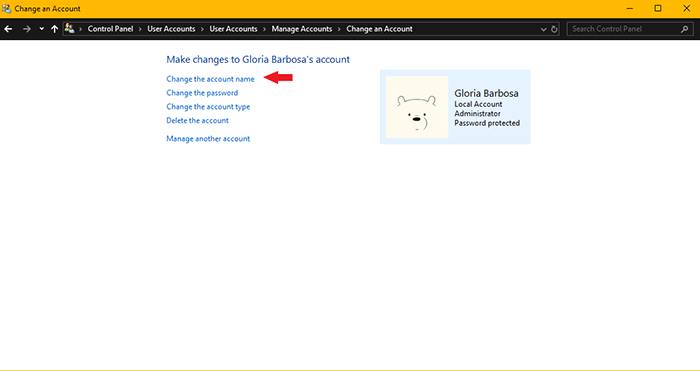
Step 4. Click Change the account name.
Step 5. Change the local account username as you want it to appear on your sign-in screen.
Step 6. Click Change Name.
After completing these steps, sign out from your account. Your new user name should show on the sign-in screen afterward.
Changing the Account Name with netplwiz
You can also change your user name by accessing it through netplwiz. Follow the below steps to do that.
Step 1. Type netplwiz in the search bar and click on the first result. The User Accounts window will open.
Step 2. Click on the Users tab.
Step 3. Select the account you want to update.
Step 4. Click Properties.
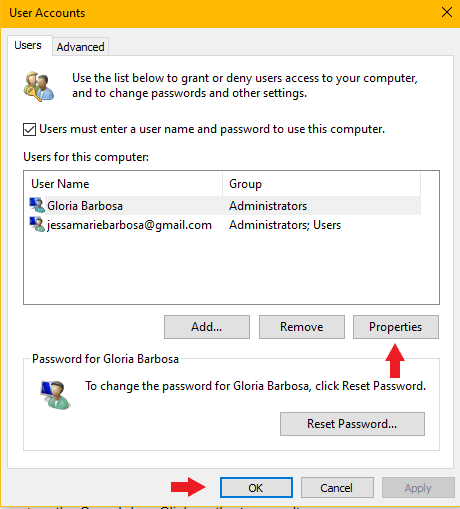
Step 5. Update the User name and full name by typing in your preferred choices.
Should you want to display your nickname instead of displaying your full name, you may leave the Full name field blank.
Step 6. Click Apply and press OK.
Step 7. Another prompt window will show up where you need to press OK once again.
Changing the User Name with Computer Management
Computer Management is a utility on your computer, and you can use it to change your username as well. The steps for changing a username with this tool are as easy as the other methods.
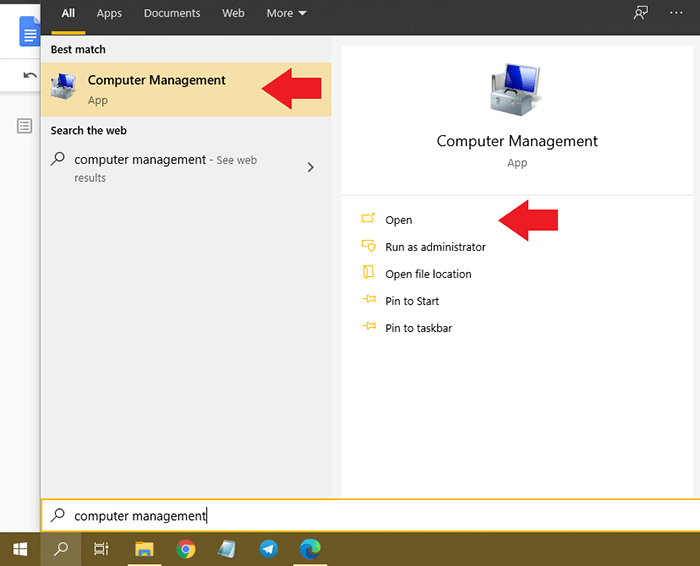
Step 1. Type Computer Management in the search bar and click on the top result.
Step 2. Expand System Tools.
Step 3. Double-click on Local Users and Groups.
Step 4. Click on Users.
Step 5. Right-click on the account you want to change and Select Properties
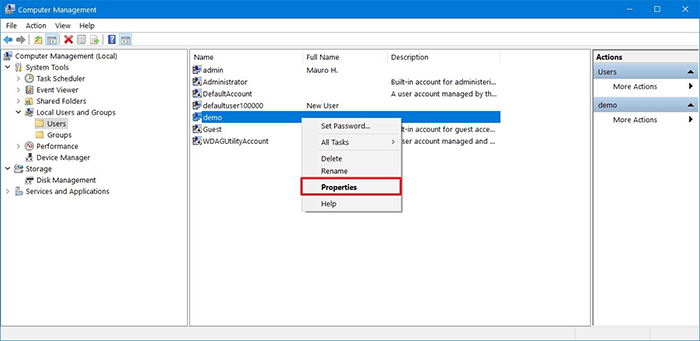
Tip: use the Rename option if you only want to change your profile’s nickname.
Step 6. Click on the General tab. Fill out and edit the Full name field.
Step 7. Click Apply followed by OK.
After completing the steps, sign out of your account and sign back in. You should see the new username on your Windows 10 sign-in screen.
These are the three methods on how you can change your username in Windows 10. It’s pretty much straightforward, but you first have to consider what type of account you’re using to log in – whether that be a Microsoft account or a local one.
Make sure that you close all applications when signing out and restarting. Should you notice that your new username isn’t registering yet, wait for your account to sync. After syncing is done, the new changes should reflect when you sign in on your computer.