- To uninstall display drivers on your Windows 11 or Windows 10 PC, press Windows + X, select Device Manager, expand Display adapters, right-click your adapter, choose Uninstall device, enable the Attempt to remove the driver for this device option, and choose Uninstall.
Whether you’re thinking to upgrade your computer’s GPU or have issues with display drivers, it’s easy to fully remove the installed display drivers from your Windows 11 or Windows 10 PC. We’ll show you how to do just that.
There are two ways to uninstall the display drivers of your Windows PC. One is by using the built-in Device Manager, whereas the other method requires you to install a third-party tool. We recommend using the Device Manager method and only use the third-party tool if the first method doesn’t fully remove the drivers.
Remove Nvidia, AMD, and Other Display Drivers With Device Manager
Device Manager is your go-to hub for managing drivers on your computer. It allows you to install, enable, disable, and uninstall drivers with ease. To uninstall the display driver using Device Manager, follow these steps.
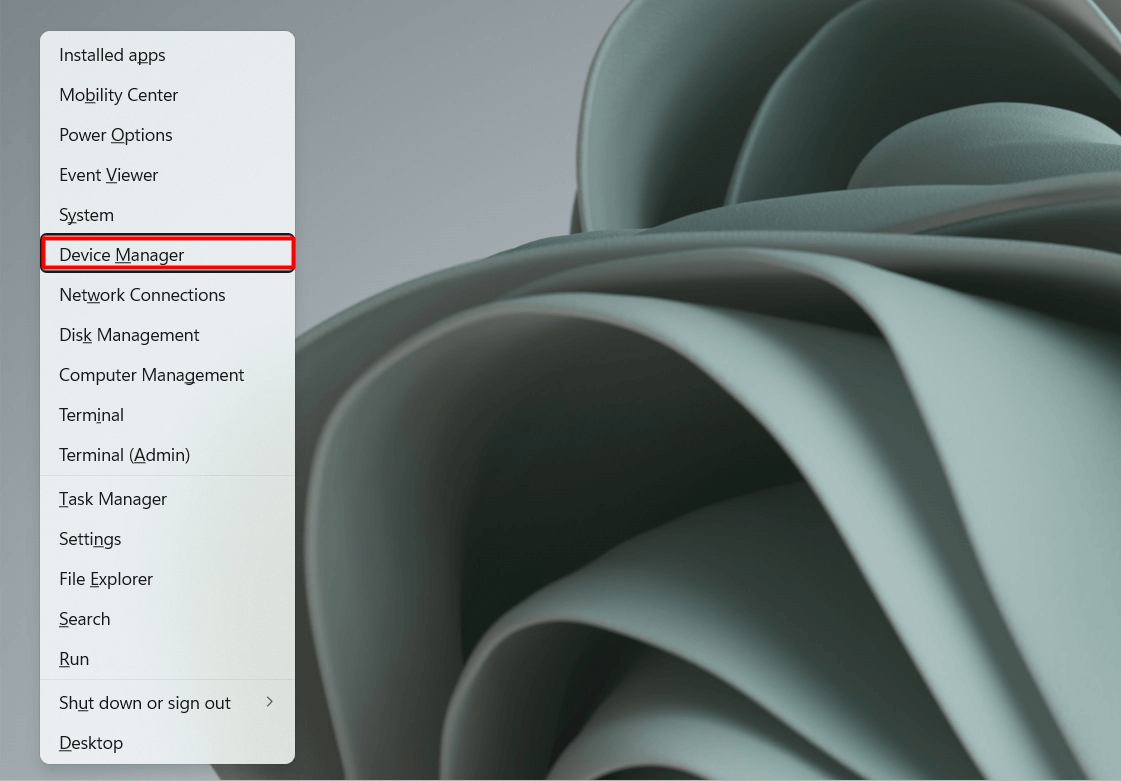
Press the Windows + X keys to open the Power User Menu, and select Device Manager from the list.
In Device Manager, double-click Display adapters to view the display drivers installed on the computer.
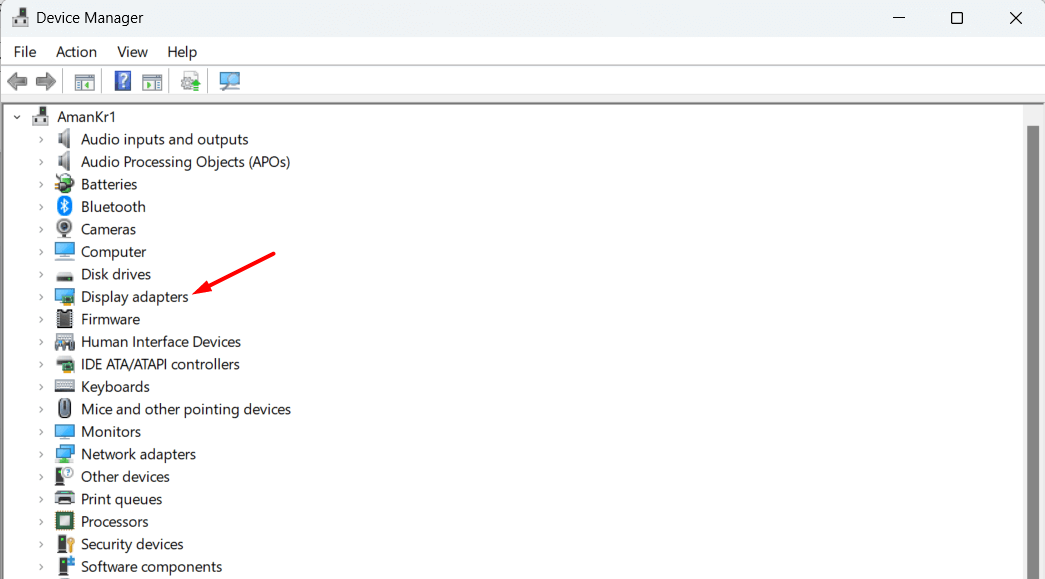
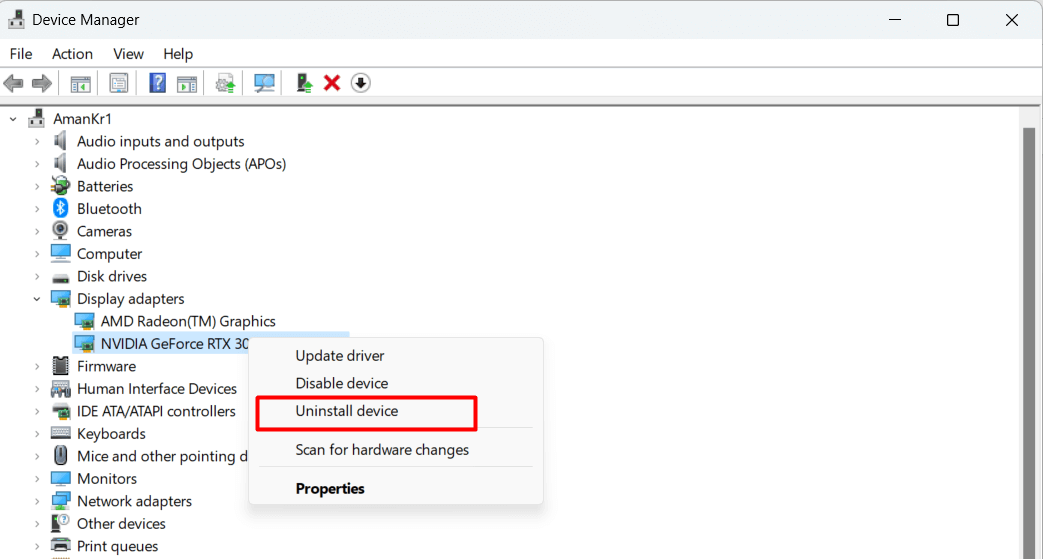
Right-click the display driver you want to uninstall. For example, if you want to uninstall the Nvidia display driver, right-click it and choose the Uninstall device option.
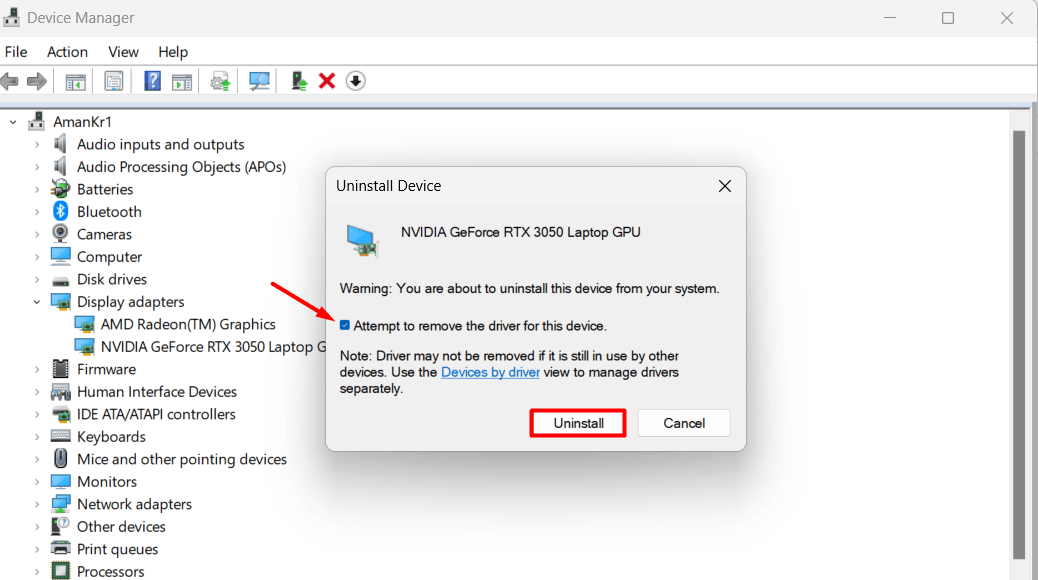
On Windows 11, check the Attempt to remove the driver for this device box. On Windows 10, enable the Delete the driver software for this device option.
Then, click Uninstall to confirm your selection.
Device Manager will uninstall the installed display driver.
Delete Drivers Using Display Driver Uninstaller (a Free Third-Party App)
If your driver leaves leftover files behind, or your issue still isn’t fixed, use a free third-party app called Display Driver Uninstaller (DDU) to fully remove the display drivers from your Windows 11 or 10 PC.
To get started, download the Display Driver Uninstaller tool from the Wagnardsoft website.
Open the downloaded file and follow the on-screen instructions to extract the app archive.
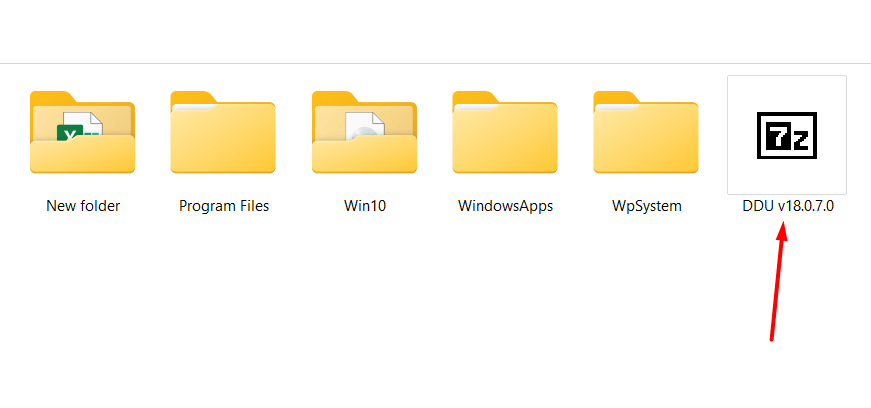
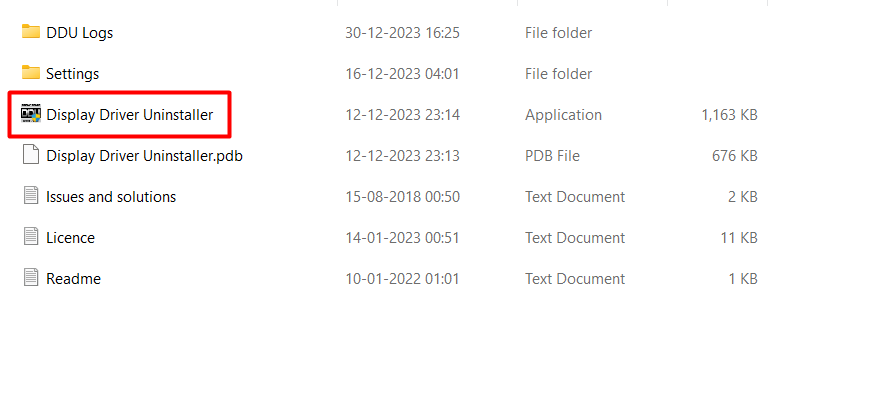
Once the extraction is complete, go to the folder where you extracted the file and double-click the Display Driver Uninstaller file to open it.
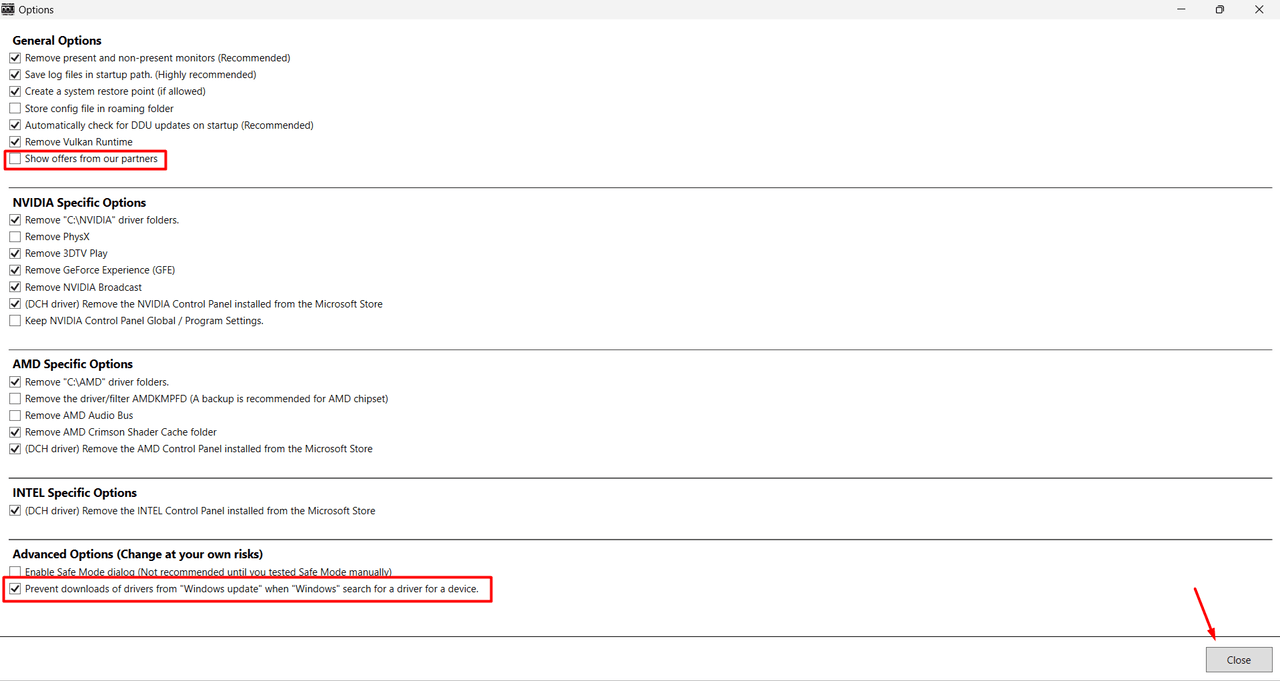
In the top-right corner of the screen, click Options.

Uncheck the Show offers from our partners box.
Check the Prevent downloads of drivers from “Windows update” when “Windows” search for a driver for a device box.
Then, click Close.
From the Select device type drop-down menu, choose GPU. The tool automatically detects the GPU currently installed on your computer and shows it on the screen. If this doesn’t happen, choose your GPU from the Select device drop-down menu.
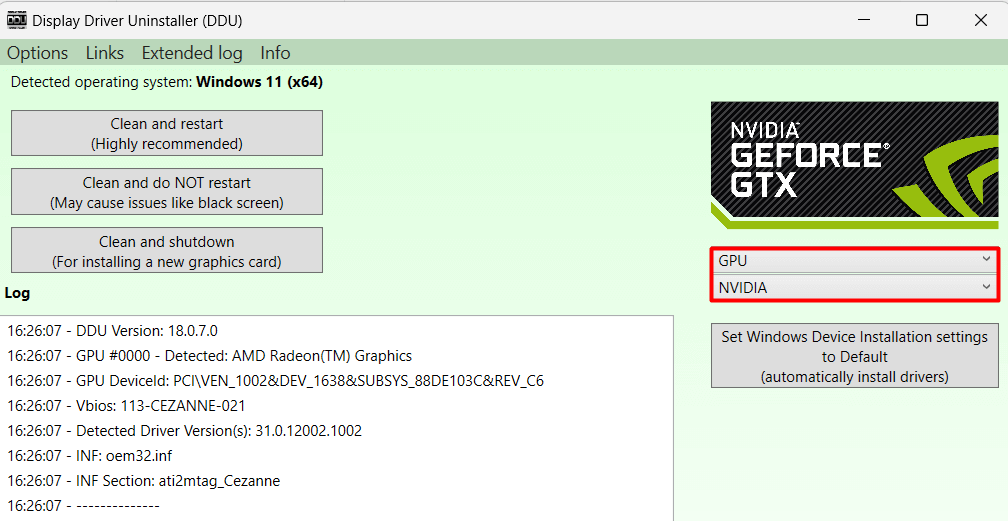
If you want to install the new graphics card right away, click the Clean and shutdown button. If you’ve already installed the new graphics card and just want to clear the files of the previous one, click the Clean and restart button.
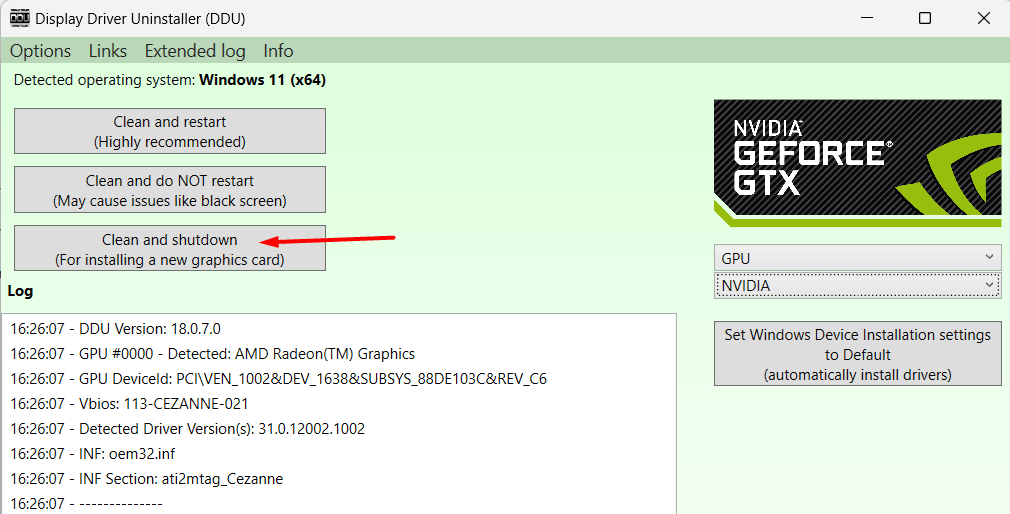
DDU will take some time to remove all the files of the selected graphics card. You can see the progress status in DDU’s log box. Once the process is complete, you can install the new graphics card.
How to Clean Install Your Display Drivers
Once you’ve uninstalled the current display driver, you’re all set to clean install the new display drivers. The best way to install the display driver is through Windows Update.
As it turns out, whenever you install new hardware on your computer, you can download its driver through Windows Update. Here’s how to do it:
Note: The following instructions are for Windows 11. On Windows 10, you’ll navigate to Settings > Update & Security > Windows Update > View optional updates and download and install the available updates.
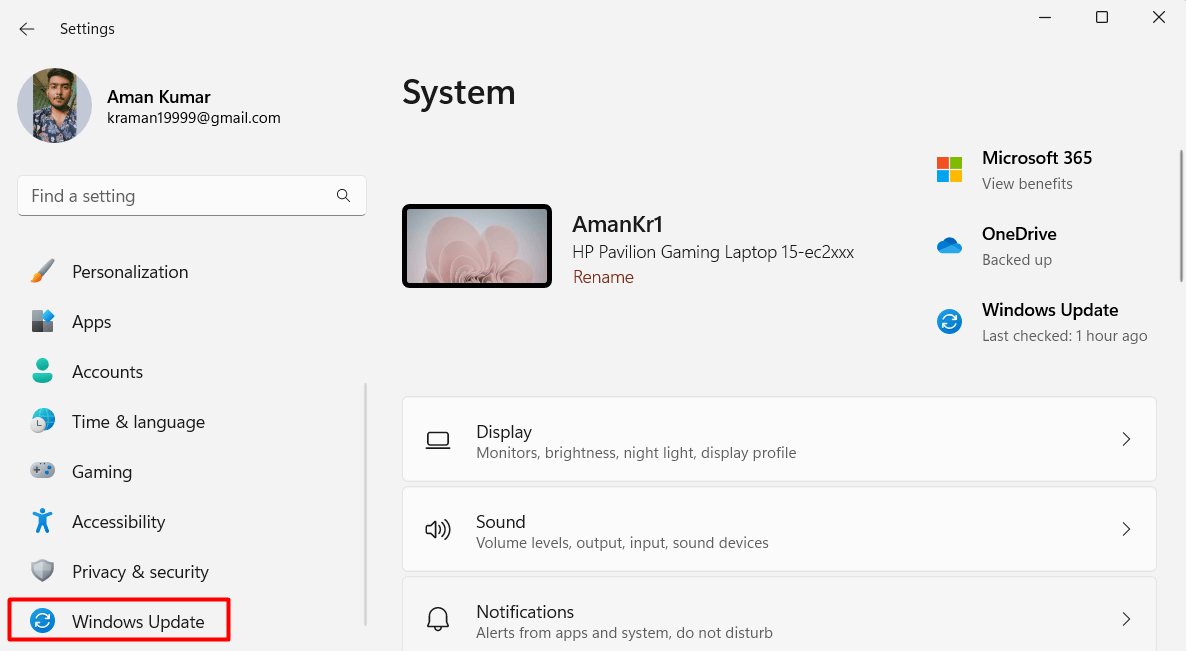
Press the Windows + I keys to open the Settings app. In the Settings app, click Windows Update.
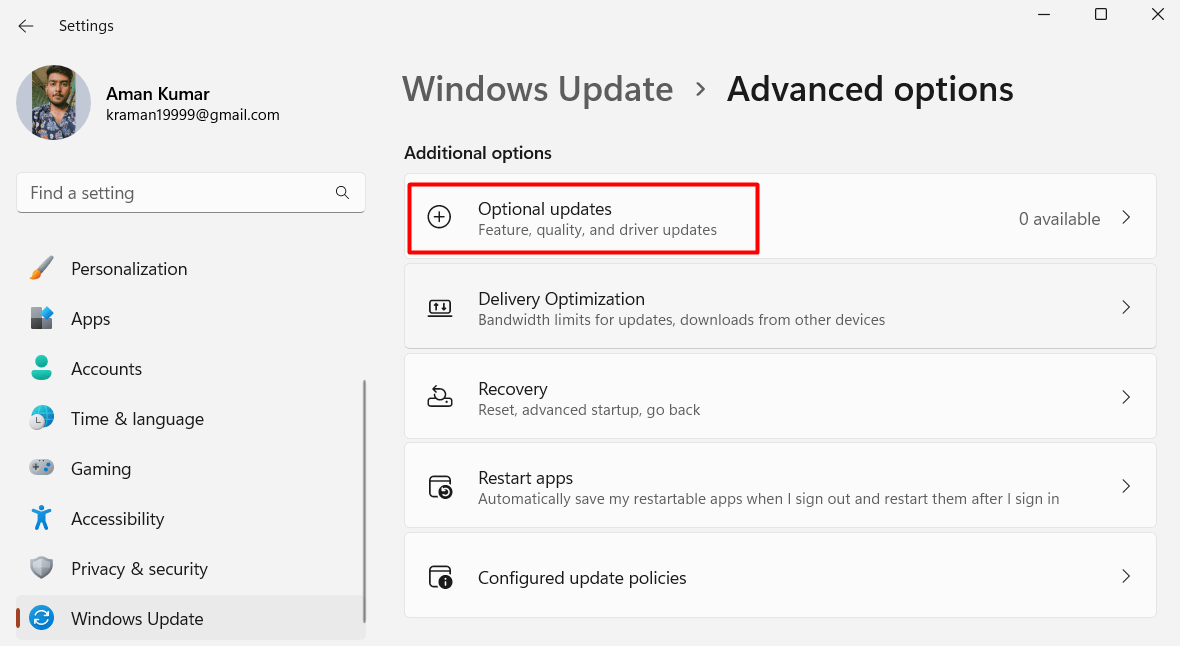
Click Advanced options.

Under the Additional options section, click Optional updates.
Select the driver you want to install. In this case, select your display driver and click the Download & install button.
Once the installation is complete, restart your computer to see the changes.
Alternatively, directly download the display driver from the manufacturer’s website and manually install it:
And that’s all you need to know about uninstalling your display driver. You won’t have any problems installing a new one after wiping the old one clean. Enjoy!