
- To permanently turn off automatic updates in Windows 11’s Pro or Enterprise edition, open Run, type gpedit.msc, press Enter, navigate to Computer Configuration > Administrative Templates > Windows Components > Windows Update > Manage end user experience, double-click Configure Automatic Updates, choose Disabled, and select Apply > OK.
- In Windows 11’s Home edition, open Run, type regedit, press Enter, navigate to Computer\HKEY_LOCAL_MACHINE\SOFTWARE\Policies\Microsoft\Windows, right-click Windows, select New > Key, enter AU as name, right-click AU, choose New > DWORD (32-bit) Value, enter NoAutoUpdate as name, open this value, enter 1 in Value data, select OK, and reboot PC.
Tired of Windows downloading updates on its own? Whether you’re on a tight data plan or have software that might clash with Windows updates, you have options. Here are three ways to turn off automatic updates on Windows 11’s Pro, Enterprise, and Home editions.
If you aren’t sure what edition you’re running, head into Settings > System > About > Windows specifications, and look for the value next to Edition.
Pause (and Not Totally Turn Off) Automatic Updates
The fastest way to disable automatic updates on Windows 11 is through the Settings app. This method is ideal if you need to pause updates for a specific period, not disable them entirely. Here’s how to do it.
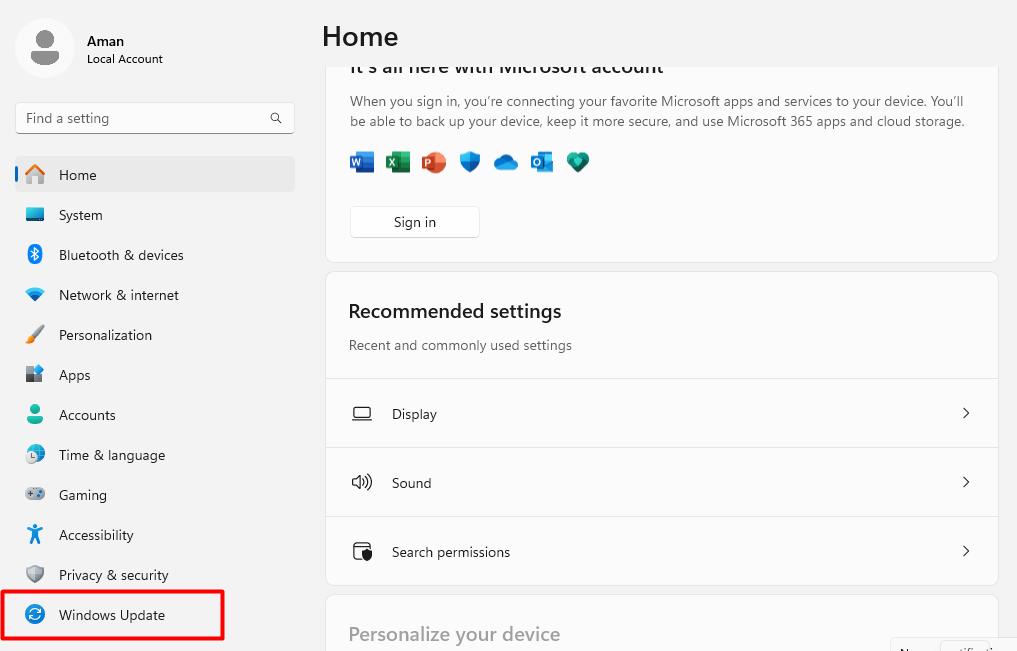
Press the Windows + I keys to open Settings and click Windows Update in the left sidebar.
Under More options, click the drop-down menu next to Pause updates and choose your desired duration. For instance, select Pause for 1 week to stop Windows from looking for updates for that timeframe.
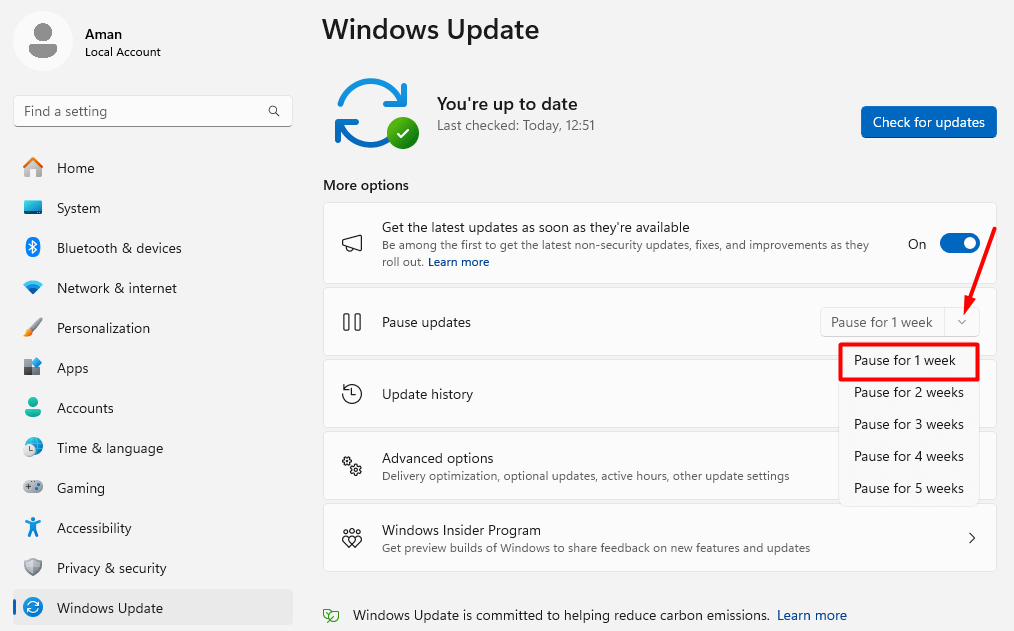
Once paused, Windows won’t download any updates. If you want to continue receiving updates, click the Resume updates option.

Permanently Disable Updates in Windows 11 Pro and Enterprise Editions
The Settings app lets you pause updates for a set period. If you want to disable automatic updates entirely until you manually re-enable them, use the Local Group Policy Editor. This tool, however, is only available in Windows 11 Pro and Enterprise editions, not the Home edition (see method below if you’re a Home edition user).
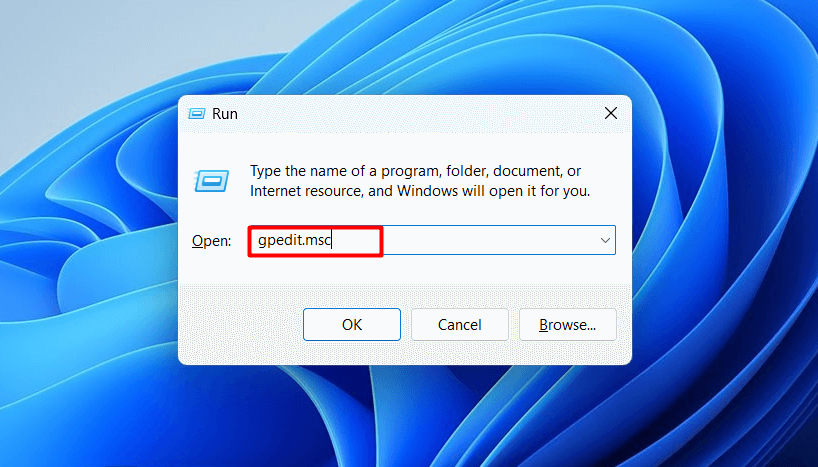
To begin, press the Windows + R key to open the Run dialog box, type gpedit.msc in the box, and click OK.
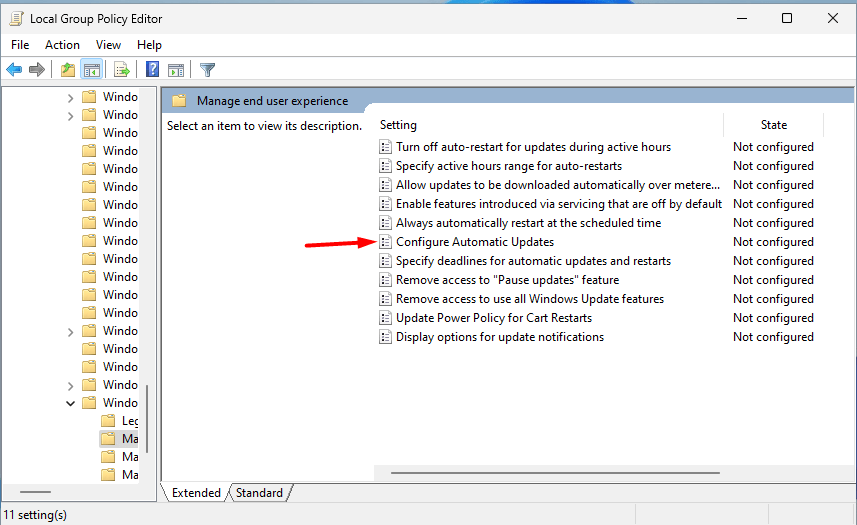
In the Local Group Policy Editor, head towards the following location:
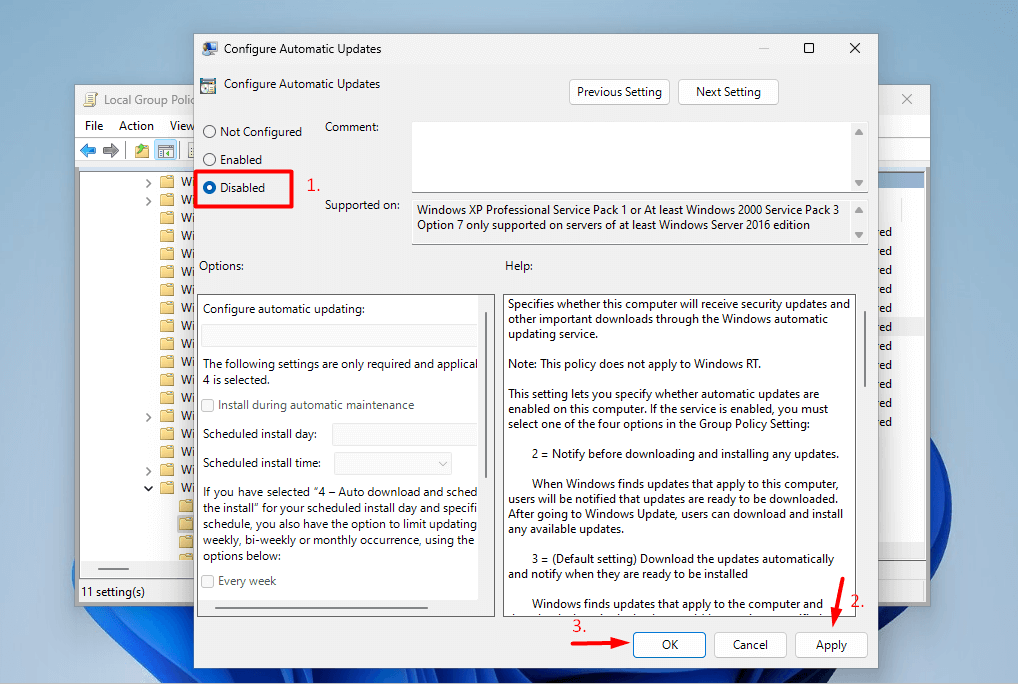
Computer Configuration > Administrative Templates > Windows Components > Windows Update > Manage end user experience
Double-click the Configure Automatic Updates policy.
Choose Disabled and then click Apply > OK to save the changes.
After that, restart your computer. Upon restart, you will see that Windows is no longer searching for updates.
If you want to reverse the settings, simply choose the Not Configured option for the Configure Automatic Updates policy and save the changes.
Permanently Disable Updates in Windows 11 Home Edition
In Windows Home edition, you can completely turn off automatic Windows updates using the Registry Editor. However, editing the registry is risky, as one wrong move can make your system unstable. Therefore, make sure to back up the registry and create a restore point to be on the safe side. Then, follow these steps.
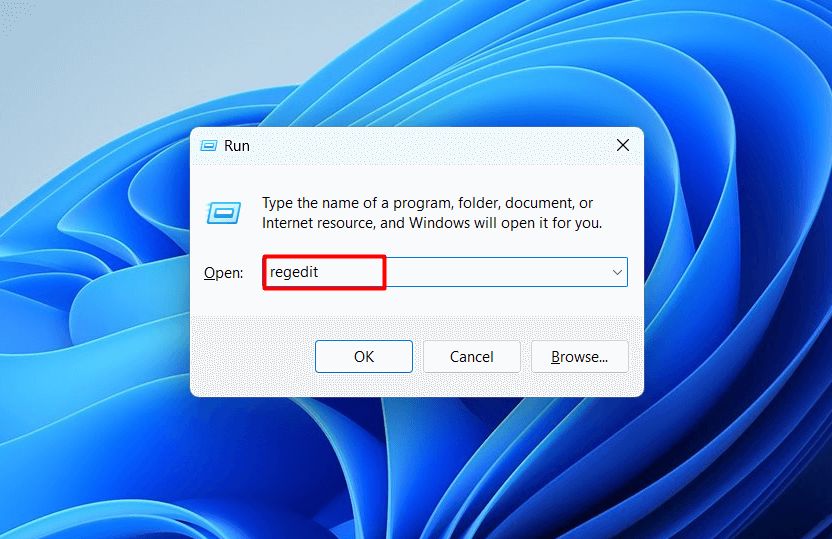
Open the Run dialog box by pressing Windows + R, type regedit, and hit Enter. In the User Account Control prompt, select Yes.
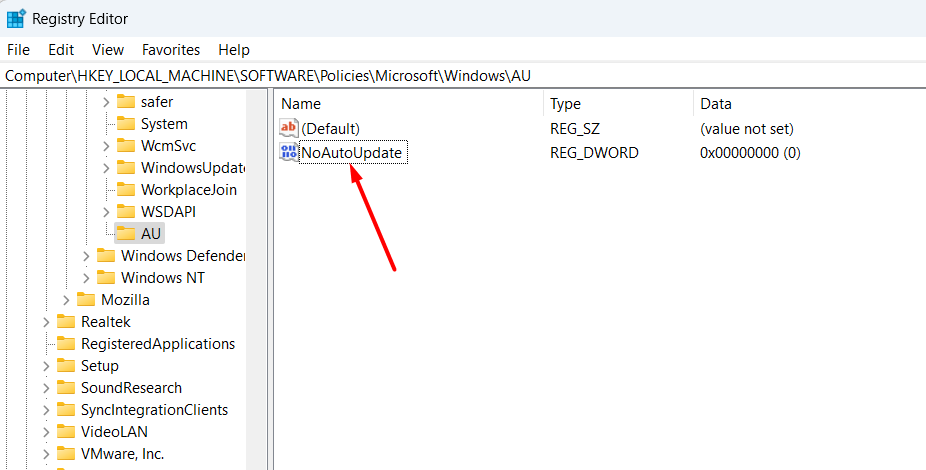
Navigate to the following location in the Registry Editor:
Computer\HKEY_LOCAL_MACHINE\SOFTWARE\Policies\Microsoft\Windows
Right-click the Windows key, hover over New, and choose Key.
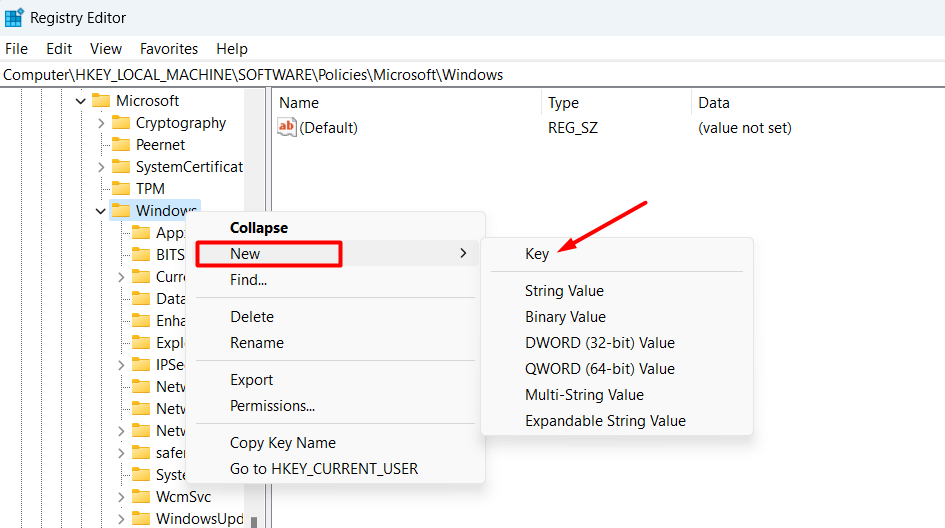
Name the key AU and hit Enter.
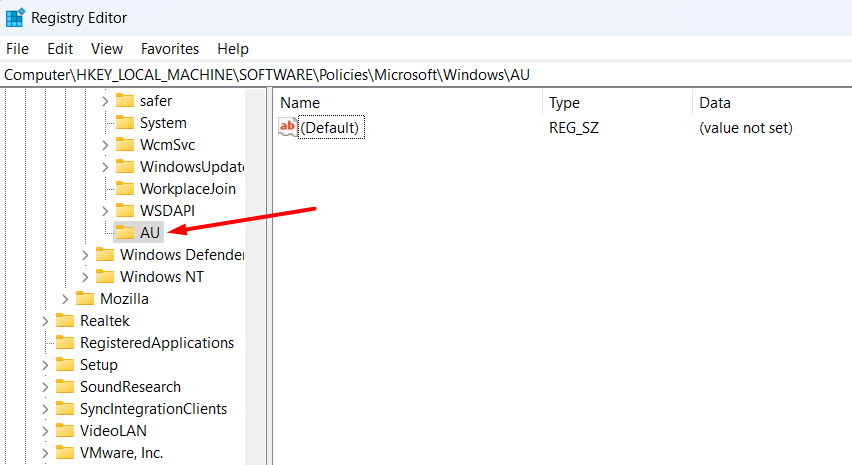
Right-click the AU key, hover over New, and select DWORD (32-bit) Value.

Name the value NoAutoUpdate and hit Enter.
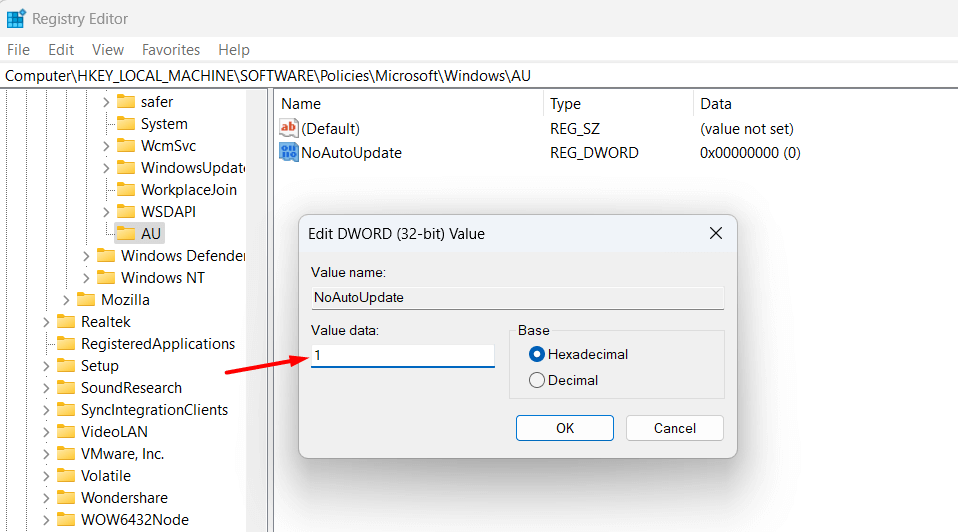
Double-click the NoAutoUpdate value, type 1 in the Value data field, and click OK.
After that, restart your computer for the changes to take effect. Windows will no longer automatically download updates.
In the future, if you want Windows to start downloading updates automatically again, type 0 in the Value data field of the NoAutoUpdate value and then save the changes.
Should You Disable Automatic Updates?
It’s always recommended to keep your Windows computer updated. This ensures you have access to the latest features, improved performance, and, most importantly, vital security patches to protect your computer against known vulnerabilities and malware.
However, if you’re on a limited data plan, don’t want Windows updates to disrupt your workflow, or have other reasons, you can temporarily disable updates on your computer. Just remember to re-enable them once you’re finished to ensure your system remains protected and up-to-date.