![]()
- Open the Start menu and click Settings (a gear icon). Go to Devices > Printers & scanners. Turn off Let Windows manage my default printer. Select a printer and click Manage. In the next screen, choose Set as default.
- You can also use Control Panel to set your default printer.
Do you have a favorite printer you want to use for printing your documents? If you do but always find yourself manually selecting it every time, we have you covered. Our guide below will walk you through how to set a default printer on Windows 10.
With Settings
If you want to set your default printer on Windows 10, you have to navigate your Settings. This method is more intuitive than the alternative since you’ll see the option more easily. Follow the steps below to know how.
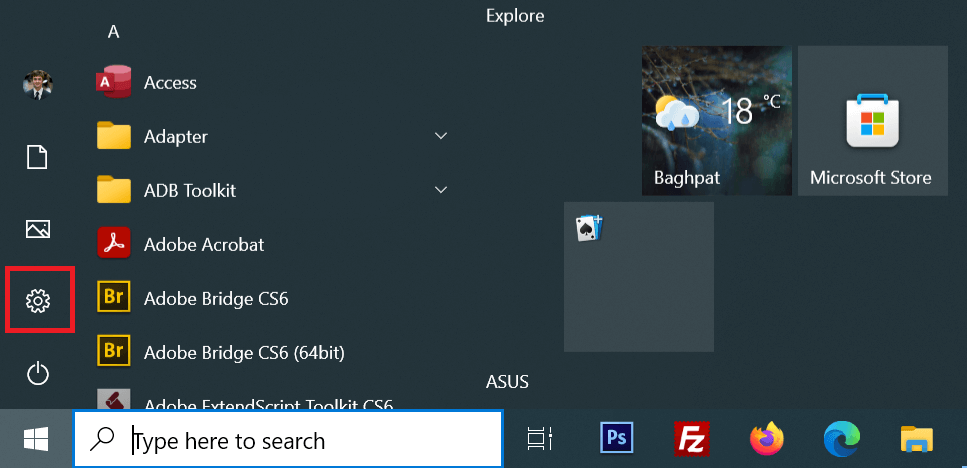
Click the Start button and choose Settings (the gear icon above the Power button).
At the top-center of the Settings window, select Devices.
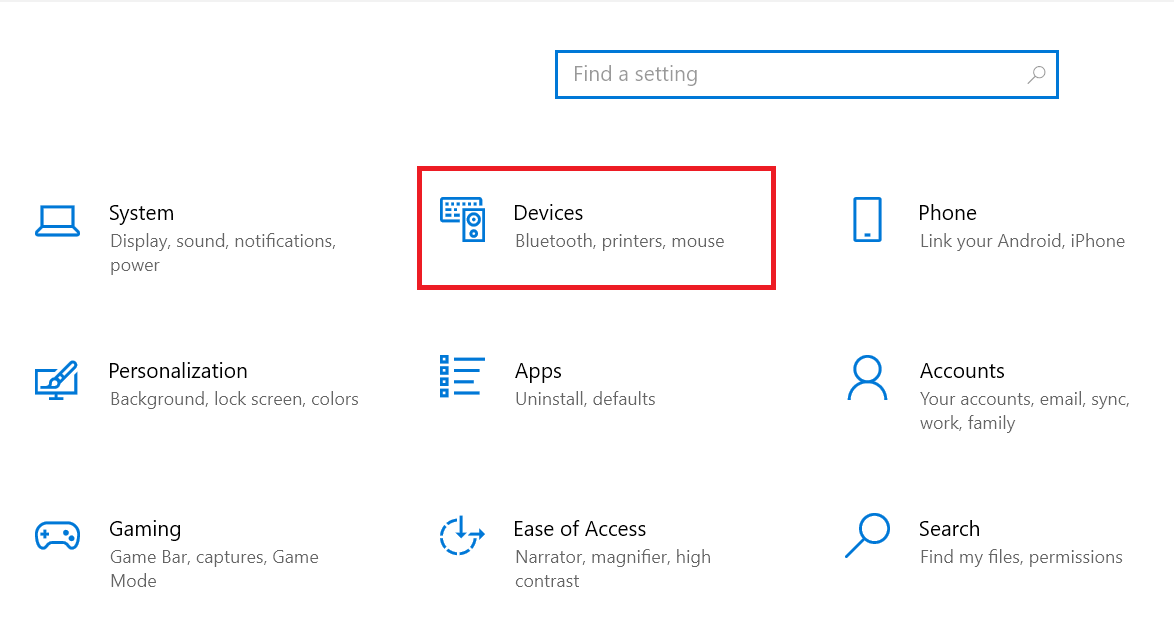
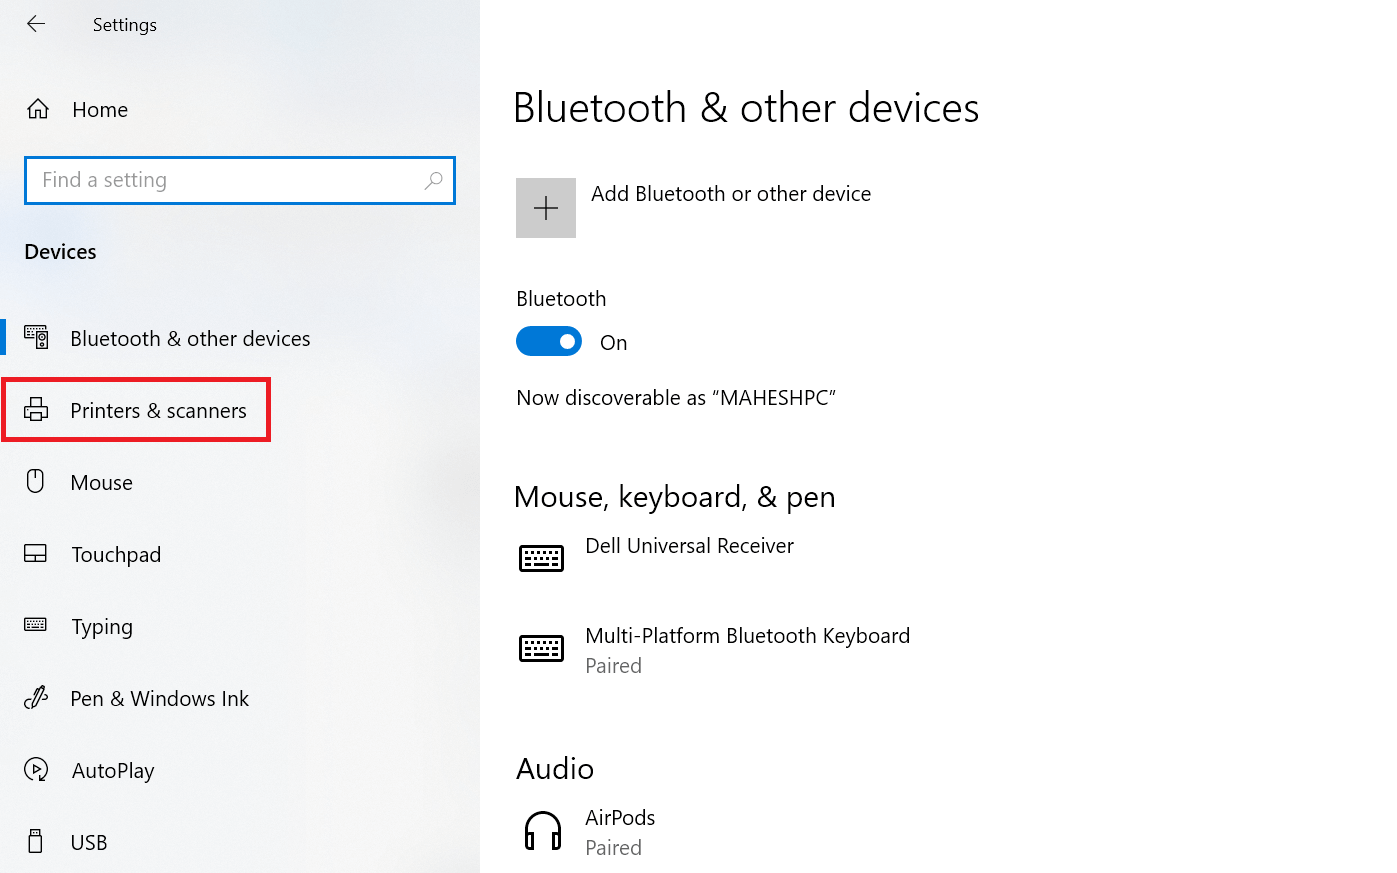
From the left side panel that appears, choose Printers & scanners.
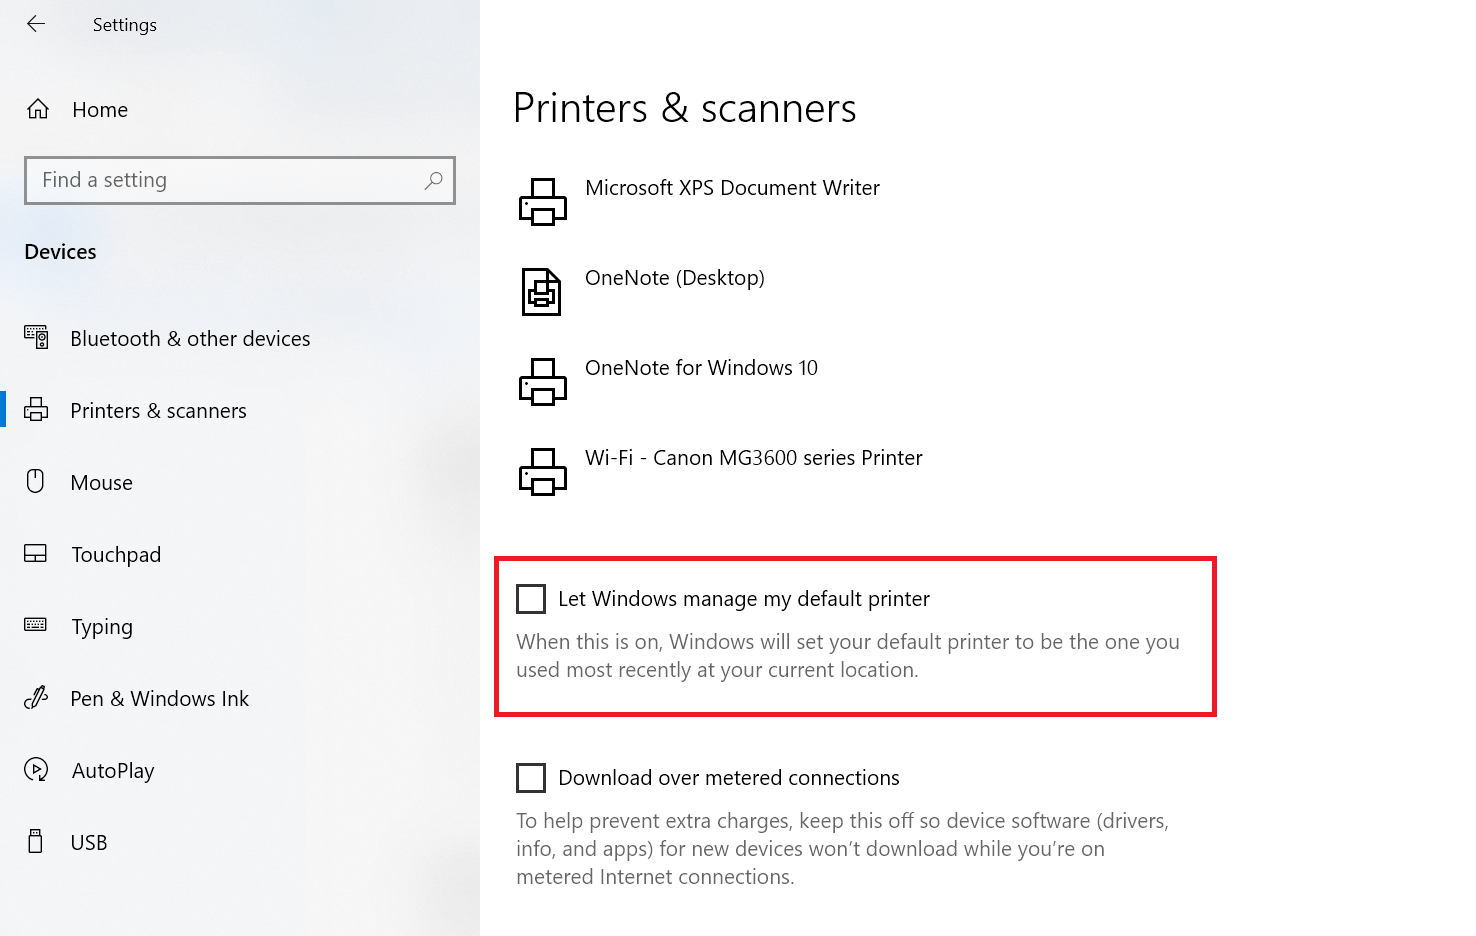
Scroll to the bottom of the page. Then, uncheck the Let Windows manage my default printer option. If this option isn’t disabled, you won’t be able to choose your preferred printer.
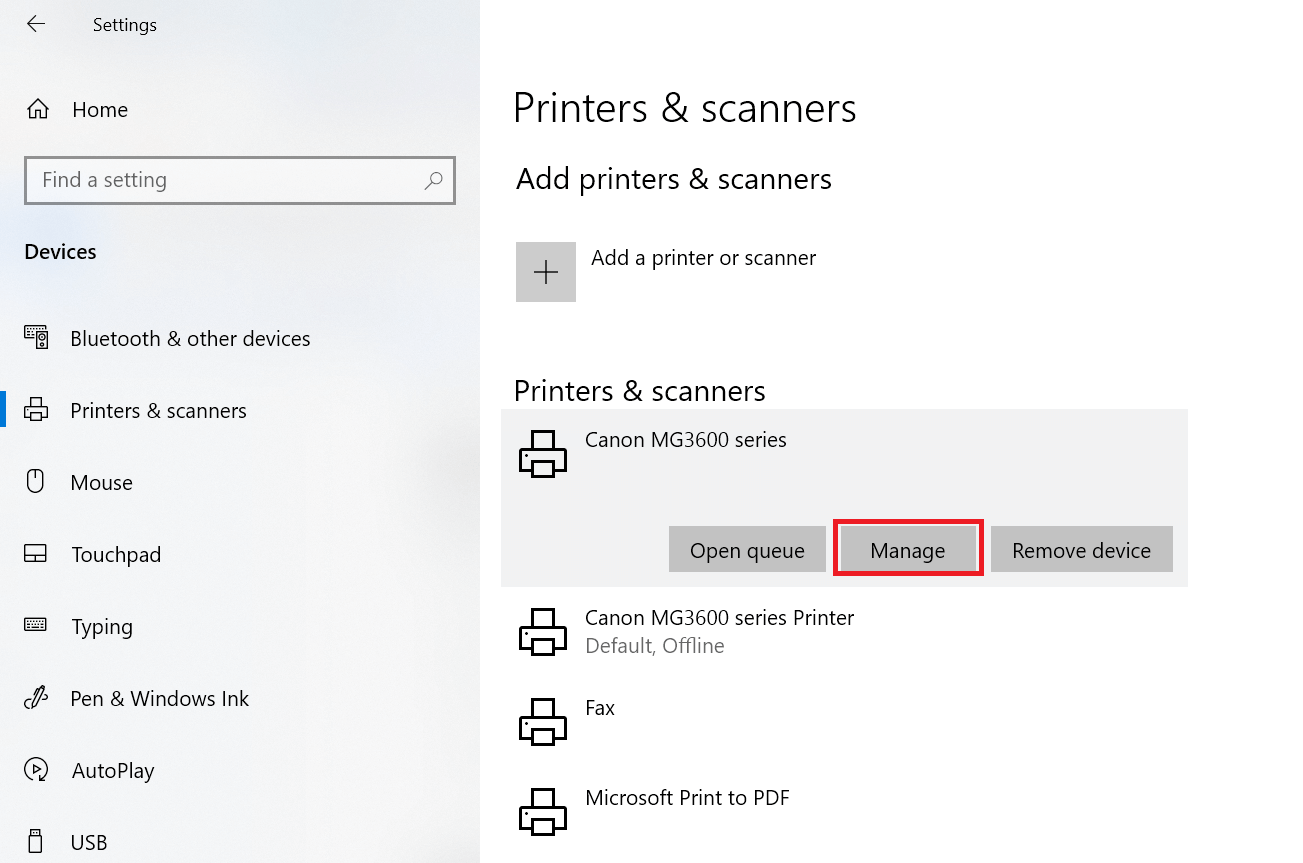
Click your desired printer’s name. Then choose Manage.
On the window that appears, select Set as default.
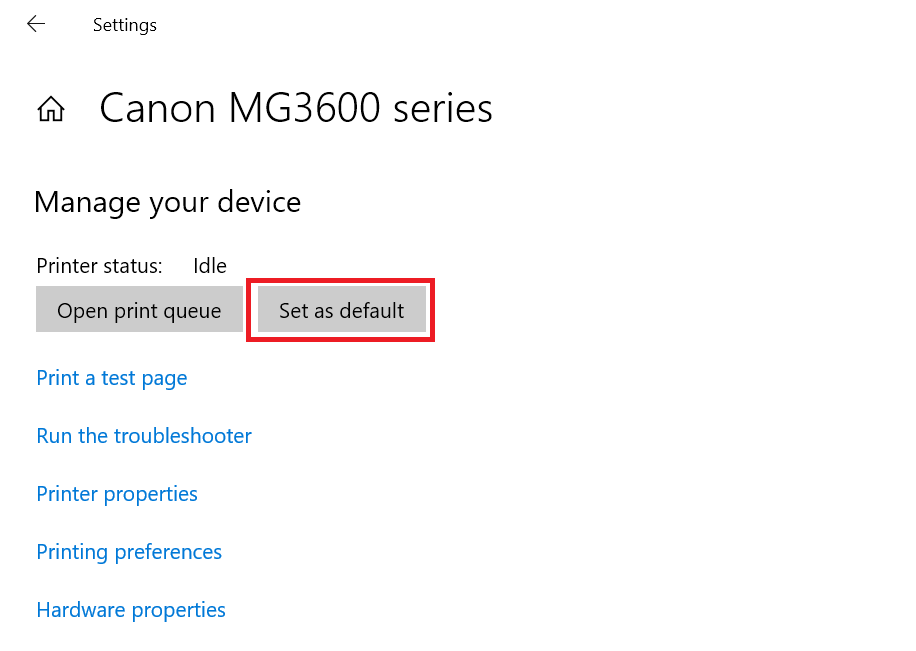
You will see Default beside your printer status.
Using Control Panel
An alternative way to set a default printer on Windows 10 is through the Control Panel, making it more traditional. Here’s what you need to do.
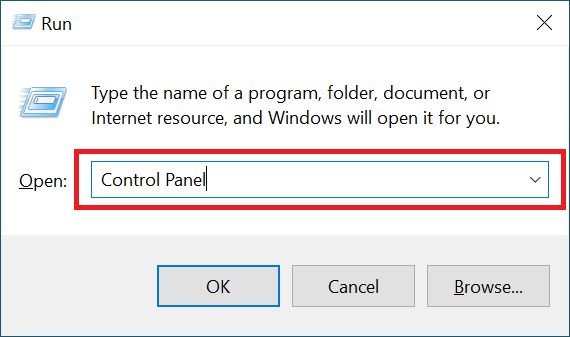
Press the Windows + R keys to open the Run dialog box. Type Control Panel and press Enter on your keyboard. You can also click OK.
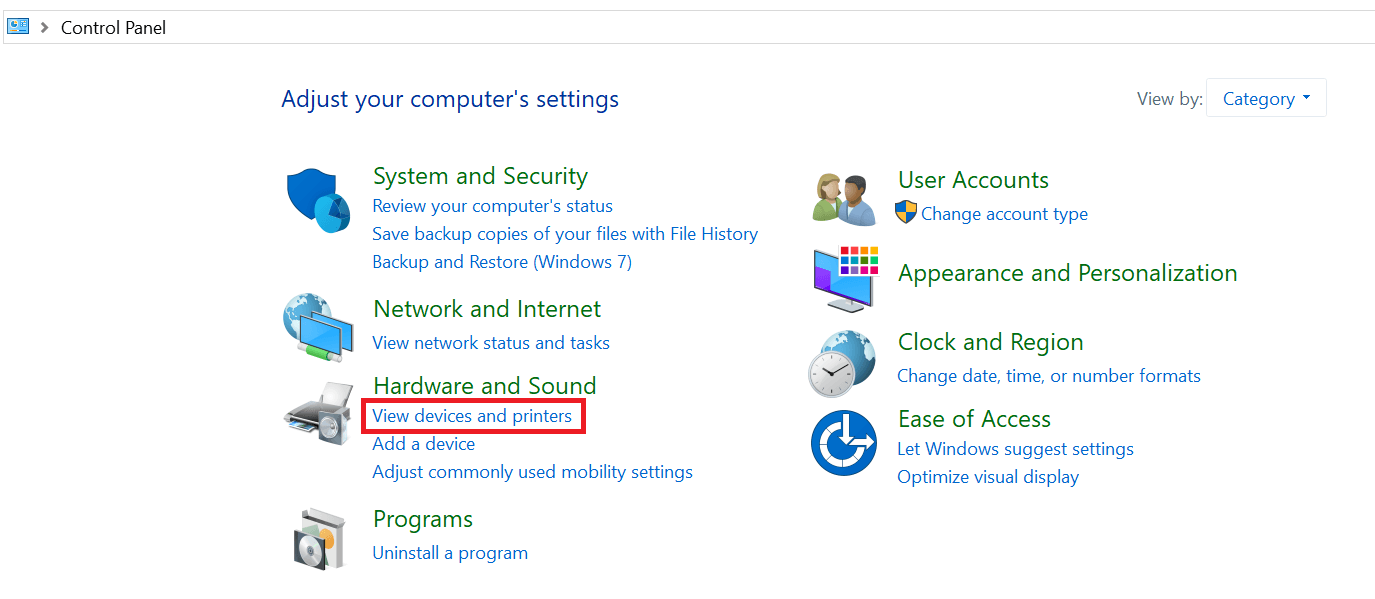
Under Hardware and Sound, select View devices and printers.
Scroll down to Printers and right-click your preferred printer. Choose Set as default printer after.
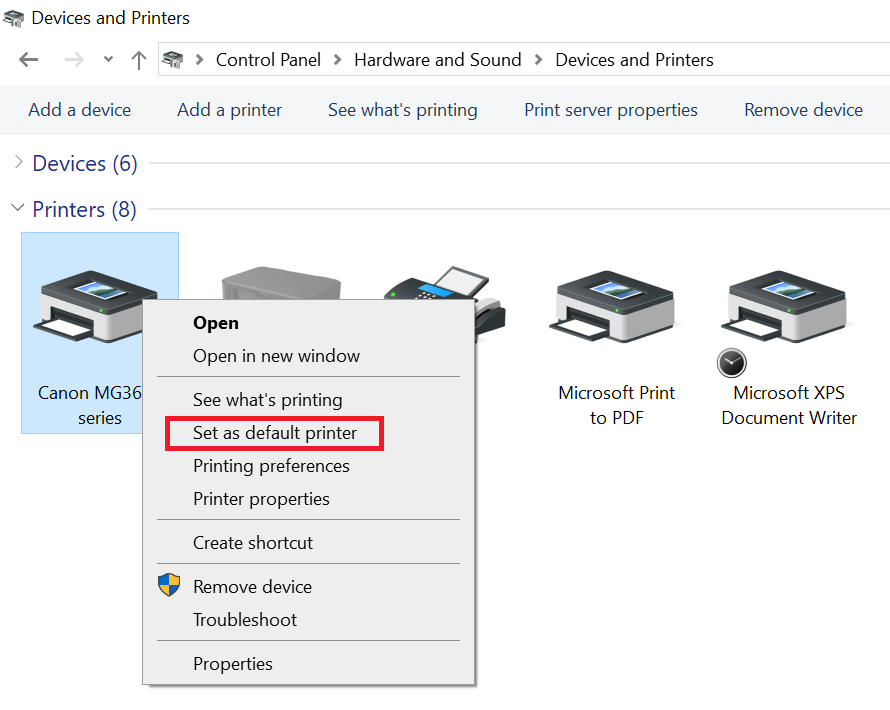
Once the Windows warning prompt appears, click OK. You will then see a checkmark beside your new default printer’s name.
And there you have it. Setting a default printer on Windows 11 is equally easy, if you have a PC running this version of the operating system.