- To place GIFs next to each other in Notion on desktop, hover over a GIF, click and hold the six-dot icon, and place the GIF next to another GIF.
- In Notion for iPhone and Android, you can insert GIFs, but you can’t place them side-by-side.
Can’t figure out how to get GIFs next to each other in Notion? Don’t worry—it’s possible and a lot easier than you think. We’ll show you how to add GIFs to Notion on desktop Android, and iPhone. We’ll also demonstrate how to place them next to each other and delete them if you don’t need your GIFs anymore.
How to Add a GIF to Notion
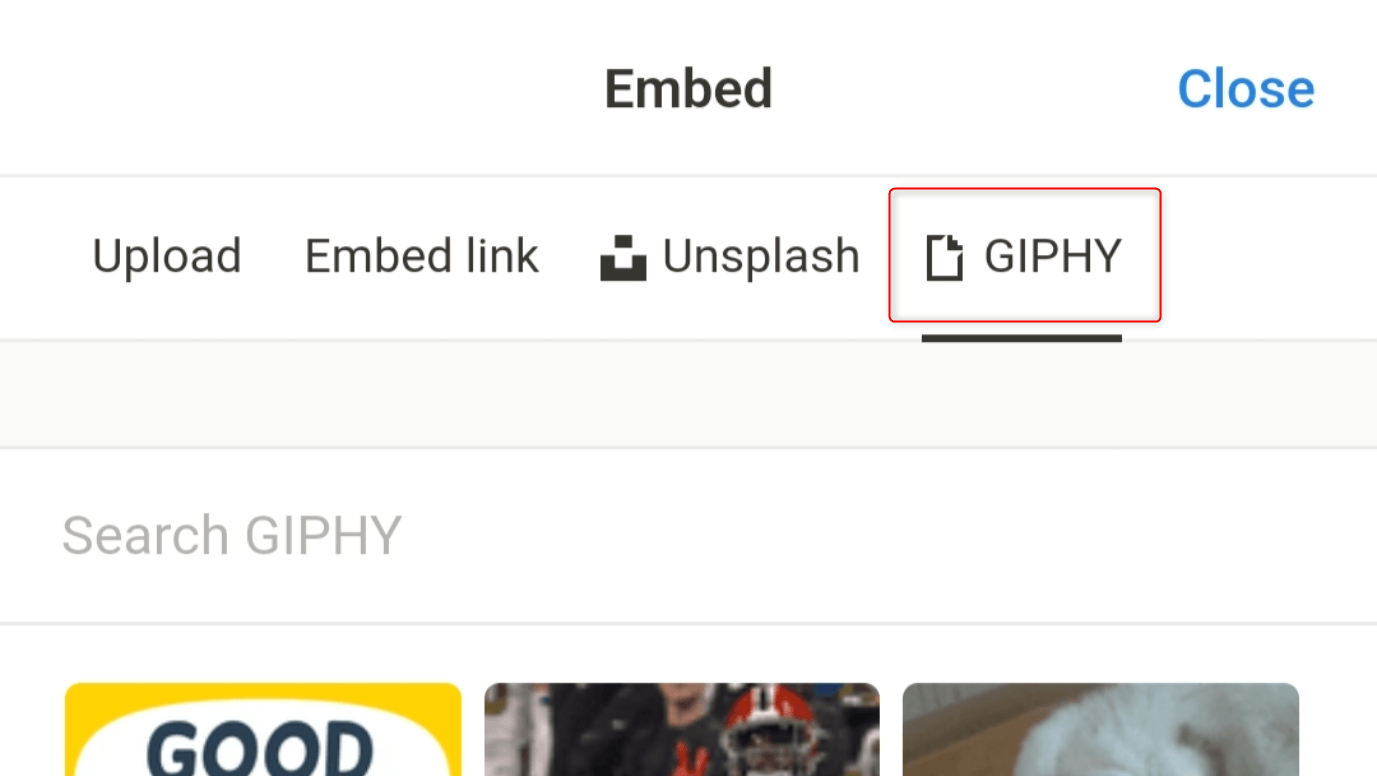
When adding GIFs to your Notion pages, you can choose from four sources, including your local files, online links, Unsplash, and GIPHY.
If you want to use online links, make sure that you copy the image link of the photo—not the link of the whole web page. Otherwise, you’ll end up embedding the whole web page into your Notion page.
Here’s how you add GIFs to Notion, depending on your device.
On Desktop
Launch your web browser and go to Notion. Alternatively, you can open the Notion desktop app since their interfaces are not different.
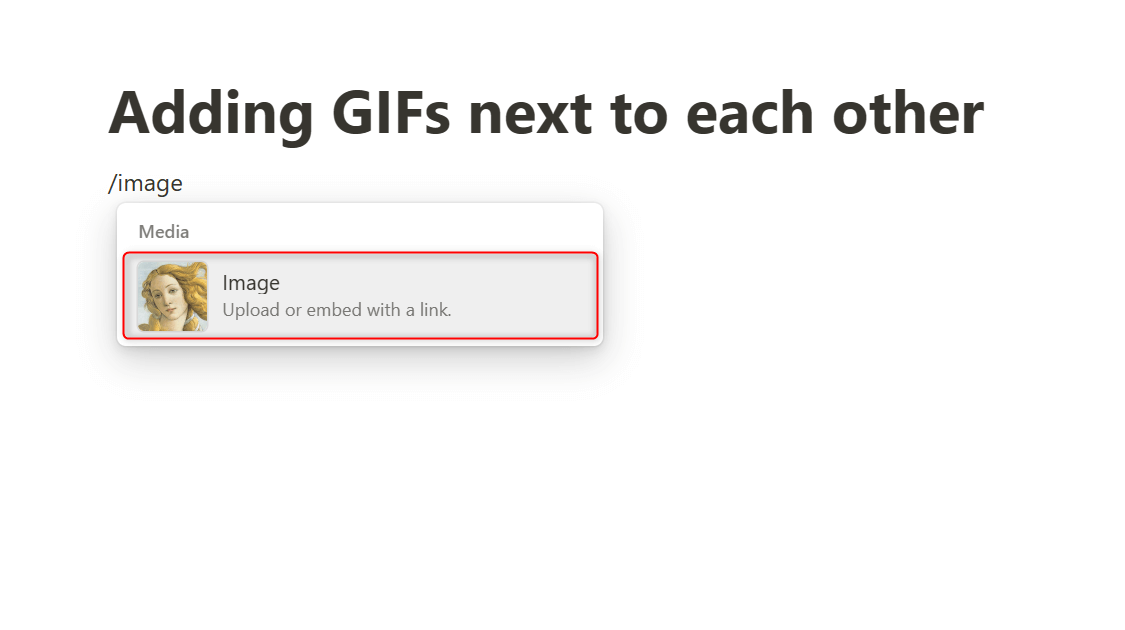
Navigate to the page where you want to add your GIF. Type /image and click Image from the displayed commands. Or, just press Enter or Return on your keyboard.
Notion will display a dialog where you can choose your GIF source. We’ll use GIPHY in this example, but feel free to use whichever you prefer.
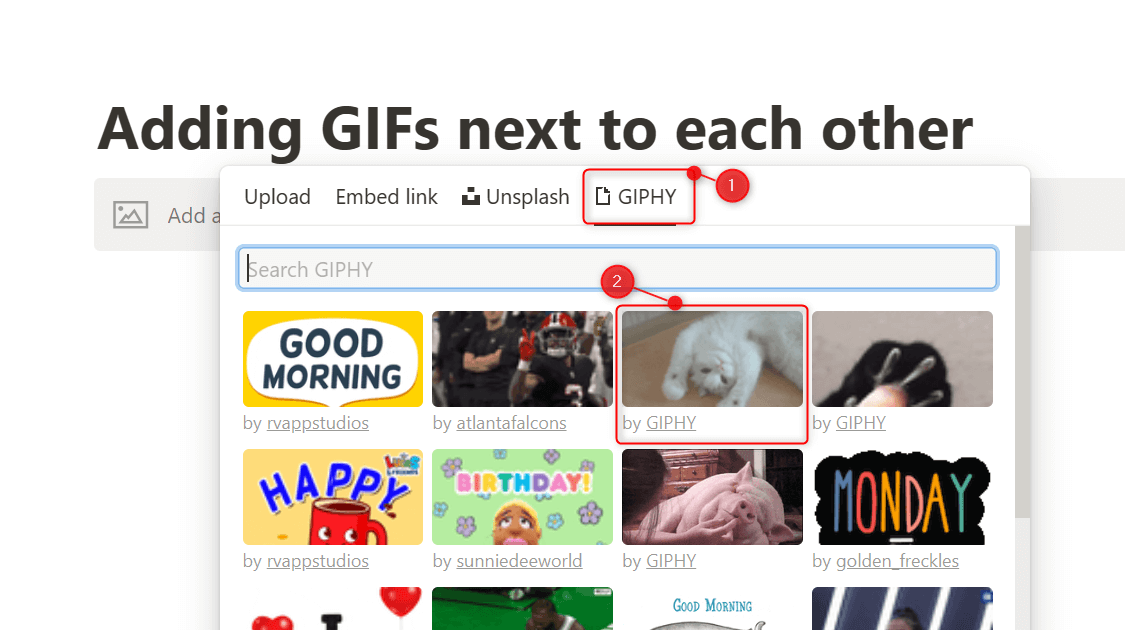
Click the GIF that you want to use, and it will appear on your Notion page.
On Android or iPhone
Launch the Notion app on your Android or iPhone, and go to your page. Tap anywhere on the whitespace and wait for the controls and on-screen keyboard to appear.
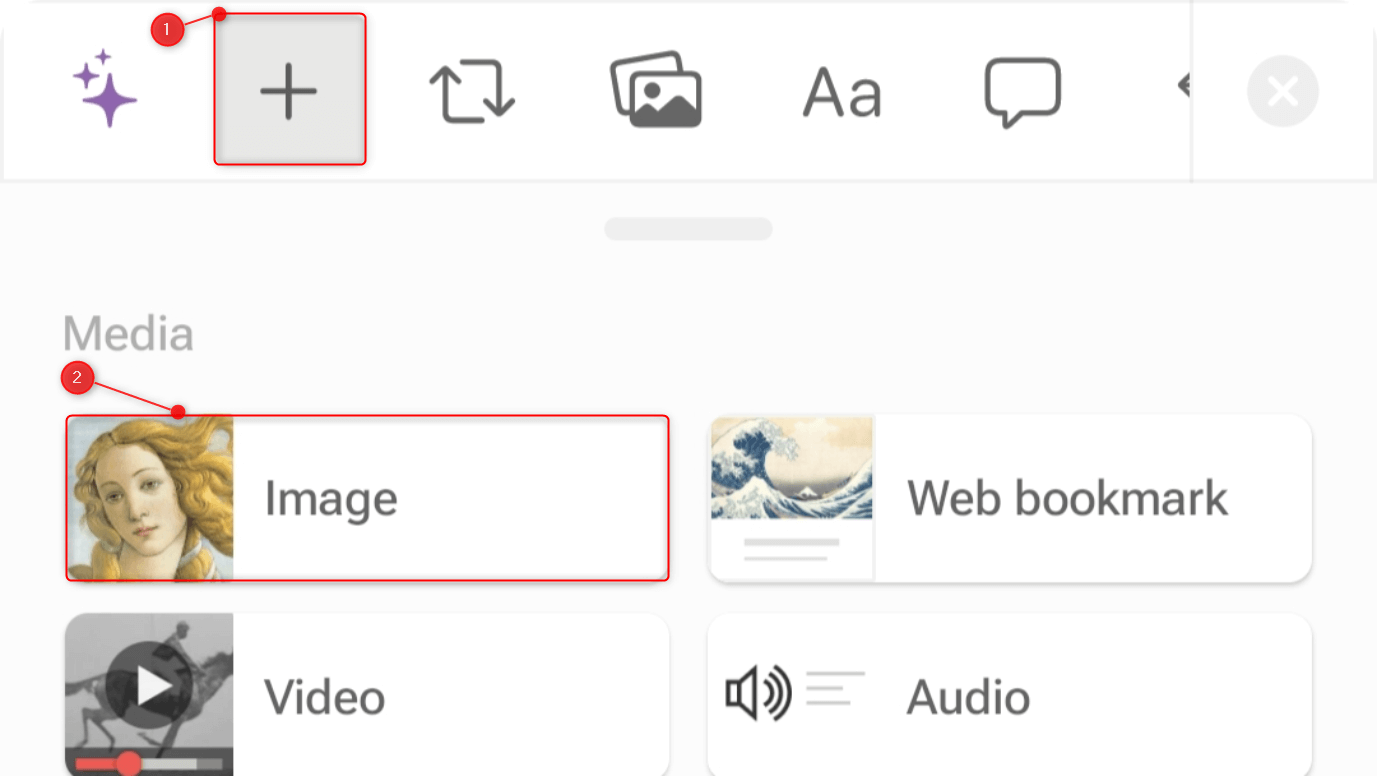
Above the keyboard, tap Add (the plus icon) from the displayed toolbar. Scroll down to Media and tap Image from the provided options.
The Embed interface will appear on your screen. Select your source (GIPHY, for example) and choose your GIF.
If you want to upload a GIF from your phone’s gallery, you can shorten the process by tapping the Image icon directly on the toolbar.
![]()
Select Files (on Android) or Choose Files (on iPhone) from the upload interface. The exact options may vary depending on your phone model, but the interface will be similar.

From your files, find and tap your GIF. Wait for the upload process to finish, and you’re good to go.
Place Your GIFs Next to Each Other in Notion
You can only place GIFs next to each other in the desktop version of Notion. They are also viewable, but not editable, on iPad or tablet. When you view them on your Android phone or iPhone, the GIFs would simply shift to the bottom of the other.
With that said, here are two easy methods to place GIFs side by side in Notion.
Method 1. Drag GIFs Next to Each Other
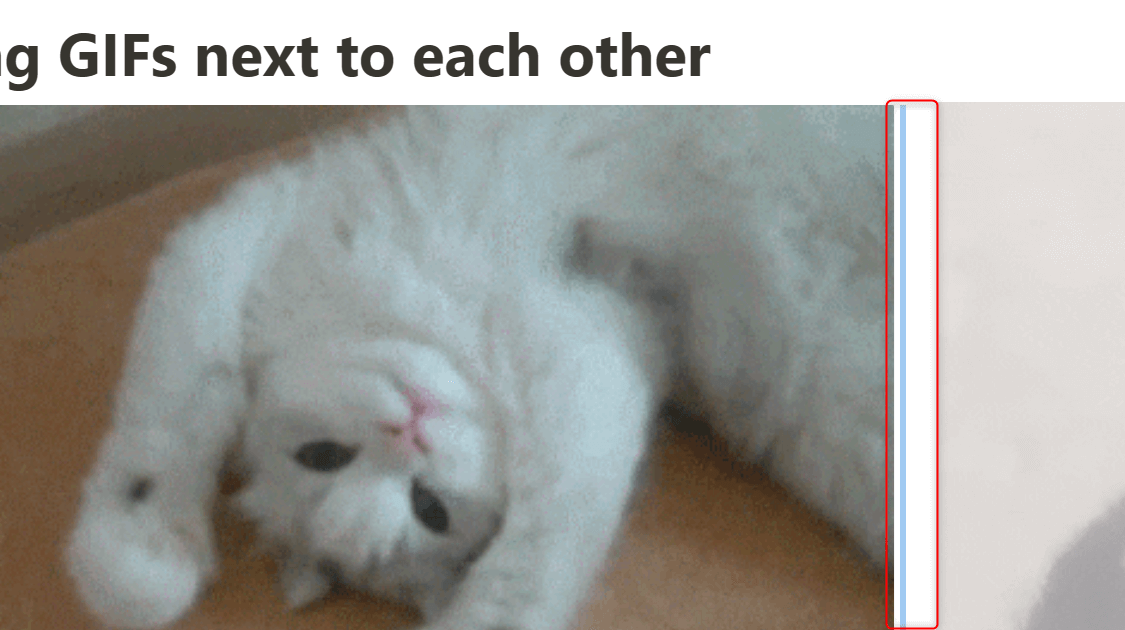
Hover your mouse cursor over one of your GIFs. On its right, a six-dot icon will appear.
![]()
Click and hold the six-dot icon and drag it to the left or to the right of the other GIF. You know you’re doing it right when a blue line indicator appears on your interface. Once it shows, release your cursor.
Your GIFs are now next to each other.

If you have other GIFs to use, you can simply replicate the steps above. To keep an optimal viewing size, we recommend you only put up to five GIFs side by side.
Method 2. Create Multiple Columns Before Adding GIFs
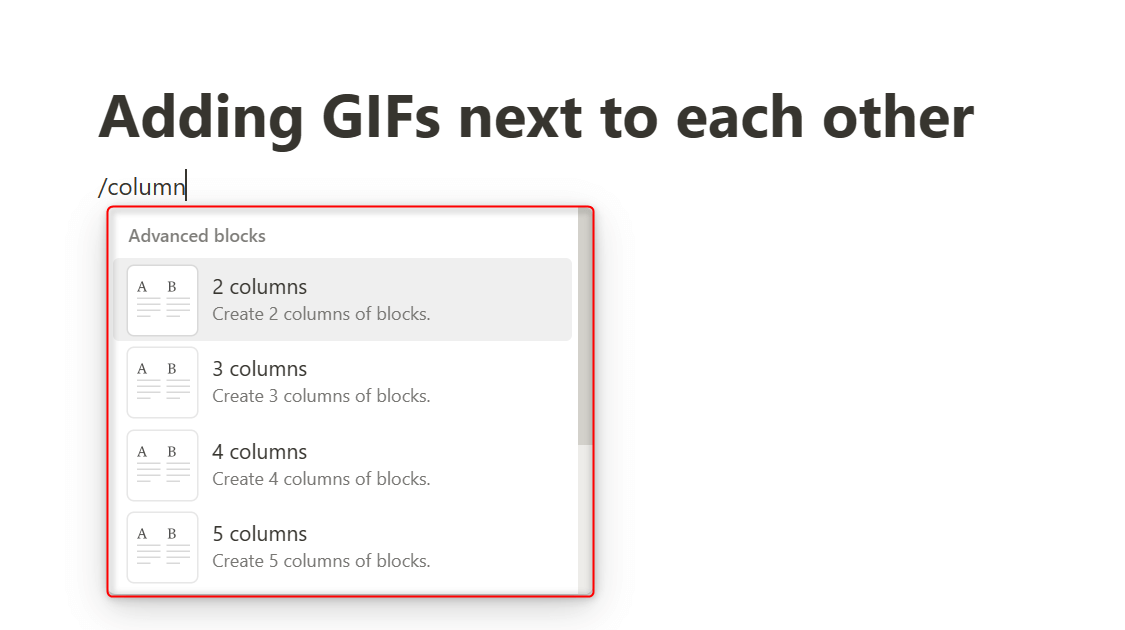
On your Notion page, type /column. From the options displayed, select the number of columns you need (it should be equal to how many GIFs you have).
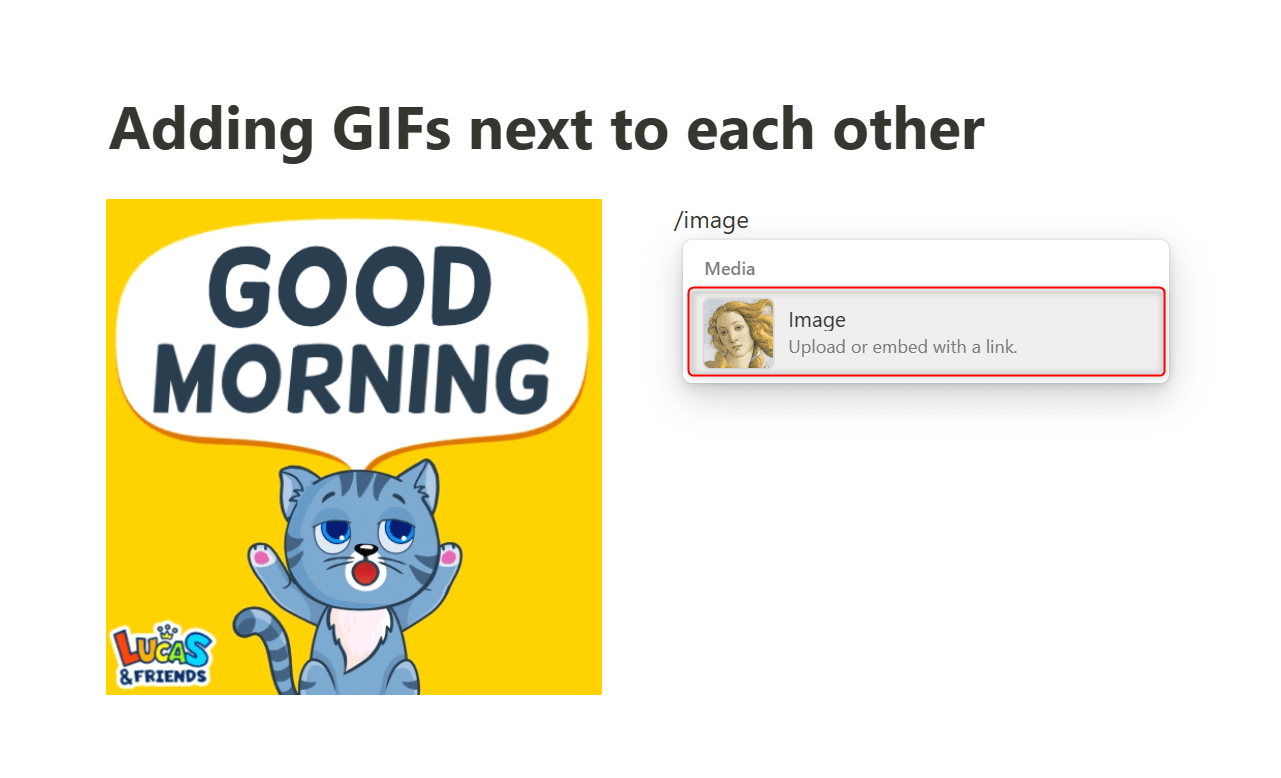
Go to one column, type /image, and press Enter. Then, select or upload your GIF. Repeat the steps for all the other columns you have.
When you drag GIFs, texts, and other embeds next to each other (like in the first method), you are simply creating Notion columns. This would be great to use if you want to put the GIFs below or above a paragraph.
Remove a GIF From Notion
If you no longer need your GIFs or want to replace them with something new, you can remove them using the methods below:
On Desktop
Hover your mouse over the GIF that you want to delete. At its upper-right corner, click More actions (the ellipsis icon). Or, you can simply right-click the GIF.
![]()
Choose Delete from the context menu.
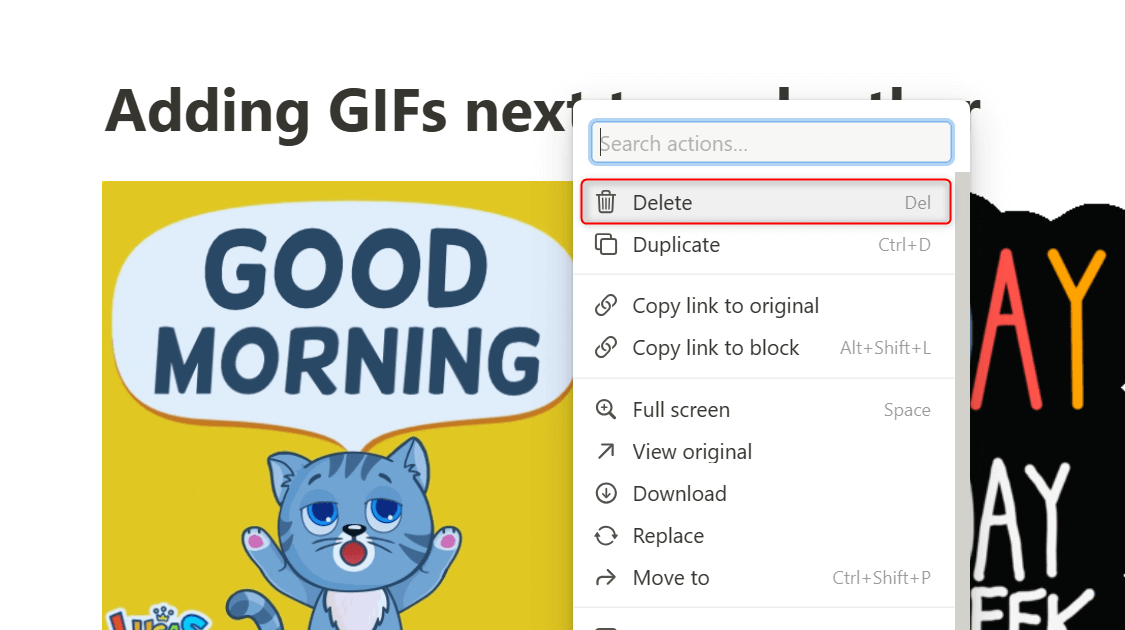
You can shorten this process by selecting your GIF and pressing Delete on your keyboard.
On Android or iPhone
You can actually use the same steps above to remove your GIFs on Notion mobile. But for a more explicit demonstration, you can follow the steps below:
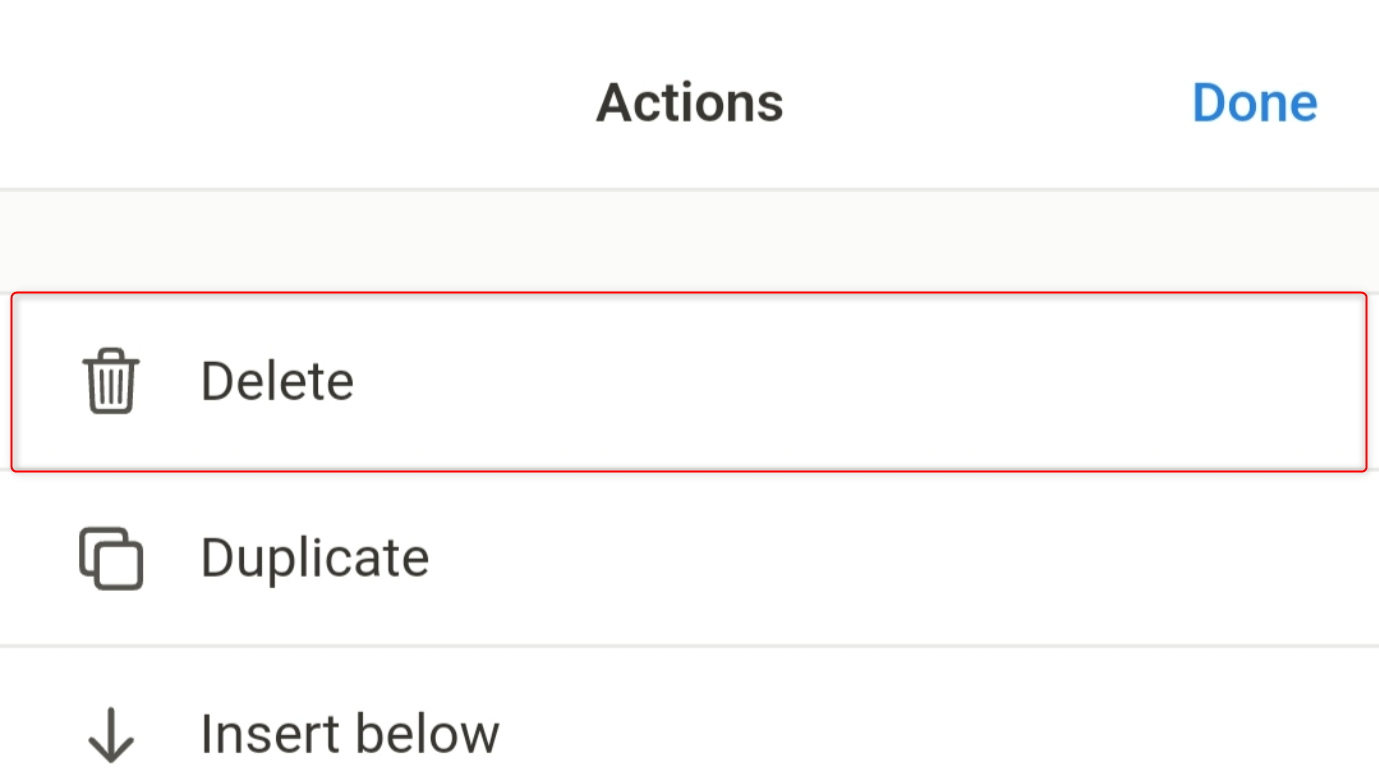
Go to your GIF and tap its corresponding ellipsis icon.
![]()
This will open the Actions interface on your screen. Tap Delete.
You’re set.
________________________________________
By now, you have figured out how to add GIFs and place them next to each other in Notion, whether on desktop, Android, or iPhone. With a few small changes, you can also apply these methods when adding other types of media, such as videos, texts, and even web page embeds, to your Notion pages.