Found a Windows Spotlight background that you want to keep? Unfortunately, Windows Spotlight images change on a regular basis. But don’t worry, we’ll teach you how to download them on your Windows 10 or 11 PC. Then, you can use these wallpapers for as long as you like.
Step 1. Show Hidden Files in File Explorer
If you are using Windows 10, know that Spotlight images are hidden by default. To make them visible and accessible, do the following steps:
Open File Explorer and switch to the View tab. In the Show/hide group, check the box for Hidden items.
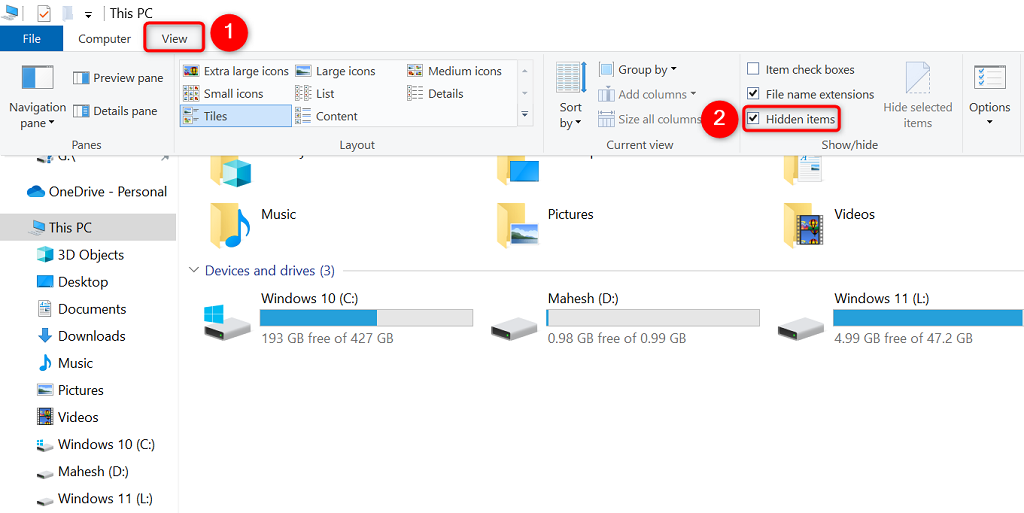
For Windows 11 users, you can skip directly to the next section.
Step 2. Find and Copy Spotlight Images
Open File Explorer on your Windows PC. Then, copy and paste the following file path to the address bar:
%USERPROFILE%\AppData\Local\Packages\Microsoft.Windows.ContentDeliveryManager_cw5n1h2txyewy\LocalState\Assets
Press the Enter key. This will bring you to the Assets folder in File Explorer, where Windows Spotlight images are stored.
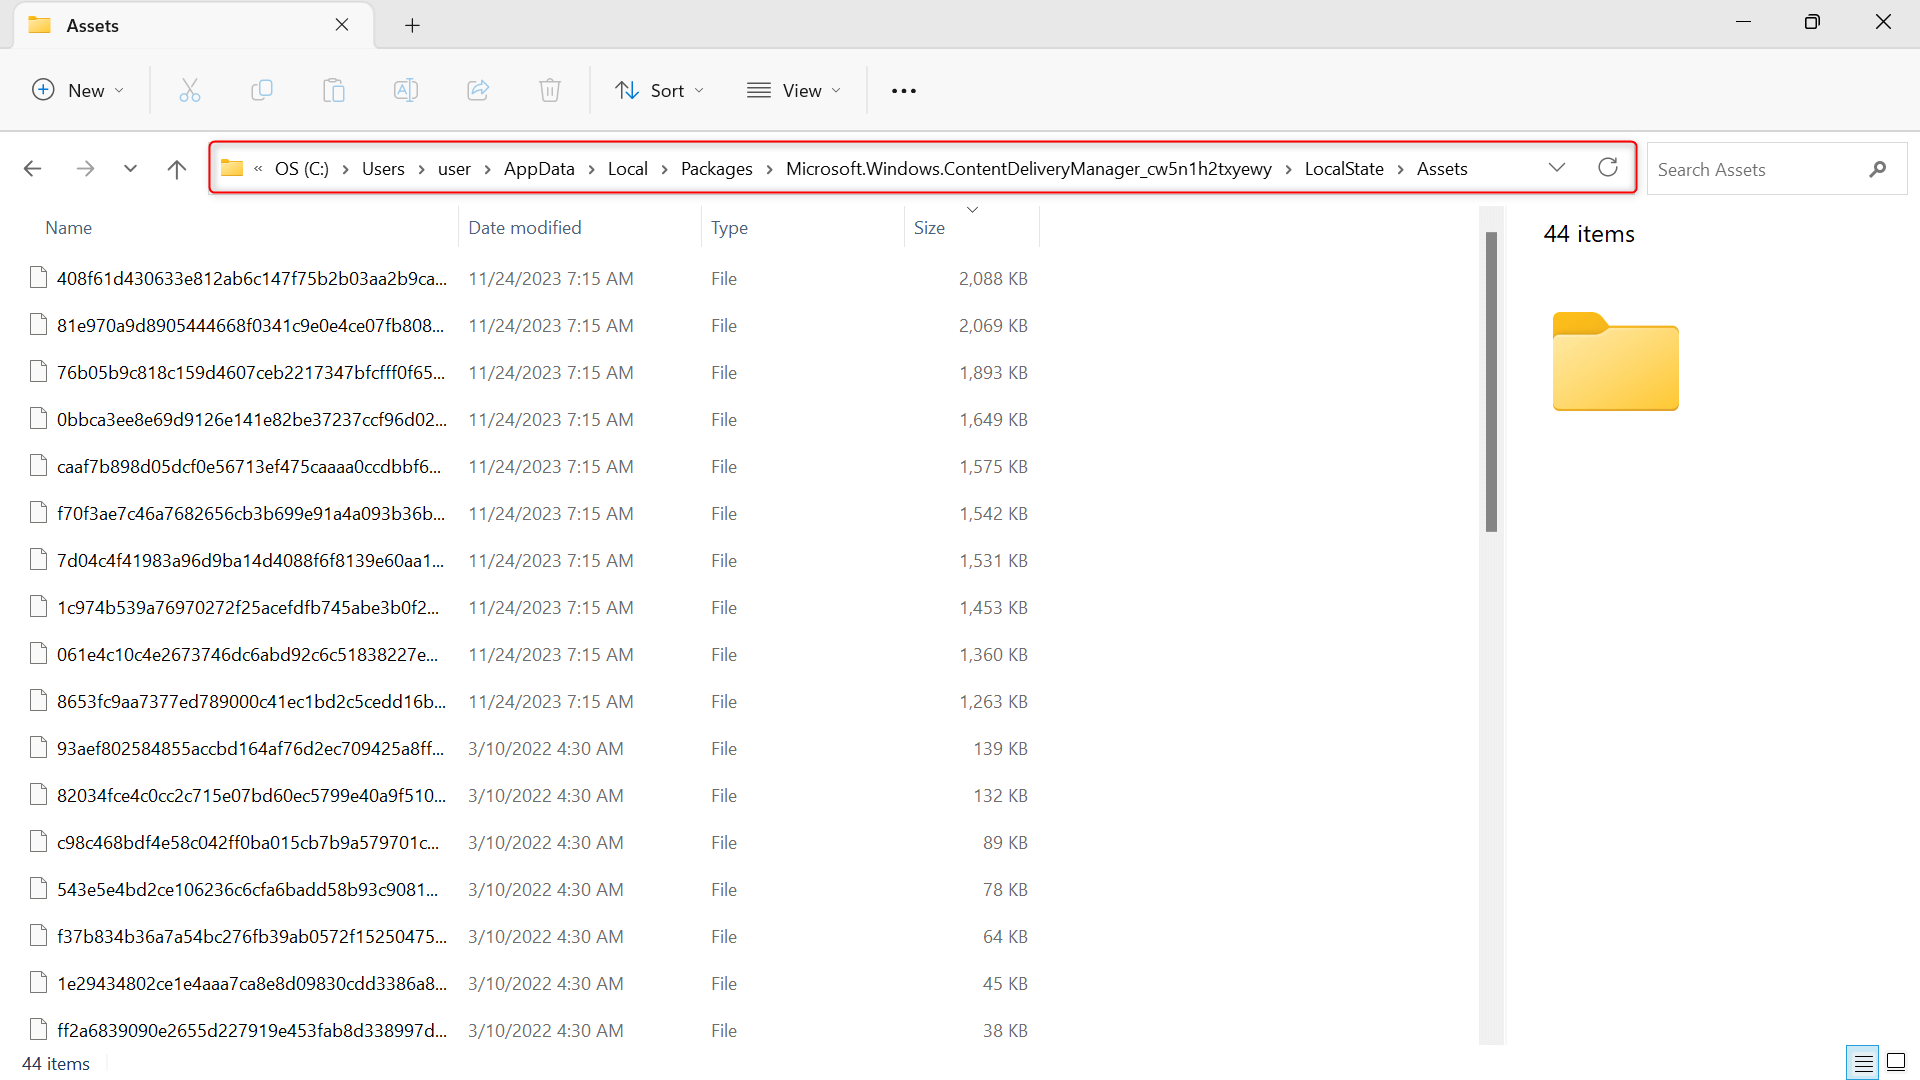
You might notice that you can only see white thumbnails in this folder and that the files have very long names of an alphanumeric mix. They have no particular file format yet, either. Hence, it becomes challenging to filter out only the Spotlight images.
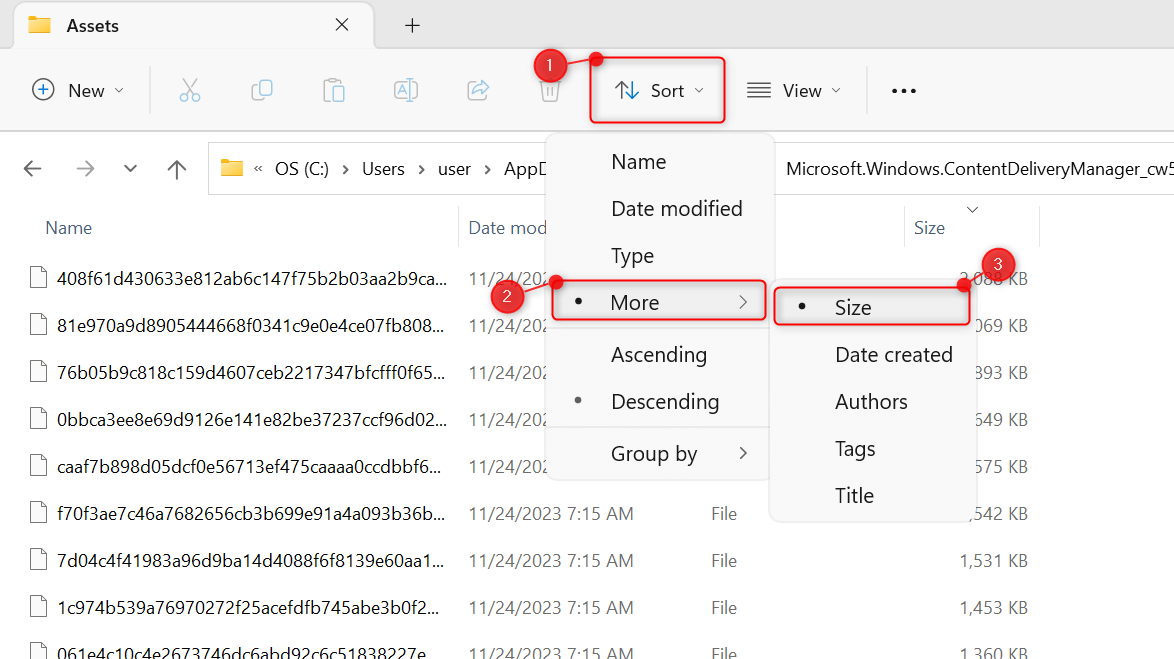
Sort Files by Size
At the top menu in File Explorer, click Sort > More > Size. You should see your files arranged in ascending or descending order. In general, any file here that is smaller than 300 KB isn’t a Windows Spotlight image.
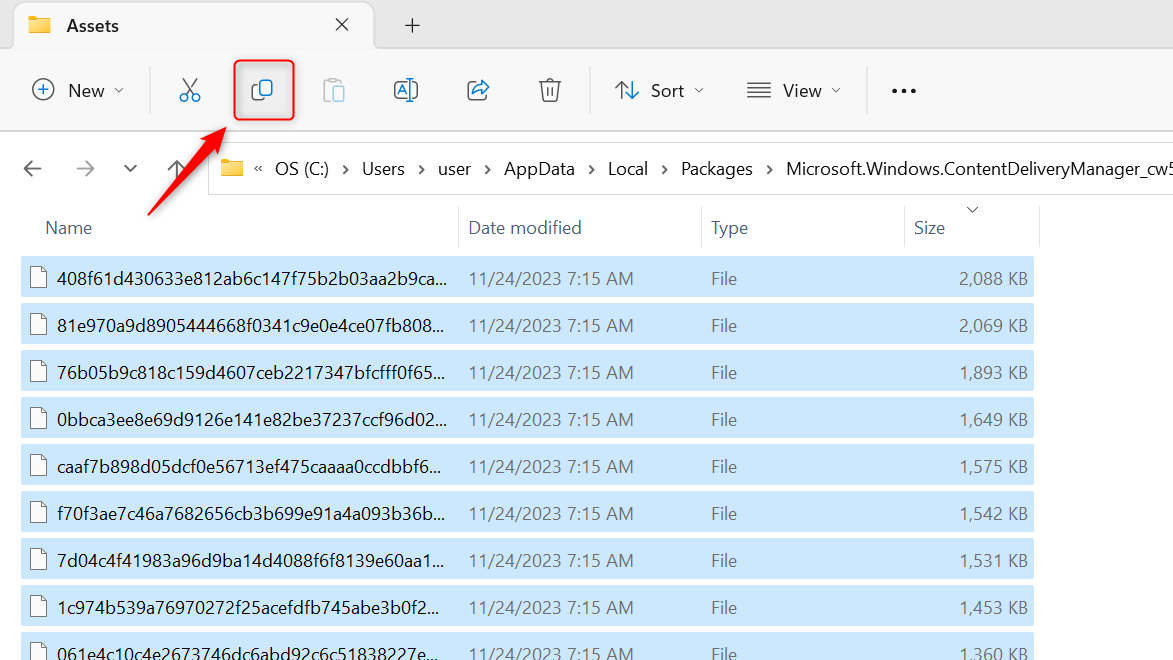
Select all files that are greater than or equal to 300 KB in size and click Copy at the top menu. Or press Ctrl + C on your keyboard.
Copy to Another Folder
To ensure that the Windows Spotlight feature doesn’t encounter issues later, let’s not convert the files you sorted inside the exact same Assets folder.
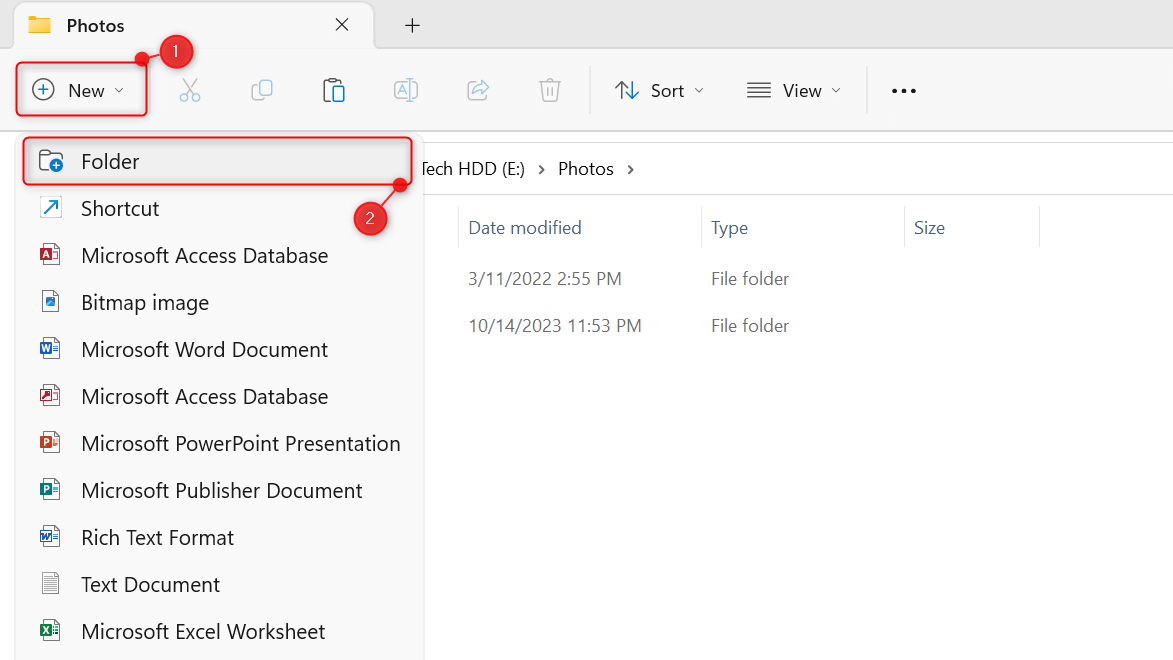
Instead, go to another location in File Explorer. At the top left, click New and choose Folder from the displayed menu. Alternatively, create a new folder by pressing Ctrl + N on your keyboard.
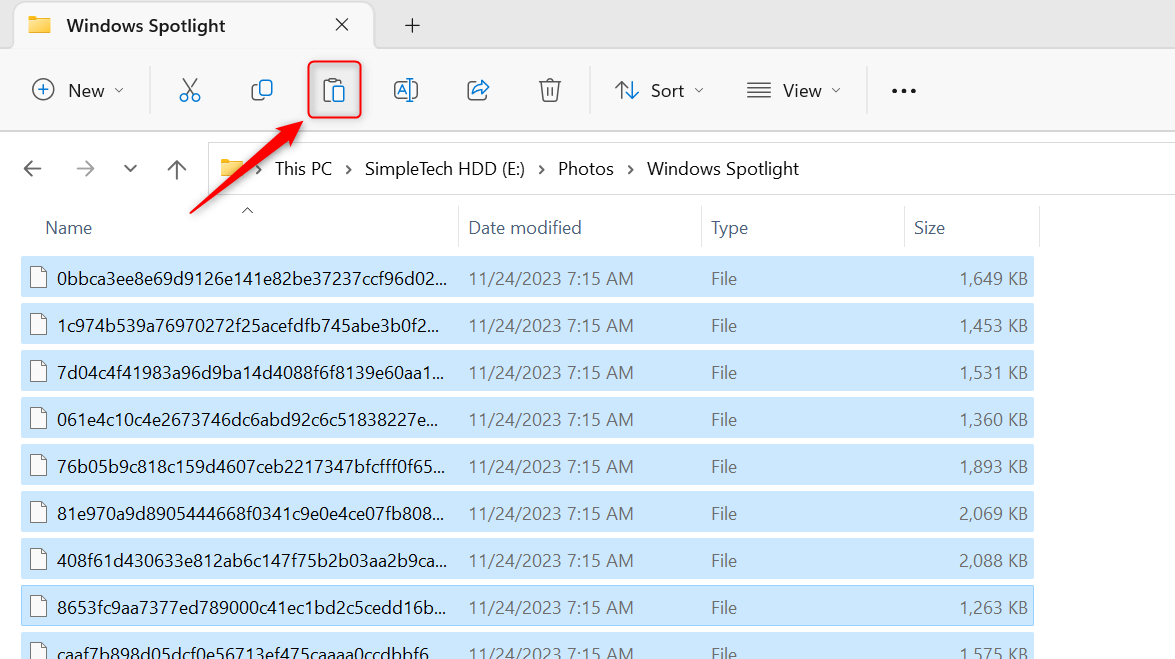
Inside your new folder, click the Paste button from the top menu (or simply press Ctrl + V).
Step 3. Add an Extension to the Copied Images
To convert one of the files you copied, right-click it and choose the Rename button. Alternatively, press F2 (or Fn + F2) on your keyboard.
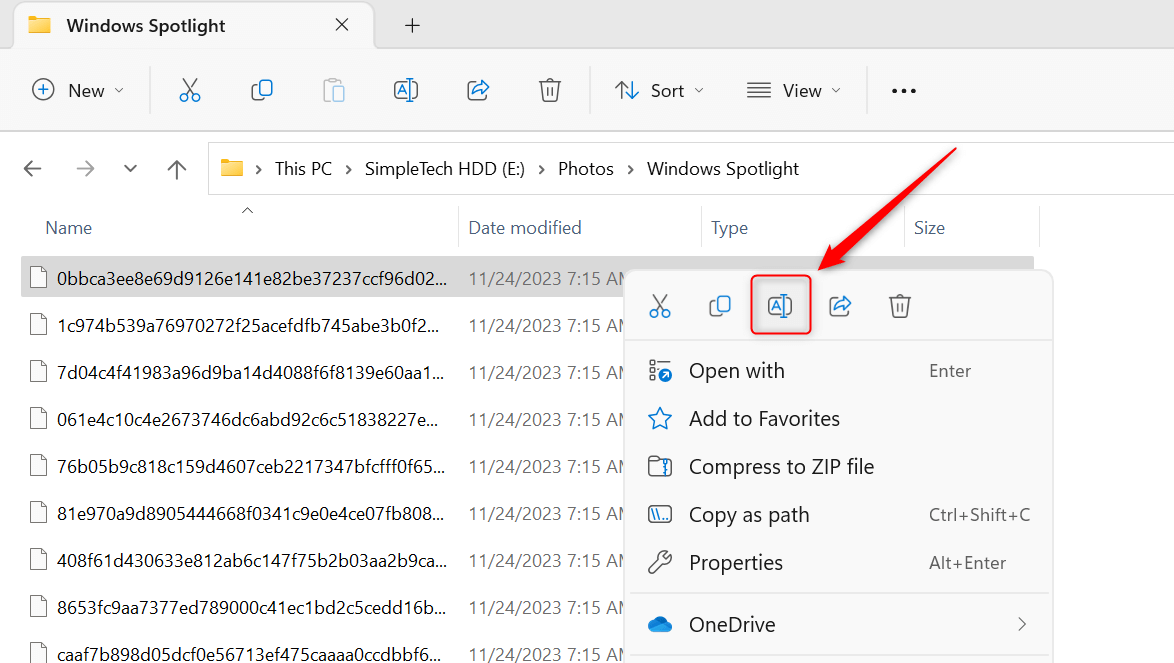
At the end of the file name, add .jpg or .png. Feel free to use other image file extensions that you prefer.
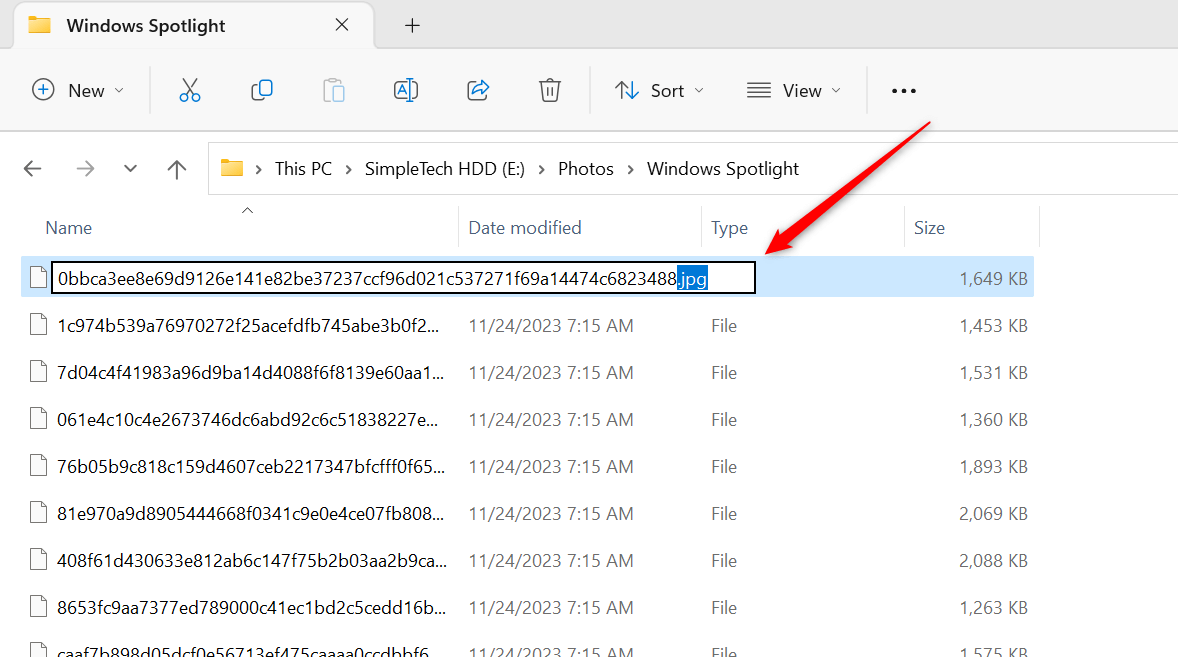
After that, the previous file should now have a thumbnail image. Open the photo and see if it’s a Windows Spotlight picture.
Bulk Rename Images With PowerShell
To ease the process, consider renaming the files you copied in bulk using PowerShell. Here’s how you do it:
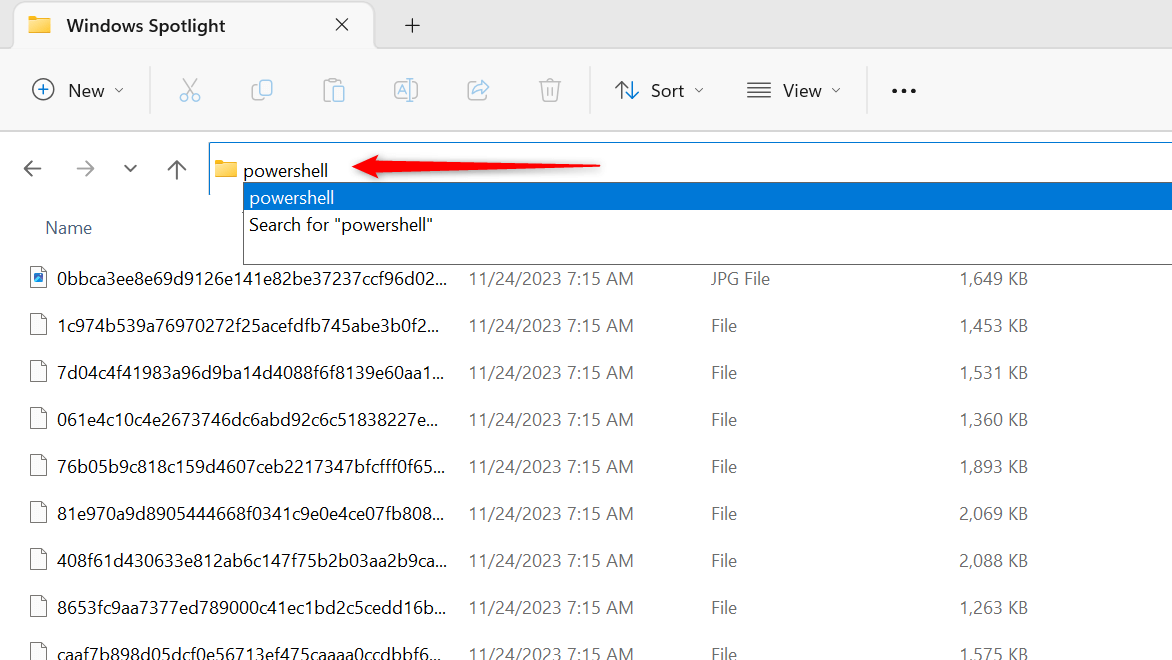
Go to the folder where you pasted the files. Click the address bar and type powershell. This will launch a Windows PowerShell tab in the Terminal app.
Copy and paste this command into the PowerShell command line:
dir | rename-item -NewName {$_. name + ".jpg"}
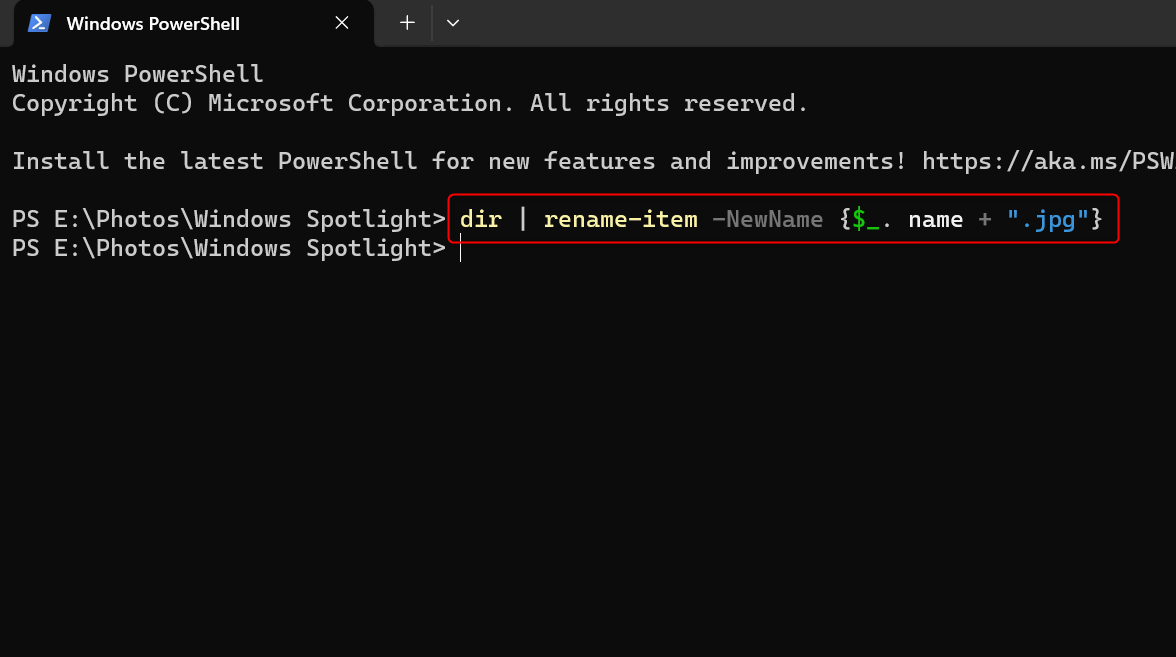
Feel free to change the image format (jpg) in the command, but do not make any other changes. Press the Enter key to execute it. Once the process is done, close the Terminal app.
Rename Files Using Command Prompt
If you prefer Windows Command Prompt over PowerShell, follow the following steps instead:
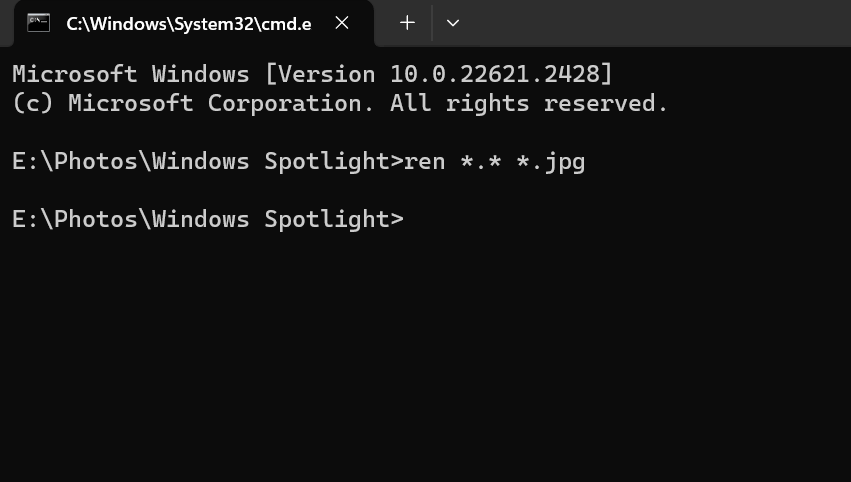
Go to your folder. Click the address bar and type cmd. Press Enter to continue opening Command Prompt in the Terminal app.
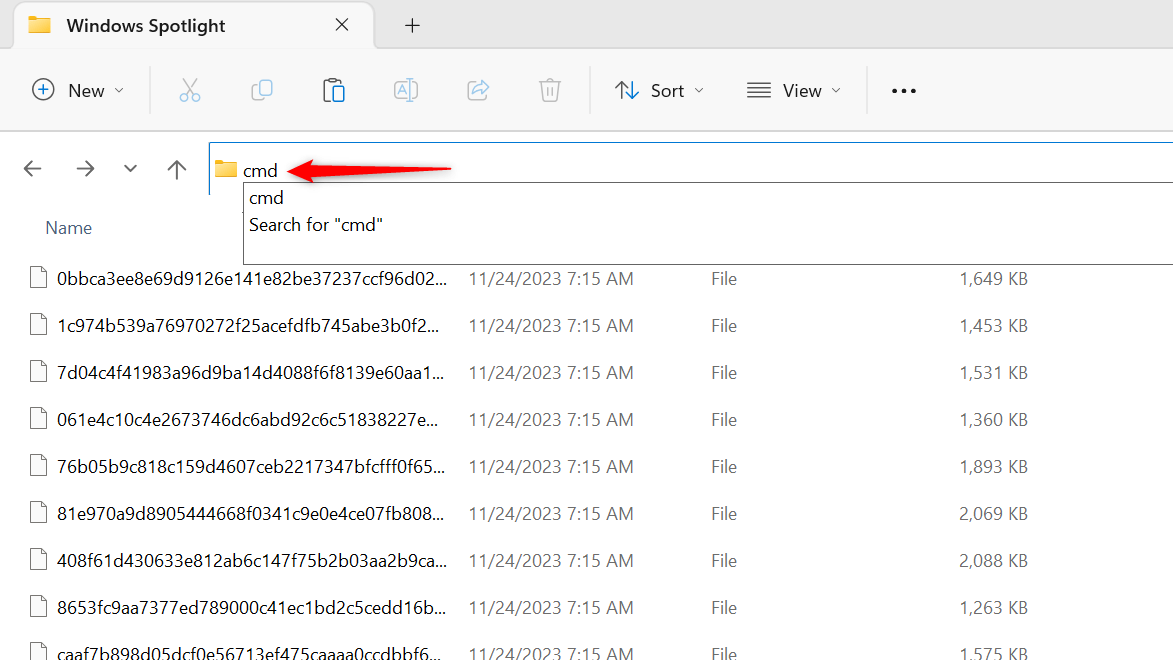
Copy and paste this command to the command line:
ren *.* *.jpg
If you want to use another file extension, just replace jpg in the given command. Press Enter to finish.
Note: If you don’t have Terminal installed, typing either powershell or cmd on the address bar will open their old-style interfaces on your computer.
How to Set a Spotlight Image as the Desktop Wallpaper
While you’re in your Spotlight folder, find and look for the image that you want to set as a desktop wallpaper. Then, open it in the Photos app.
Click See more (the ellipsis button) and choose Set as from the displayed menu. Then, select whether you want to set it as your desktop background or lock screen.
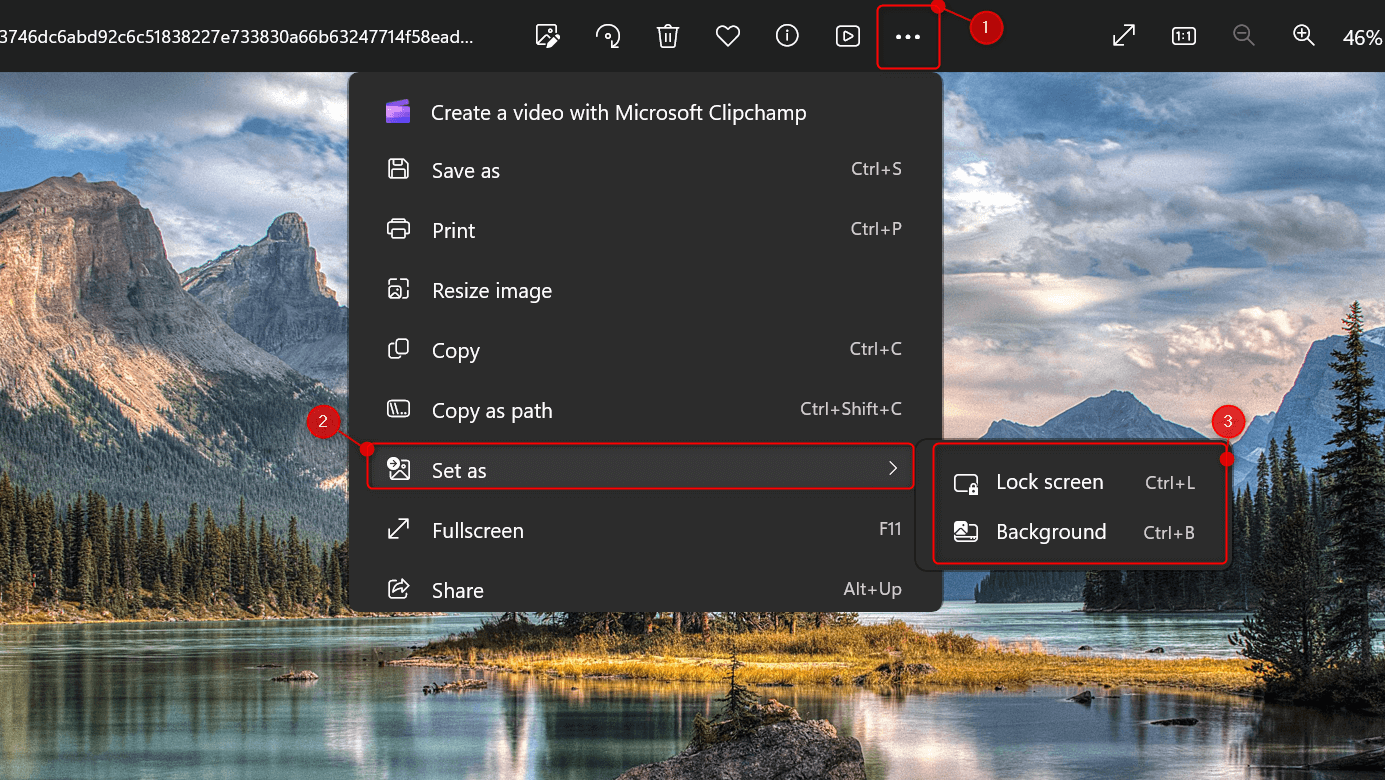 Alternatively, you can just press Ctrl + B on your keyboard to set it as your desktop background. Press Ctrl + L to set it as your lock screen.
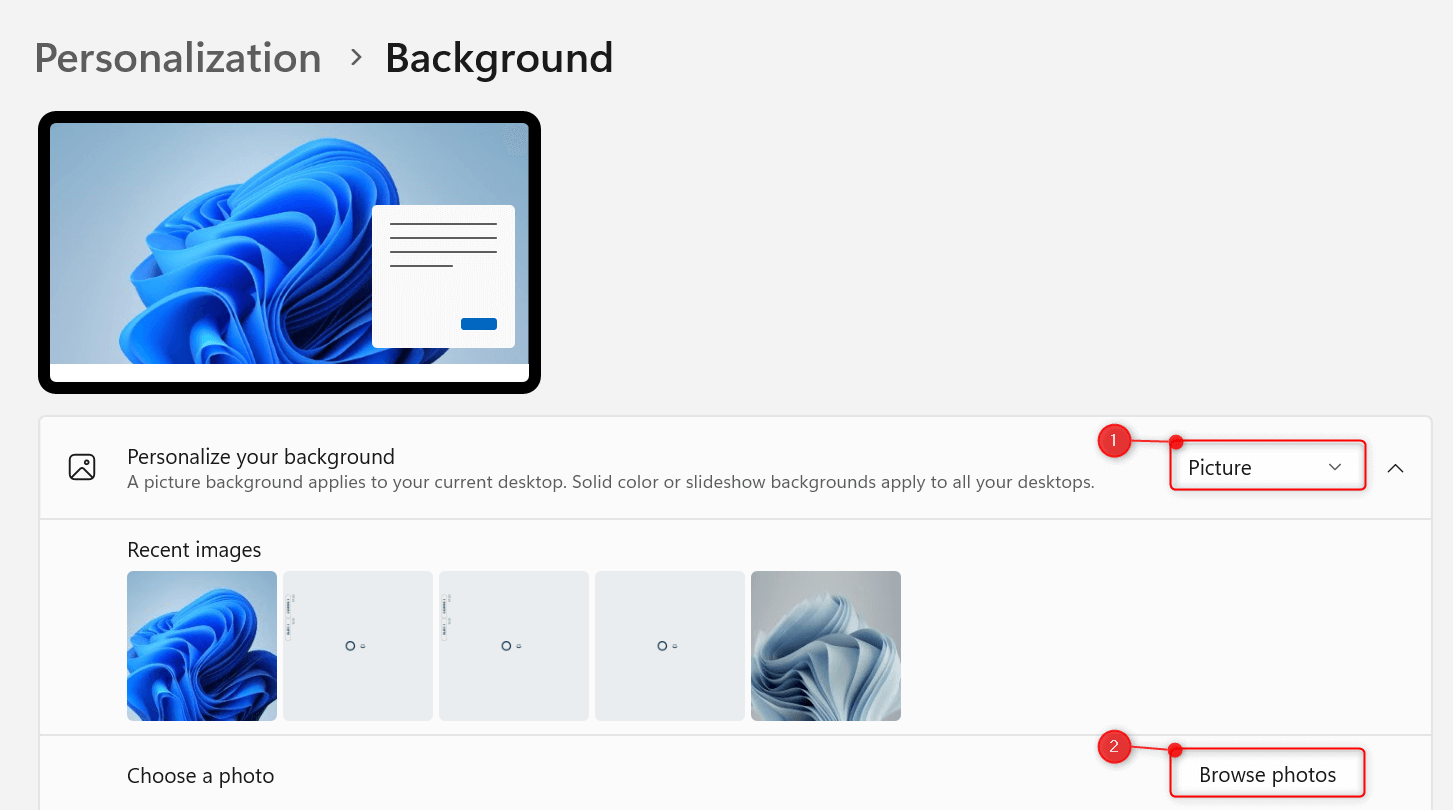
If you don’t have the Photos app installed, open the Settings app instead. Then, go to Personalization > Background (or Lock Screen).
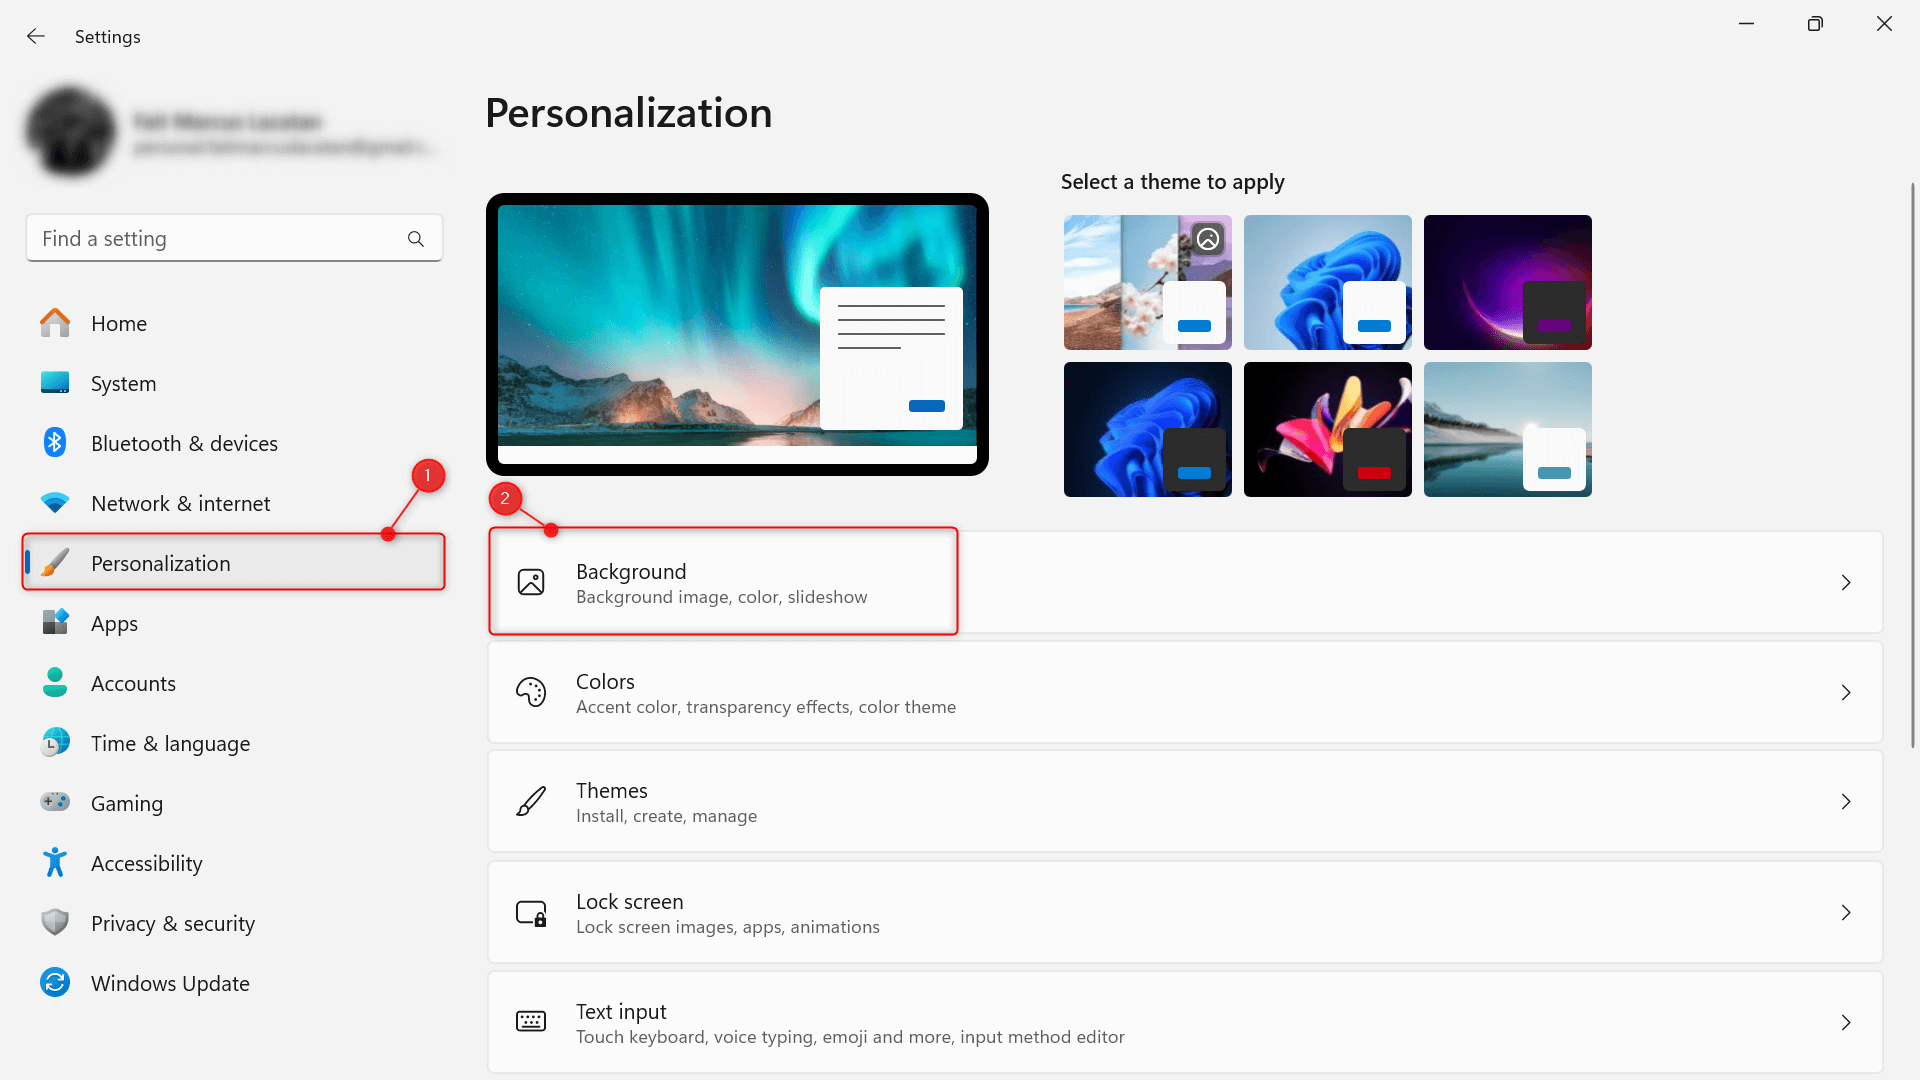
For the background type, choose Picture. Click Browse photos to find and set up the Spotlight image you saved.
And you’re all set.
If you found a Windows Spotlight image you liked, you should now be able to save it to your local storage. Still, there’s no reason to be frustrated even if you didn’t get to do so. Windows Spotlight updates regularly—maybe you’ll soon find one you’ll want to save again.