- On Windows 11, go to Settings (using Windows + I) > Accessibility > Contrast themes. Expand the Contrast themes drop-down and select a theme. Then, click Apply.
- On Windows 10, go to Settings > Ease of Access > High contrast. Then, toggle on the Turn on high contrast button.
- You can also customize contrast themes on Windows 11 and 10.
Struggling to see text or elements on your screen? Solve that by increasing the contrast between text and background colors using the high contrast mode on Windows 11 and Windows 10. We’ll further explain what this mode does and how to use it on your computer below.
What Does High Contrast Mode Do?
High contrast mode is an accessibility setting that makes things on your computer screen easier to see, whether for people with certain visual impairments or in low-light conditions.
When enabled, it does the following:
- Increases contrast by using two main colors, typically displaying text in black or white and the background in a bold contrasting color
- Removes background images and shadows
- Buttons and interfaces become simpler
In simpler words, high contrast mode prioritizes legibility over decoration. Note that, due to the suppression of background elements, text might become even harder to read in certain apps.
Turn On High Contrast Mode on Windows 11
Windows 11 offers four different preset contrast themes. Access them either from the Settings app or upon sign in.
Method 1. Using the Settings App
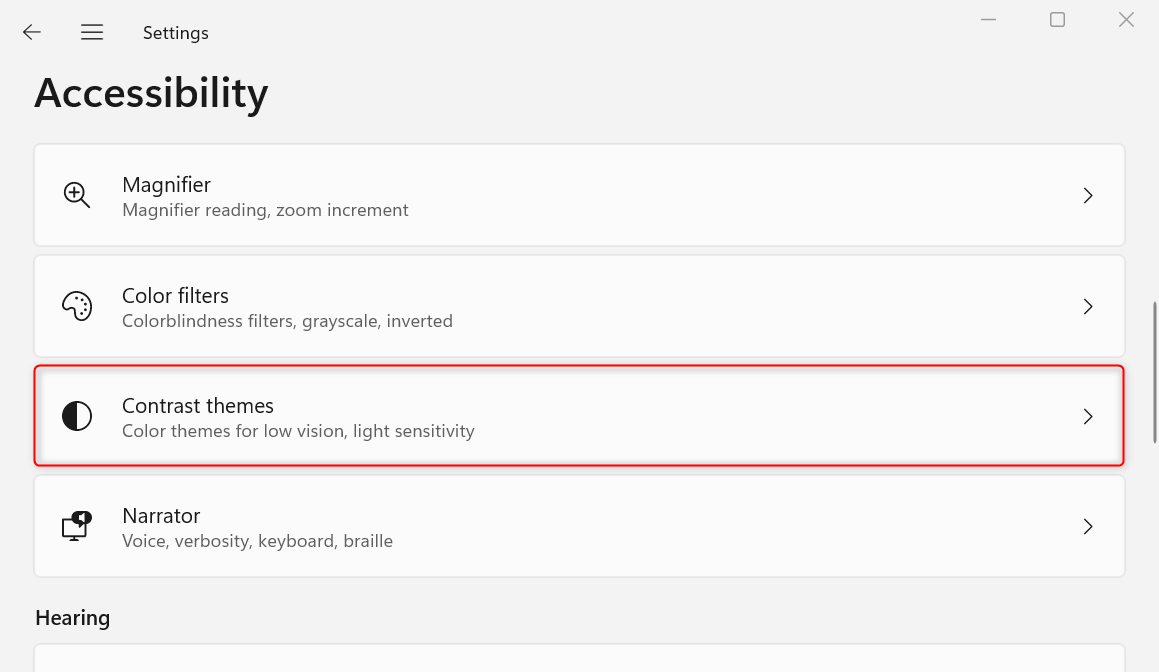
Press Windows + I to open Settings. Once it launches, go to the Accessibility submenu. Under the Vision section, click Contrast themes.
In the next section, you’ll see the available high-contrast themes that you can choose from. To select one, open the Contrast themes drop-down and pick your preferred theme. Then, click Apply to save your changes.
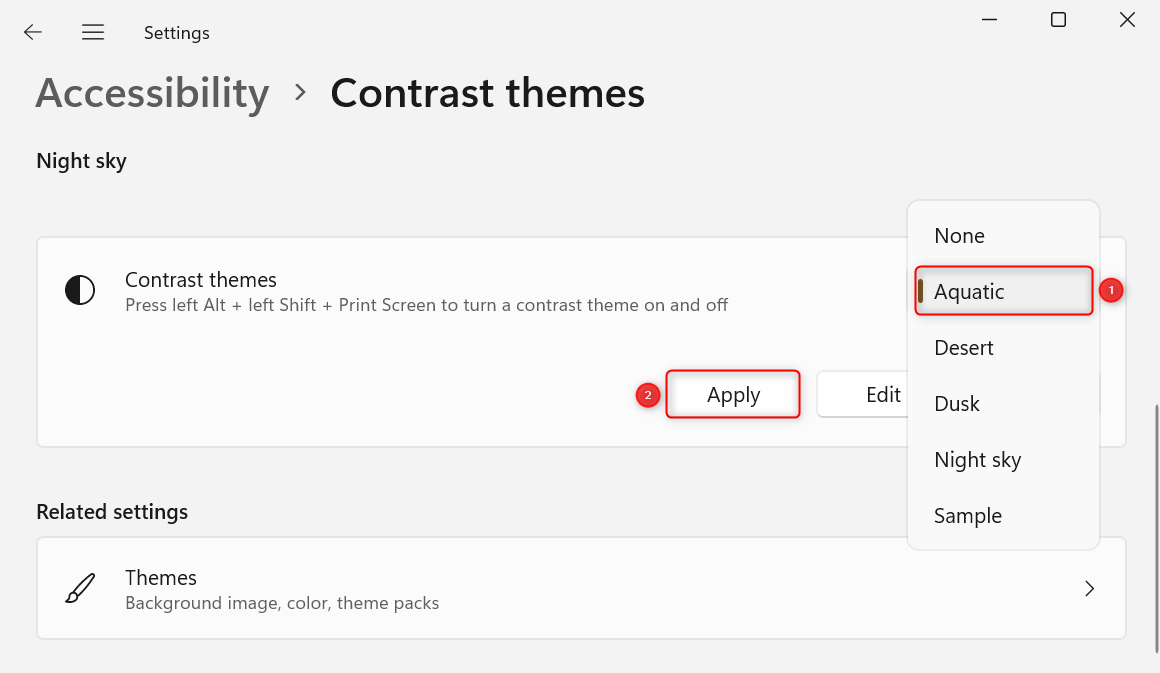
As Windows 11 applies your selected high-contrast theme, you’ll see a Please wait interface on your screen. Wait for it to disappear and enjoy your selected theme once done.
Method 2. During Sign-In
Remember that contrast themes are an accessibility feature. Access them in the sign-in screen using the Accessibility menu.
Before clicking the Sign in button, click Accessibility (a human-shaped icon) beside the Power options. From the menu, toggle on the Contrast themes switch.
Turn On High Contrast Mode on Windows 10
Enabling high contrast mode on Windows 10 follows the same process in Windows 11, except for a few differences in the interface. Here’s how.
Method 1. Using Settings
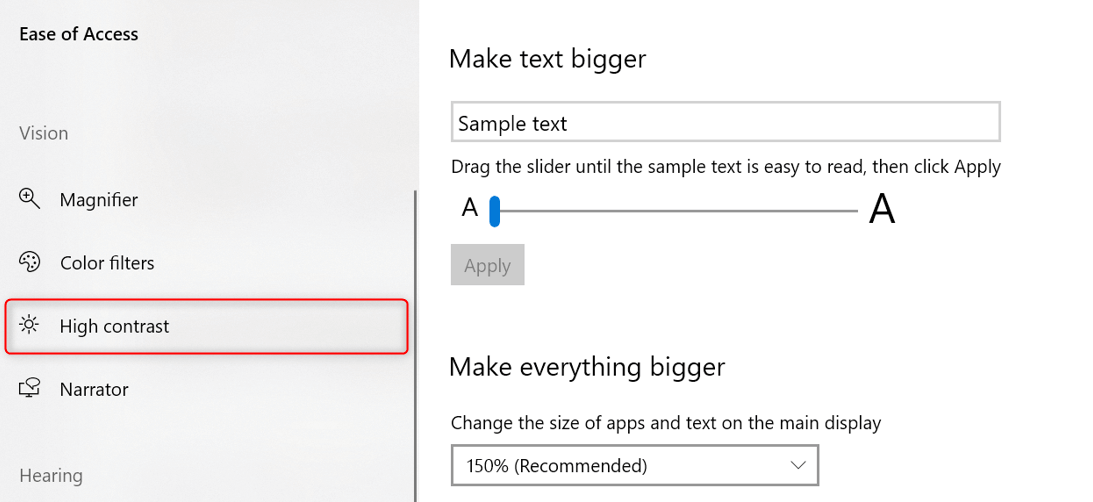
Press Windows + I to open Settings. From the main menu, click Ease of Access. Then, from the left side panel in the Ease of Access section, choose High contrast.
Under the Use high contrast section in the right pane, toggle on the Turn on high contrast switch. A Please wait screen may appear as Windows 10 applies your changes.
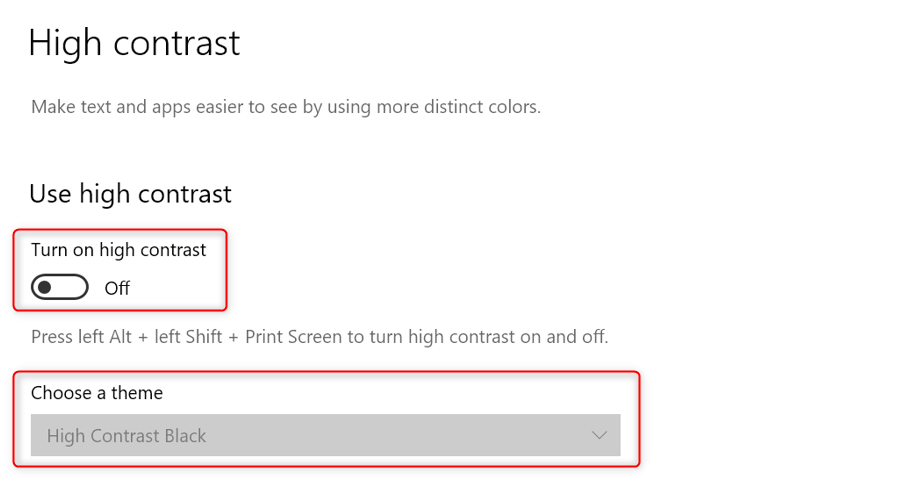
If you want to pick a specific contrast theme, expand the Choose a theme drop-down and select one from the list.
Method 2. From the Sign-in Screen
At the bottom right of the sign-in screen, click Ease of Access (a clock-like icon). From the menu that appears, switch on High Contrast.
Windows 10 will flash a Please wait screen while applying the contrast theme. Wait for it to finish and you’re good to go.
Customize Contrast Themes
If you find the colors uncomfortable, too glaring, or unable to properly display text in certain apps, customize your contrast theme. Here’s how you do it for both operating system versions.
On Windows 11
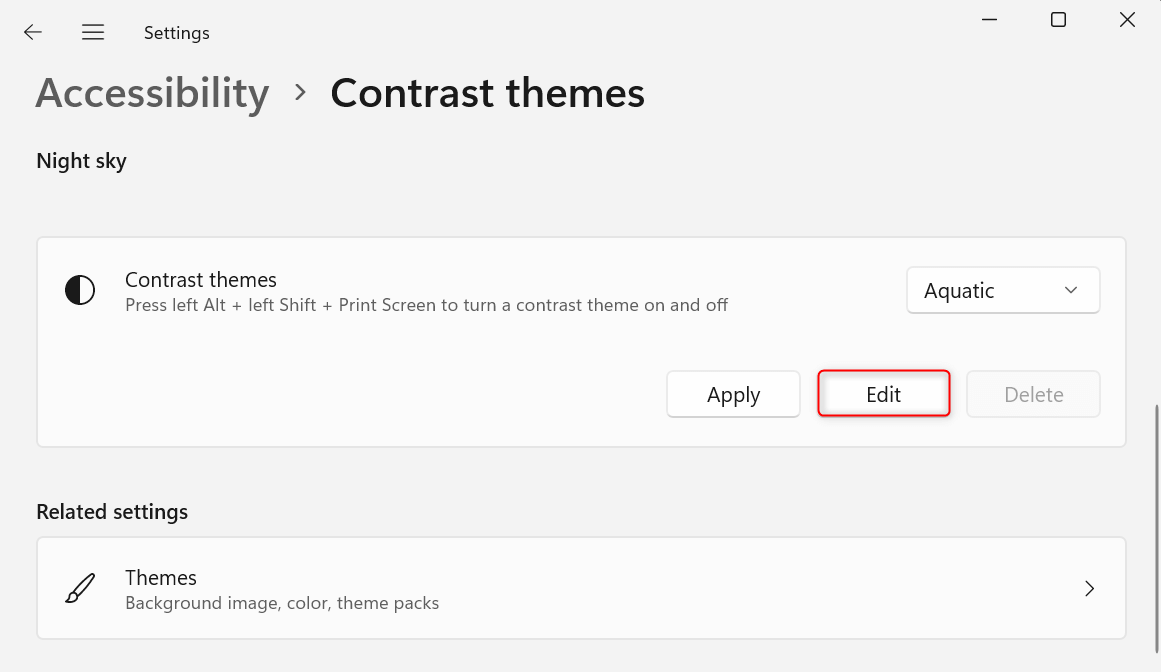
Press Windows + I to open Settings. Then, navigate to Accessibility > Contrast themes. Click the Contrast themes drop-down and select one from the presets. After choosing a preset theme, click the Edit button.
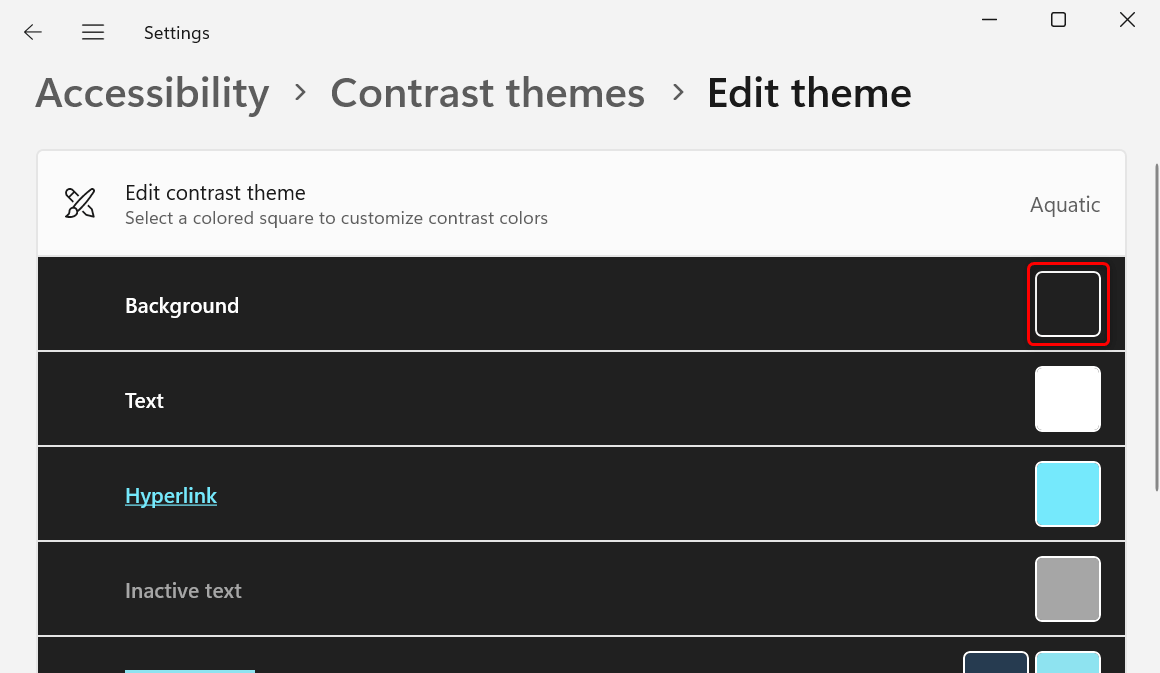
This will open the Edit theme section. Under Edit contrast theme, click the provided square for each category that you want to edit. For example, click the colored square for Background.
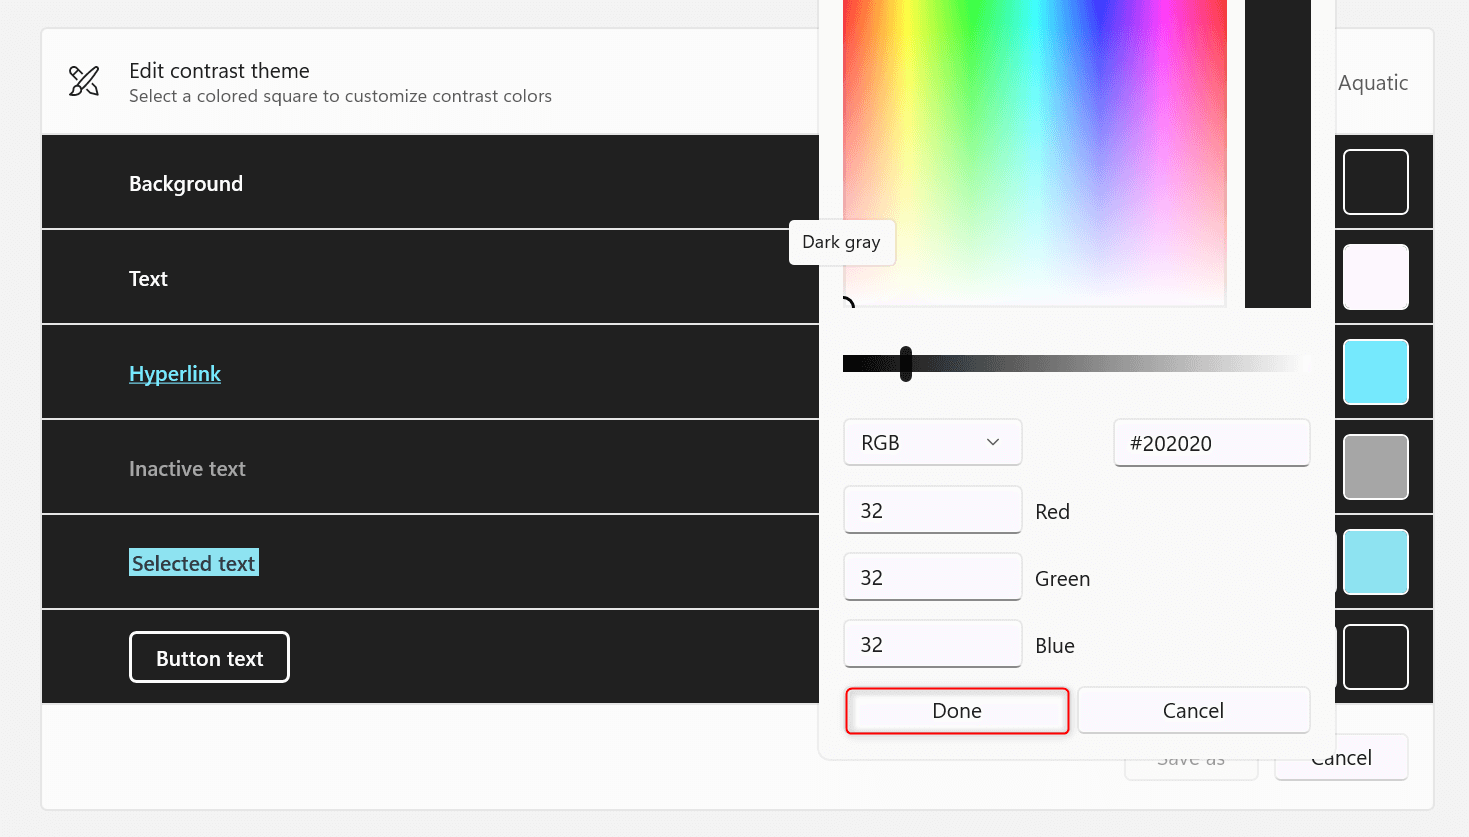
An in-context color picker will appear on your screen. Select your preferred hue and click Done. Repeat the process for the other categories as needed.
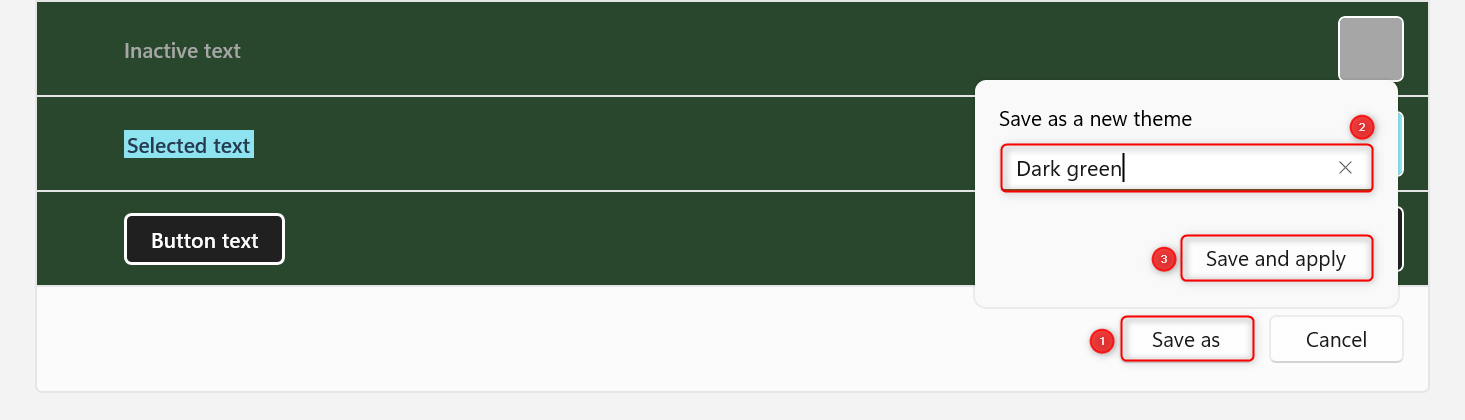
Once done, click Save as. Enter a theme name and click Save and apply.
Your custom contrast theme will automatically load and bring up the Please wait screen. Wait for it to disappear and you’re good to go.
On Windows 10
You can also customize the high contrast themes on Windows 10. However, unlike on Windows 11, you cannot save them as a separate theme.
Press Windows + I to open Settings. Then, navigate to Ease of Access > High contrast. On the right pane, scroll down to the Select a colored rectangle to customize high contrast colors section.
Click the colored rectangle for a category, like Text. Then, choose your preferred color from the picker provided.
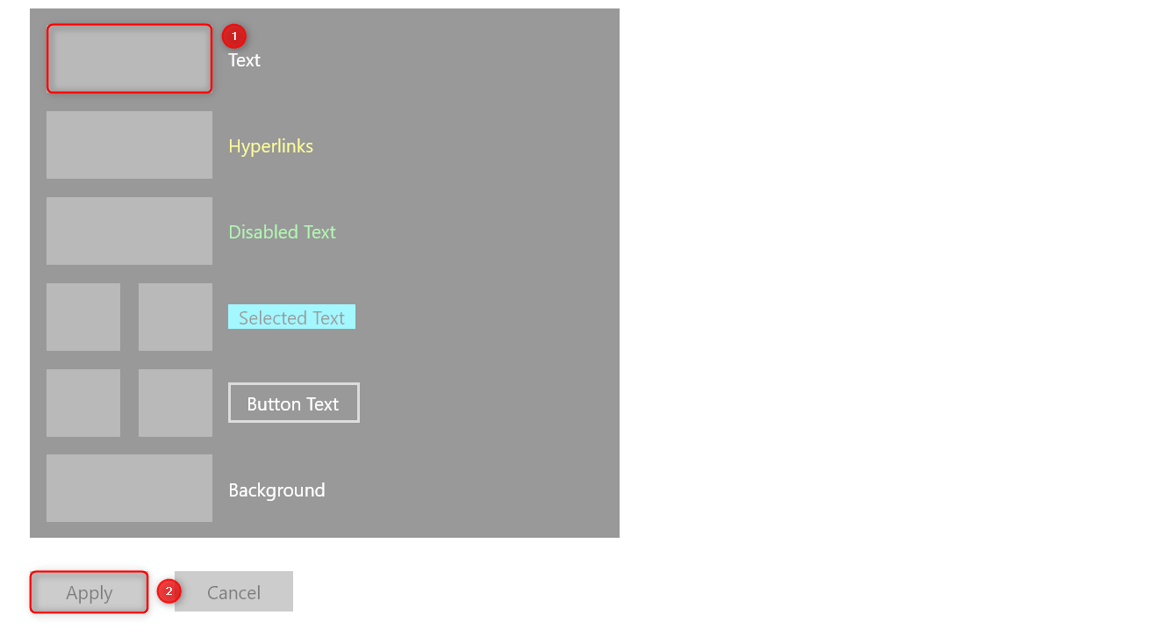
To save your changes, click Apply.
Use Shortcut Keys
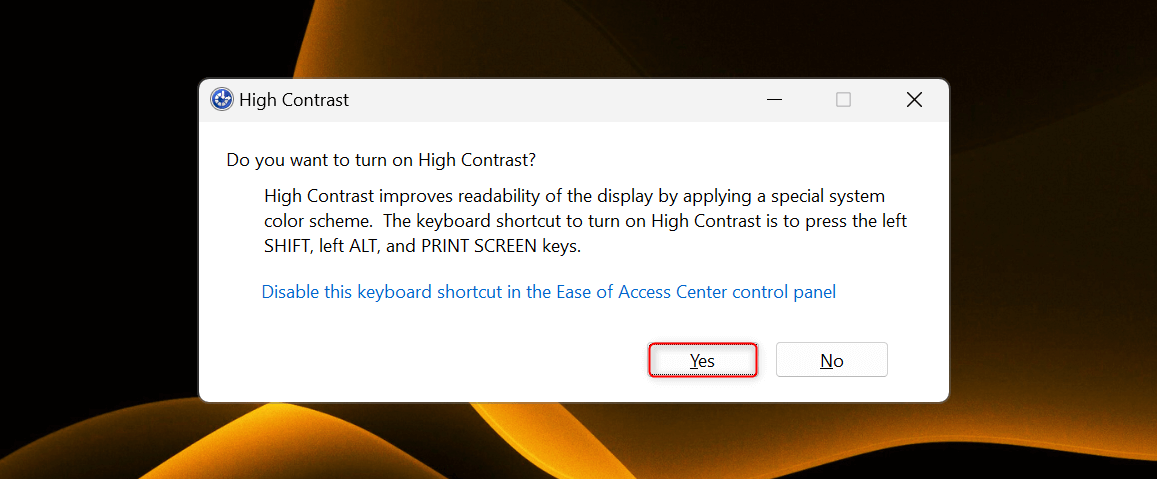
Both Windows 11 and Windows 10 have a shortcut combination that lets you enter high contrast mode quickly. To use it, simply press Left Alt + Left Shift + Prt Sc on your keyboard.
The High Contrast dialog box will appear on your screen, accompanied with a sound. Click Yes to confirm the theme change.
To exit high contrast mode, press Left Alt + Left Shift + Prt Sc again.
If the shortcut doesn’t work, it might have been disabled on your machine.
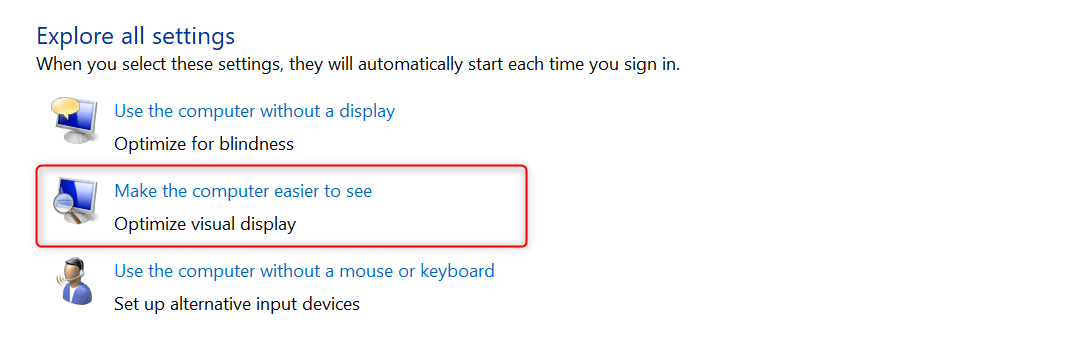
To check, launch Control Panel from the Start menu. Once it opens, navigate to Ease of Access > Ease of Access Center.
Under Explore all settings, click Make the computer easier to see.
Under High Contrast, make sure that the Turn on or off High Contrast when left ALT + left SHIFT + PRINT SCREEN is pressed option is checked.
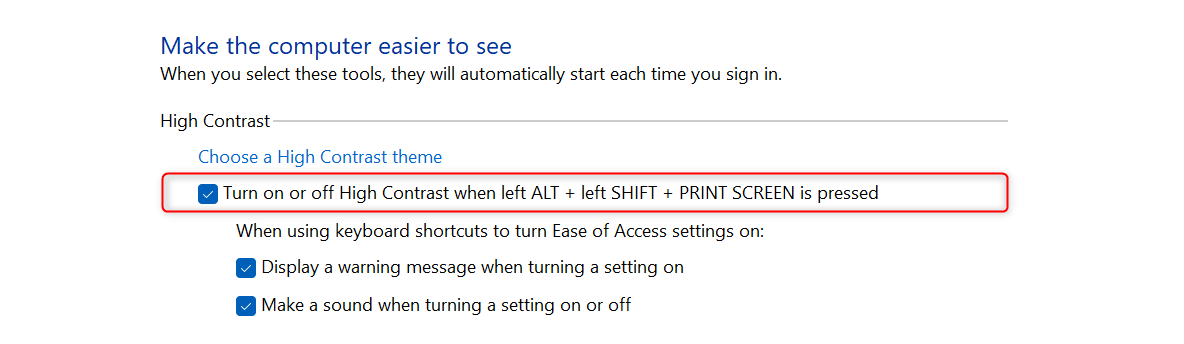
If not, tick the corresponding check box and click Apply > OK. And there you go.